how to make videos more clear on iphone
Do you want to edit out videos on your iPhone? If you have iOS 13 or later, you can edit videos in the made-up-in Photos app… just ilk you edit out your photos. You can trim, crop, and tidy up your videos. And you tush make your footage more beautiful by adjusting brightness, color, or level turning it fateful and white. Read on to disclose how to use the new television editing tools in the iPhone Photos app.
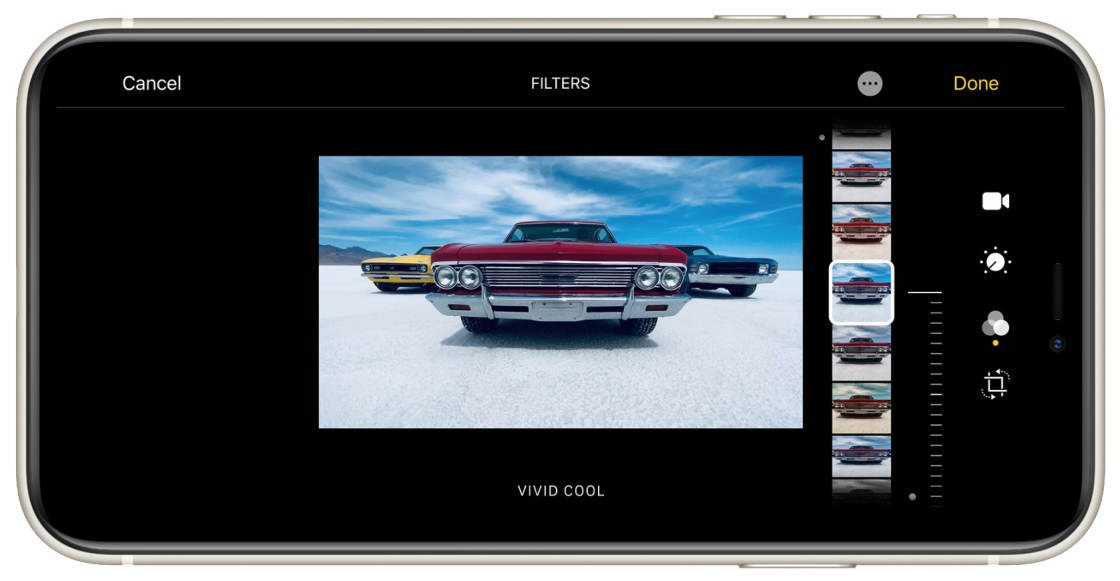
Table Of Contents: iPhone Video Editing In The Photos App
Click any title link under to go straight thereto section of the article:
1. Ensure Your iPhone Is Functional iOS 13 Or Advanced
2. Duplication Your Video To Preserve The Germinal
3. Open The TV Editor In The Photos App
4. Thin Your Video
5. Go for A Filter To Your Video
6. Adjust Color, Brightness & Sharpness
7. Snip, Straighten & Adjust Perspective
8. Set The Sluggish-Motion Section Of A Slo-Mo TV
9. Mute The Sound In Your Telecasting
10. Salve Your Edited Video
11. Remove Your Video Edits
1. Ensure Your iPhone Is Running iOS 13 Or Later
The Photos app is one of the best pic and TV editing apps for iPhone.
And it's built right into your ring – so you assume't penury to download a third-party editing app.
Only the video editing tools are only available if your iPhone is running iOS 13 or later. (iOS is the iPhone OS).
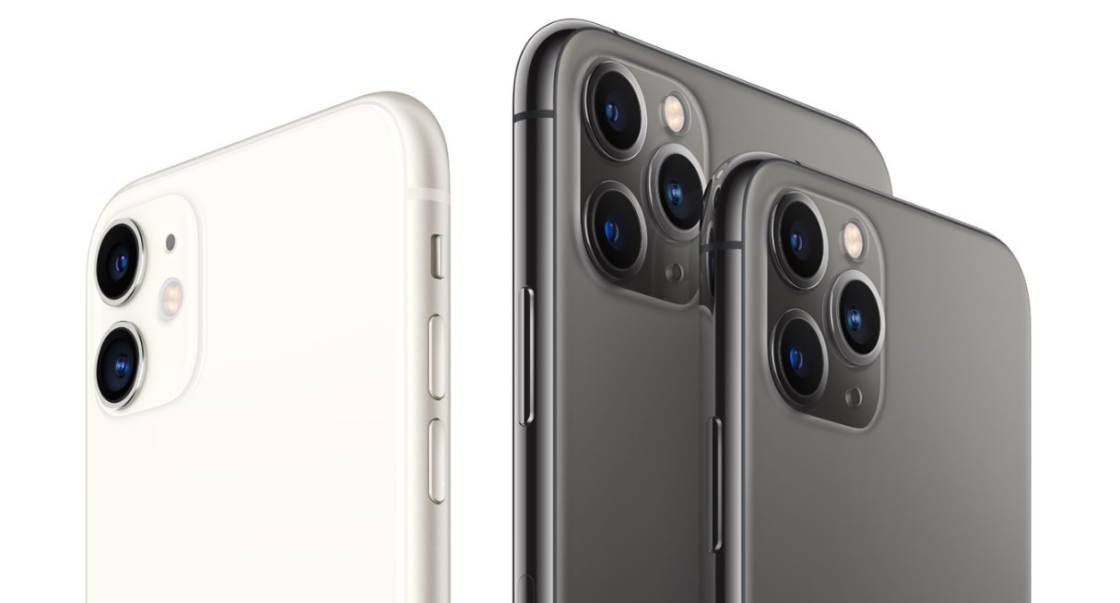
If you have iPhone 11 or iPhone 12, you'll already have the hot video redaction tools in the Photos app.
If you have an older iPhone (iPhone 6s or newer) spouting iOS 12 or in the first place, you can update to the up-to-the-minute iOS for free.
If you have the iPhone 6 operating theater earlier, unfortunately, you won't be able to access the video editing tools (because you can't update to iOS 13 operating theatre later).
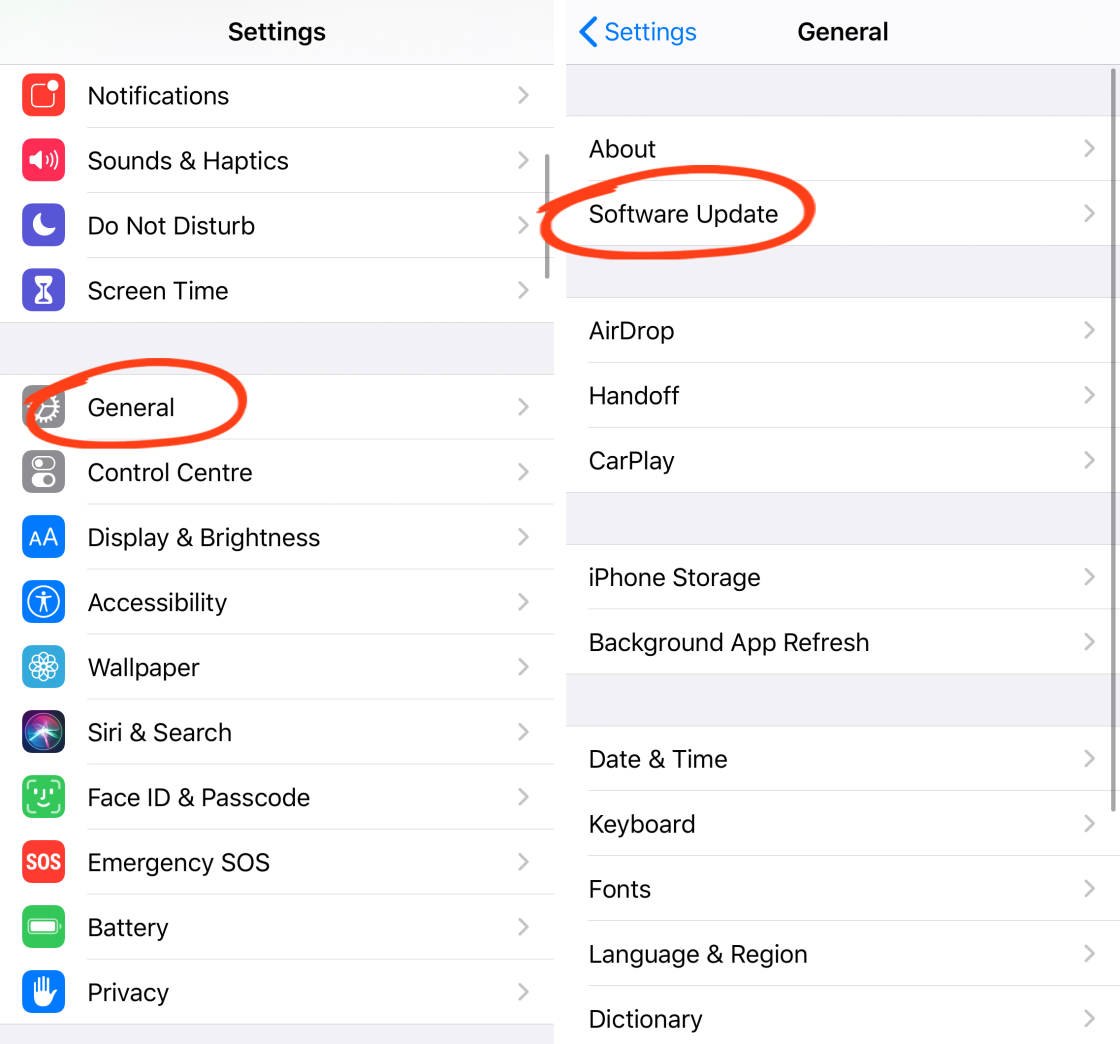
To update your iPhone to the stylish iOS, open the Settings app from the Home screen. Then go down to General >Software Update.
If your software is up up to now with iOS 13 or later, you don't need to do anything else. You'll already make access to the iPhone video editing tools.
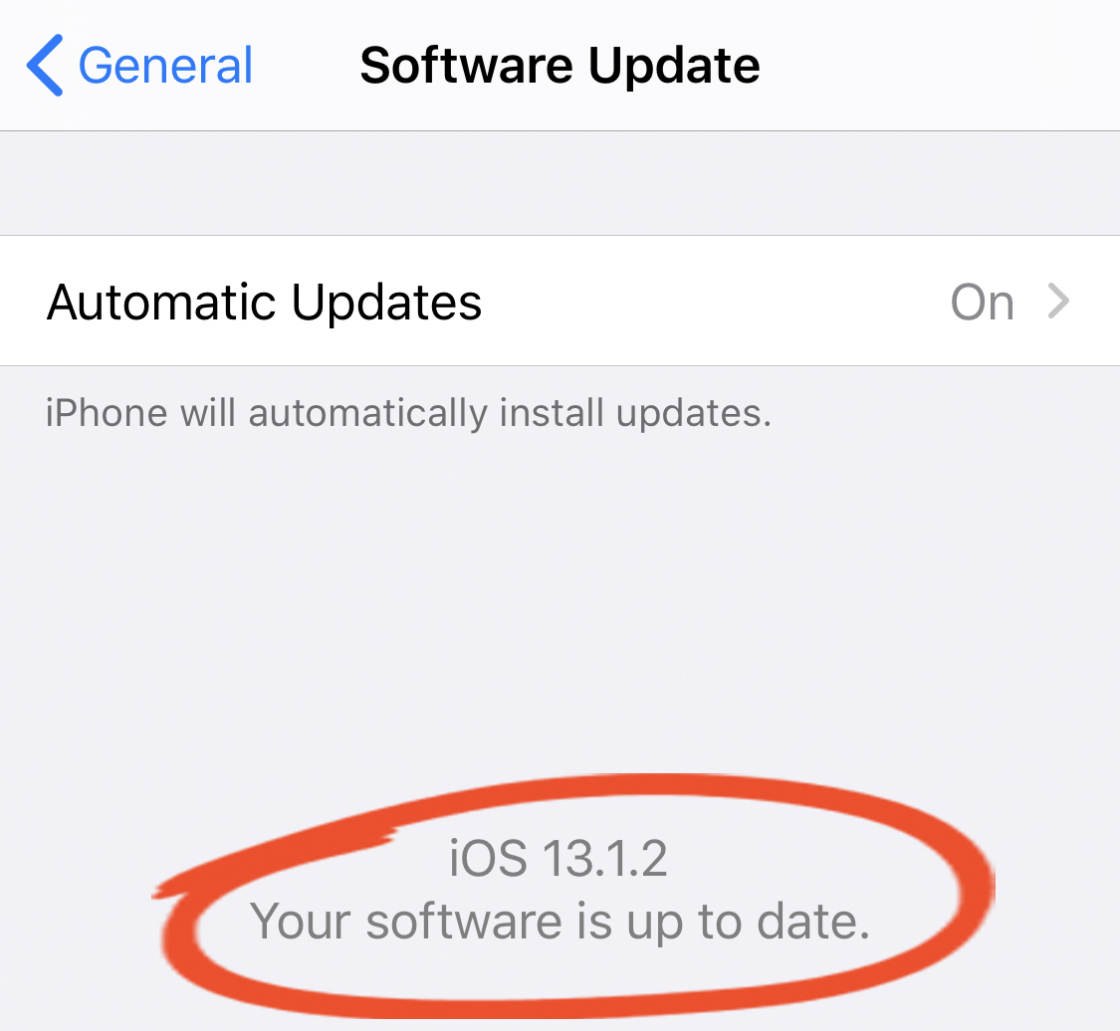
If your software isn't up to date, follow the on-screen door instructions to download and install the latest iOS. Before doing this, make sure the information on your iPhone is backed – just just in case something goes wrong!
2. Duplicate Your Video recording To Preserve The Original
When you blue-pencil a video, the original video recording is overwritten with the edited version.
However, edits that you make in the Photos app are not-destructive. Soh you can revert back to the original video at some time.
But what if you want to keep the original video in your photo depository library, along with a separate edited interpretation?
In such cases, you can duplicate the video before editing. That way, you'll experience cardinal copies of the telecasting on your iPhone – one of which give the axe be edited.
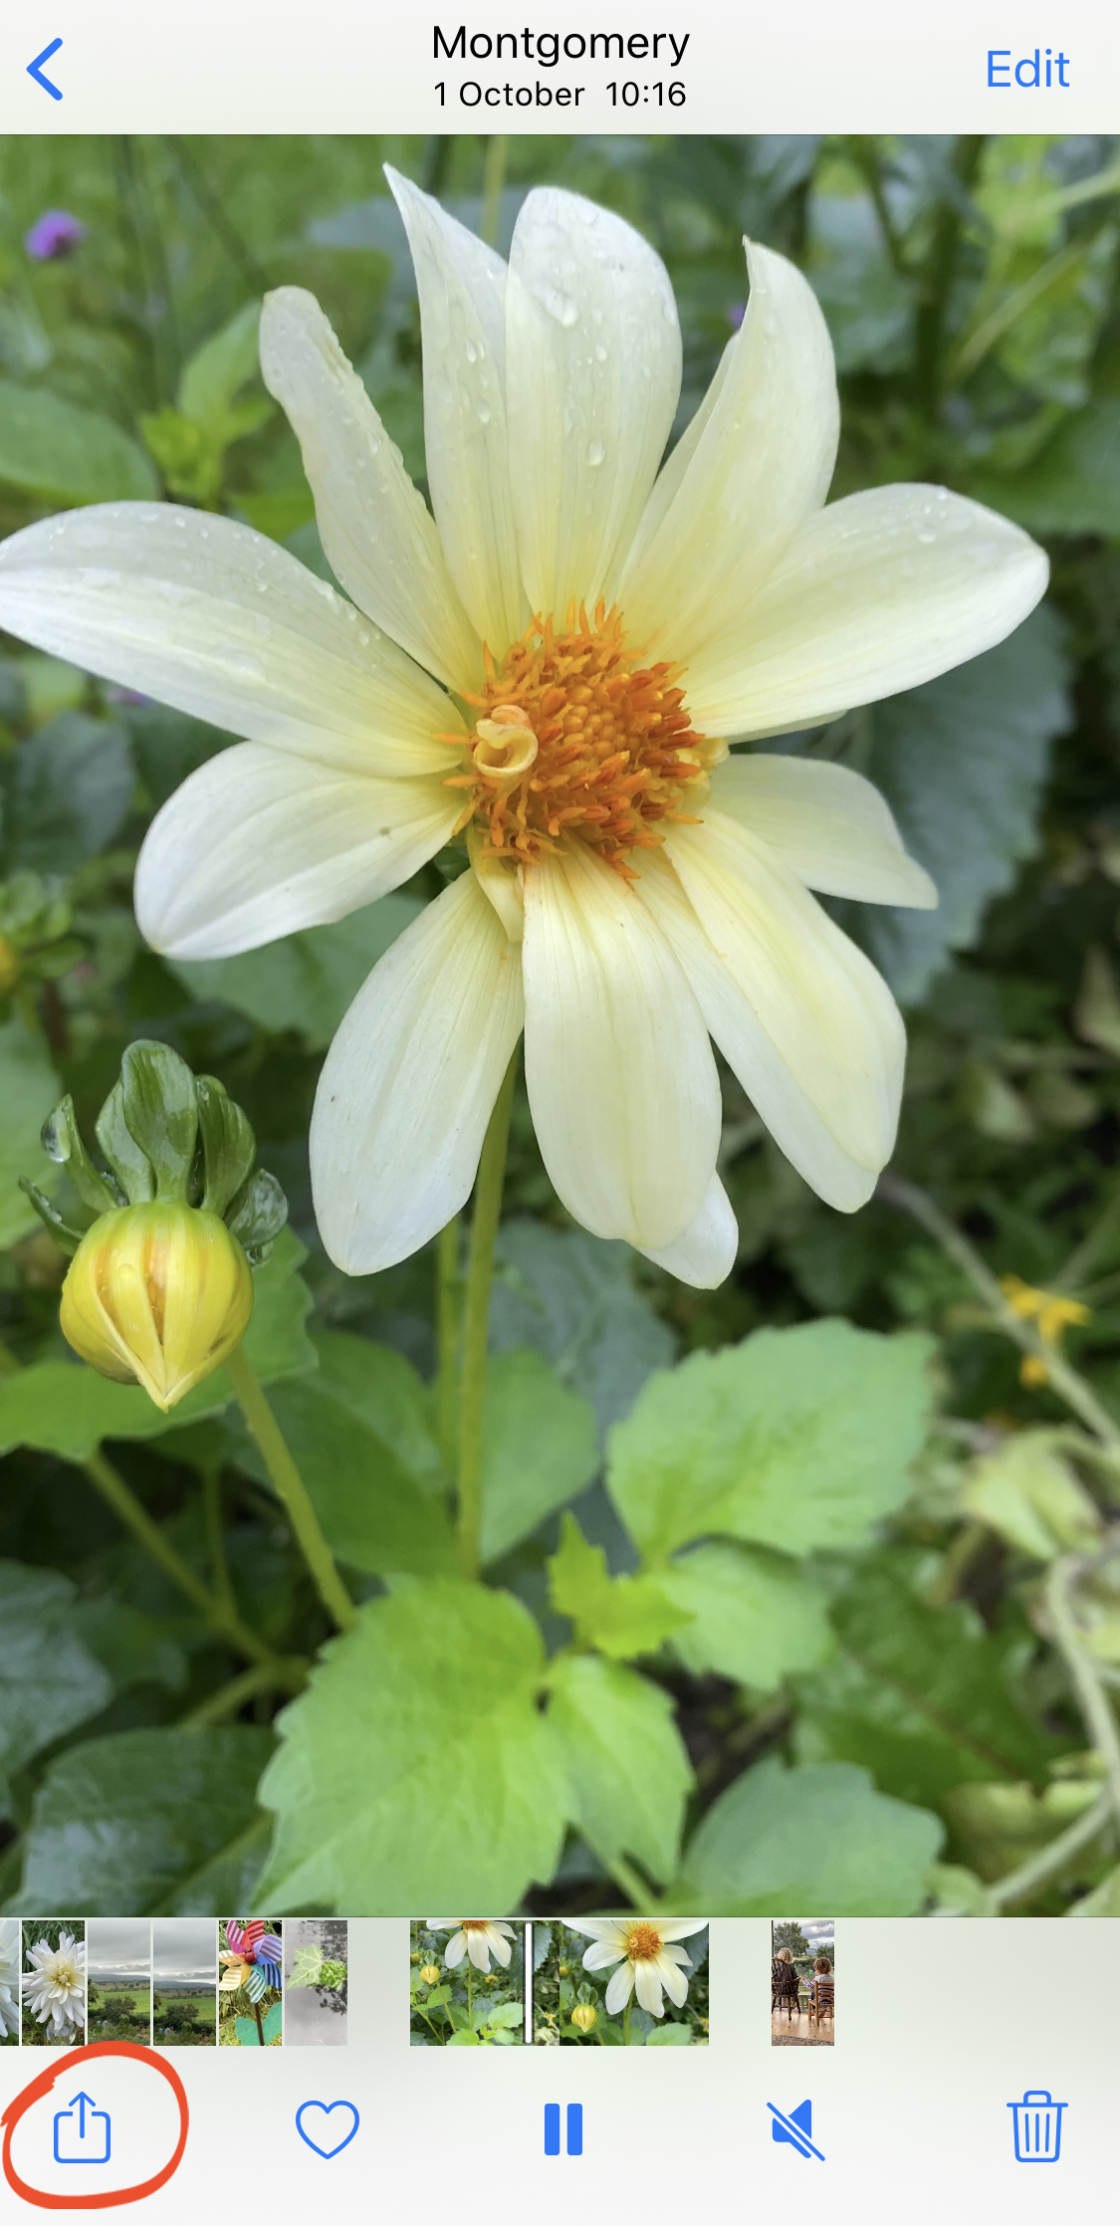
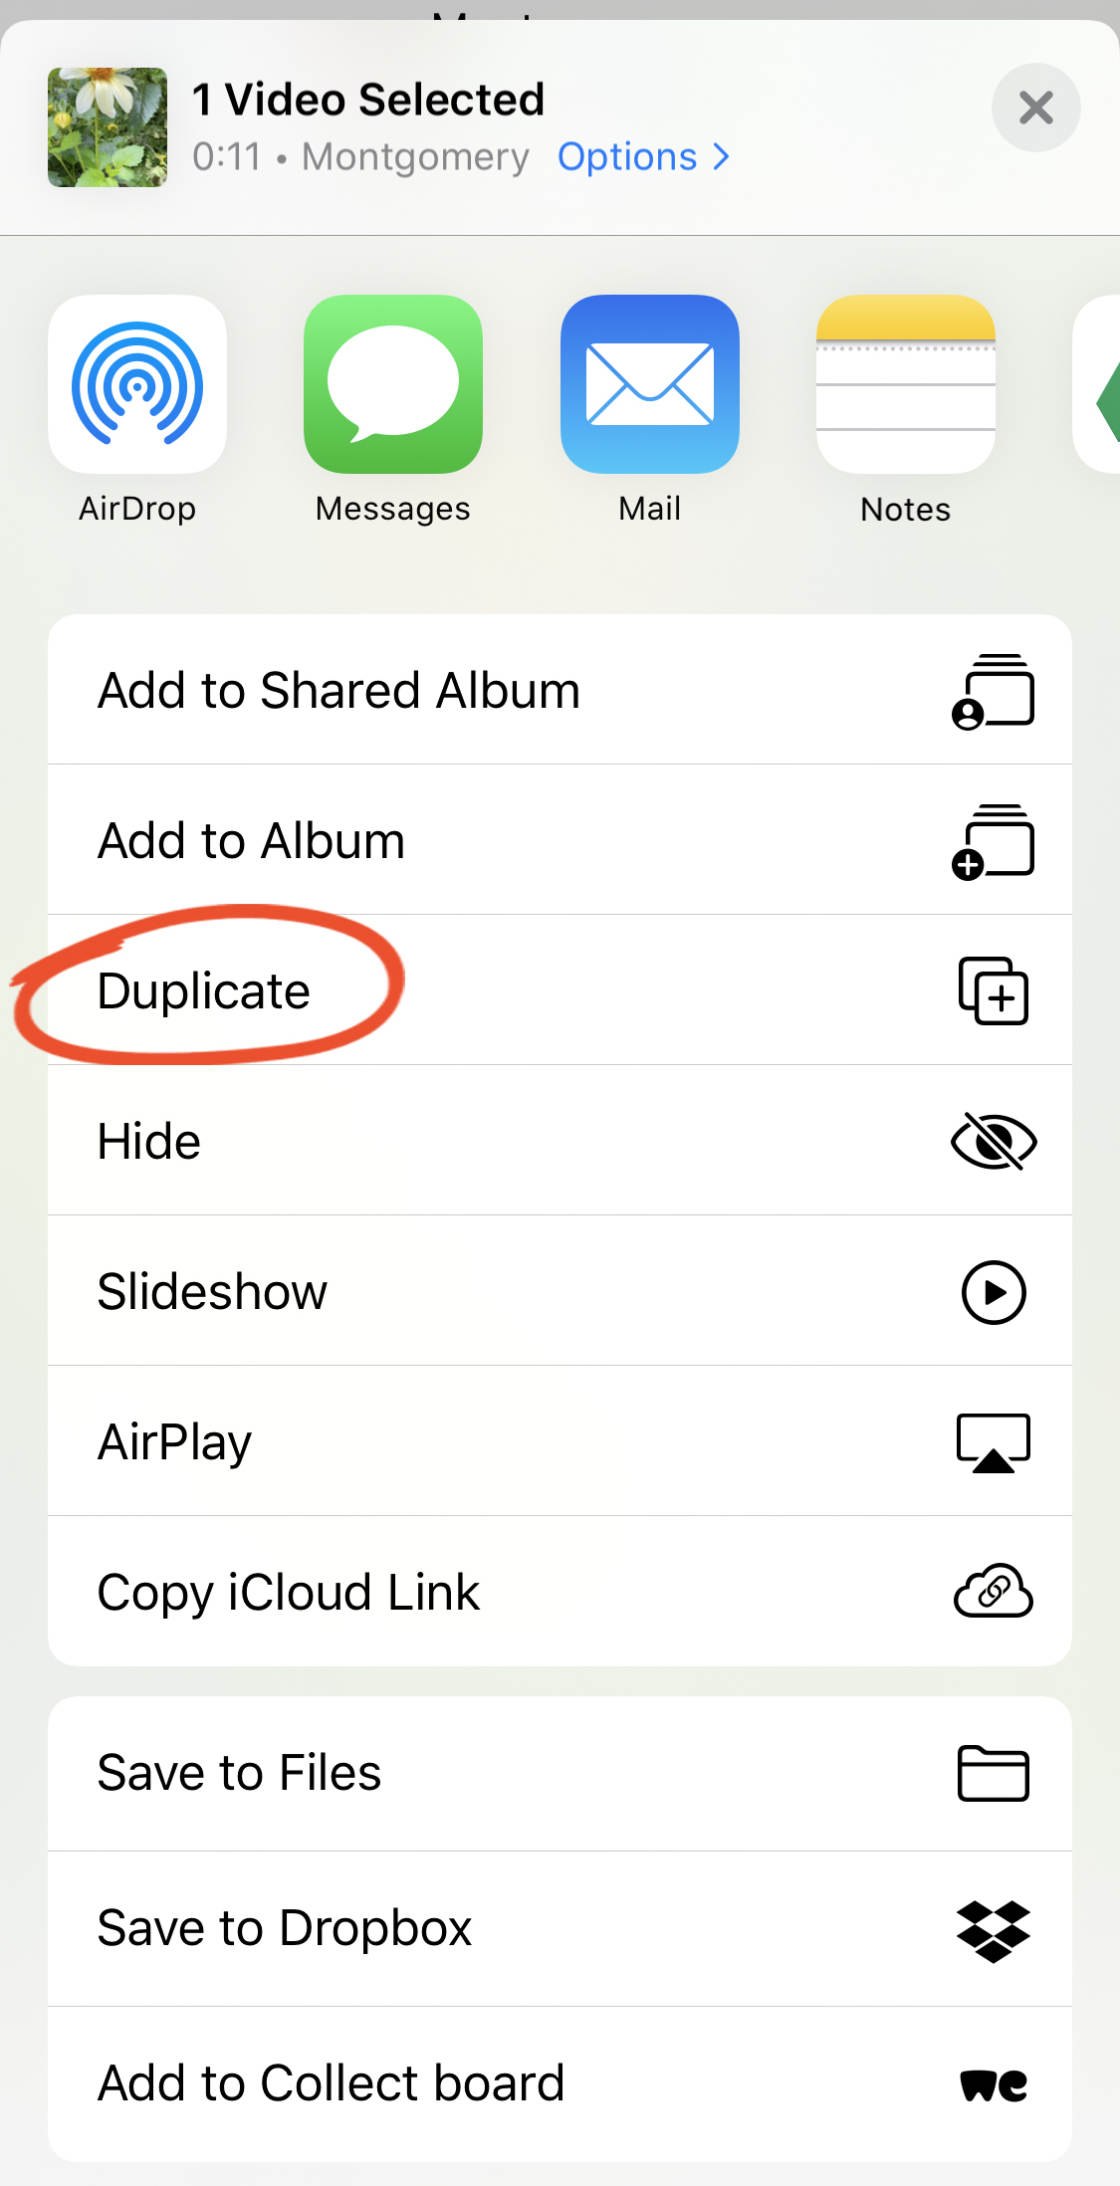
To duplicate a television, open it in thePhotos app, then tap theDivvy up icon (square with pointer) at the bottom left.
Scroll down and selectDuplicate.
Tip theBack arrow at the round top unexpended of the screen to return to thumbnail aspect in your photo library.
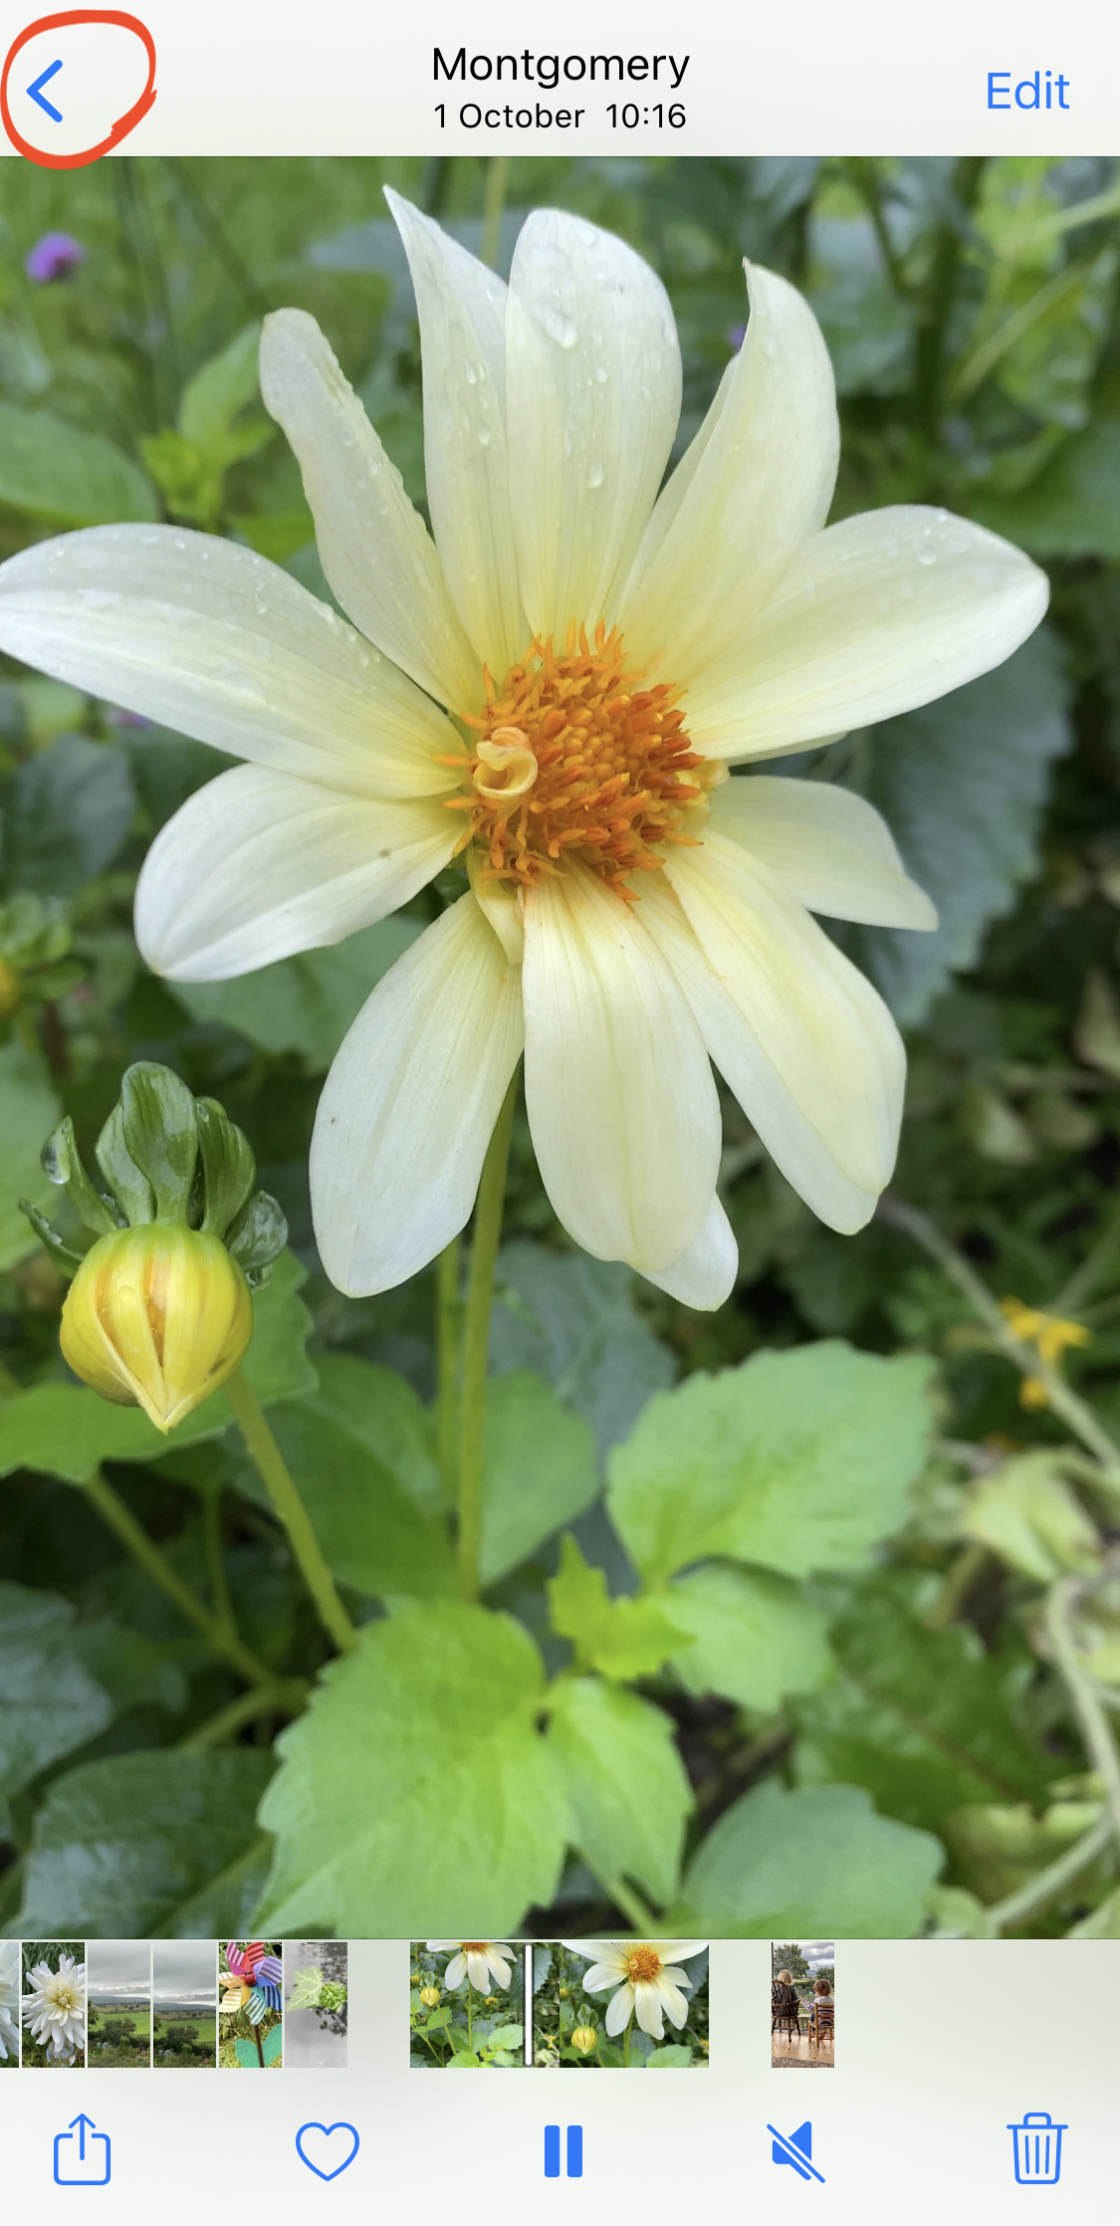
The duplicate video will glucinium at the bottom of your photo subroutine library.
You john like a sho edit this replicate video recording, safe in the knowledge that the original reading won't be altered.
Note that the video editing tools supporting all TV formats captured on iPhone. And so you can edit videos, time-lapse videos, and slo-Show Me State videos.
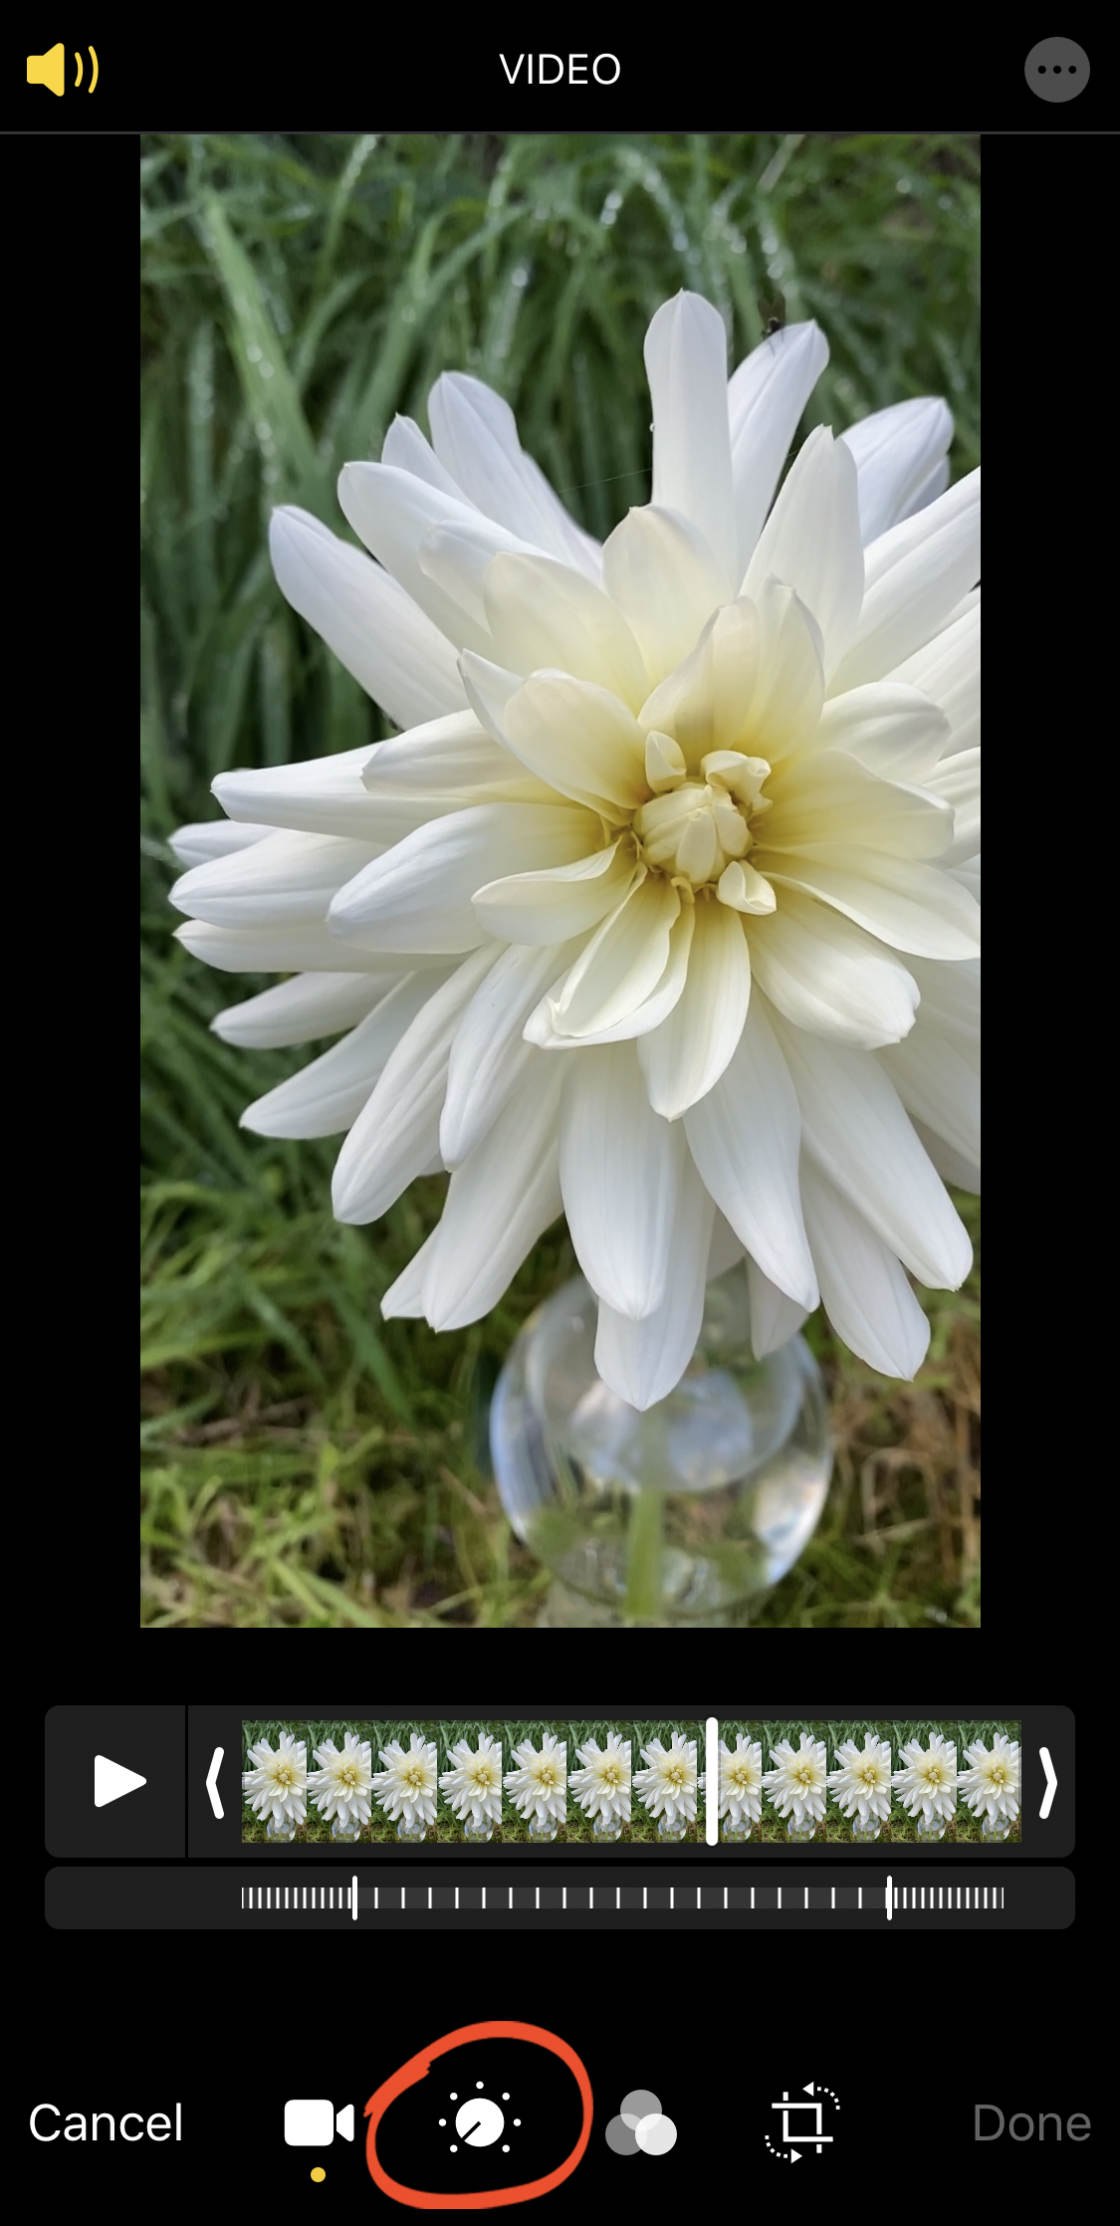
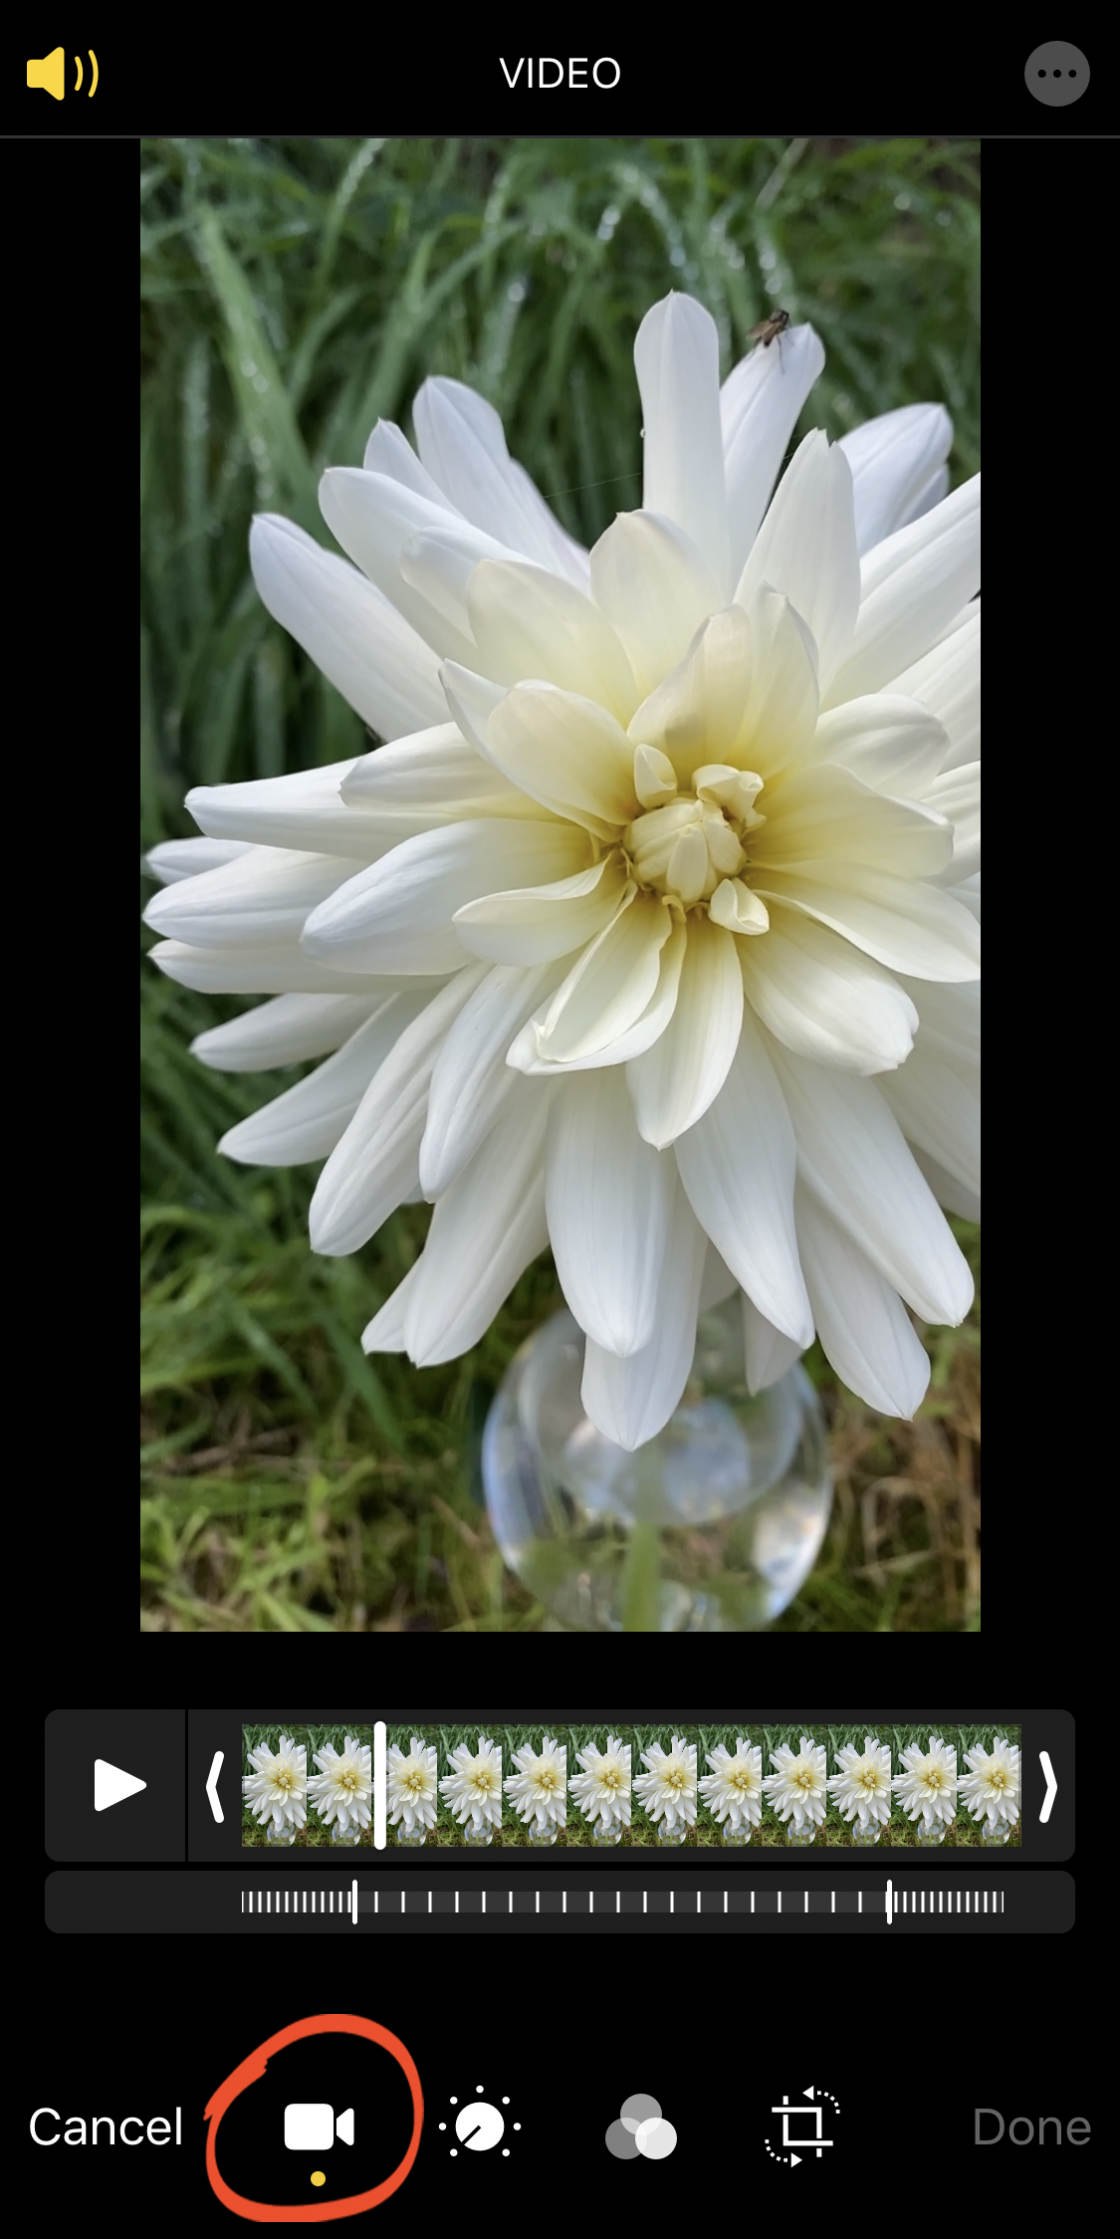
3. Unfastened The Video Editor in chief In The Photos App
So, how do you access the television redaction tools in the Photos app?
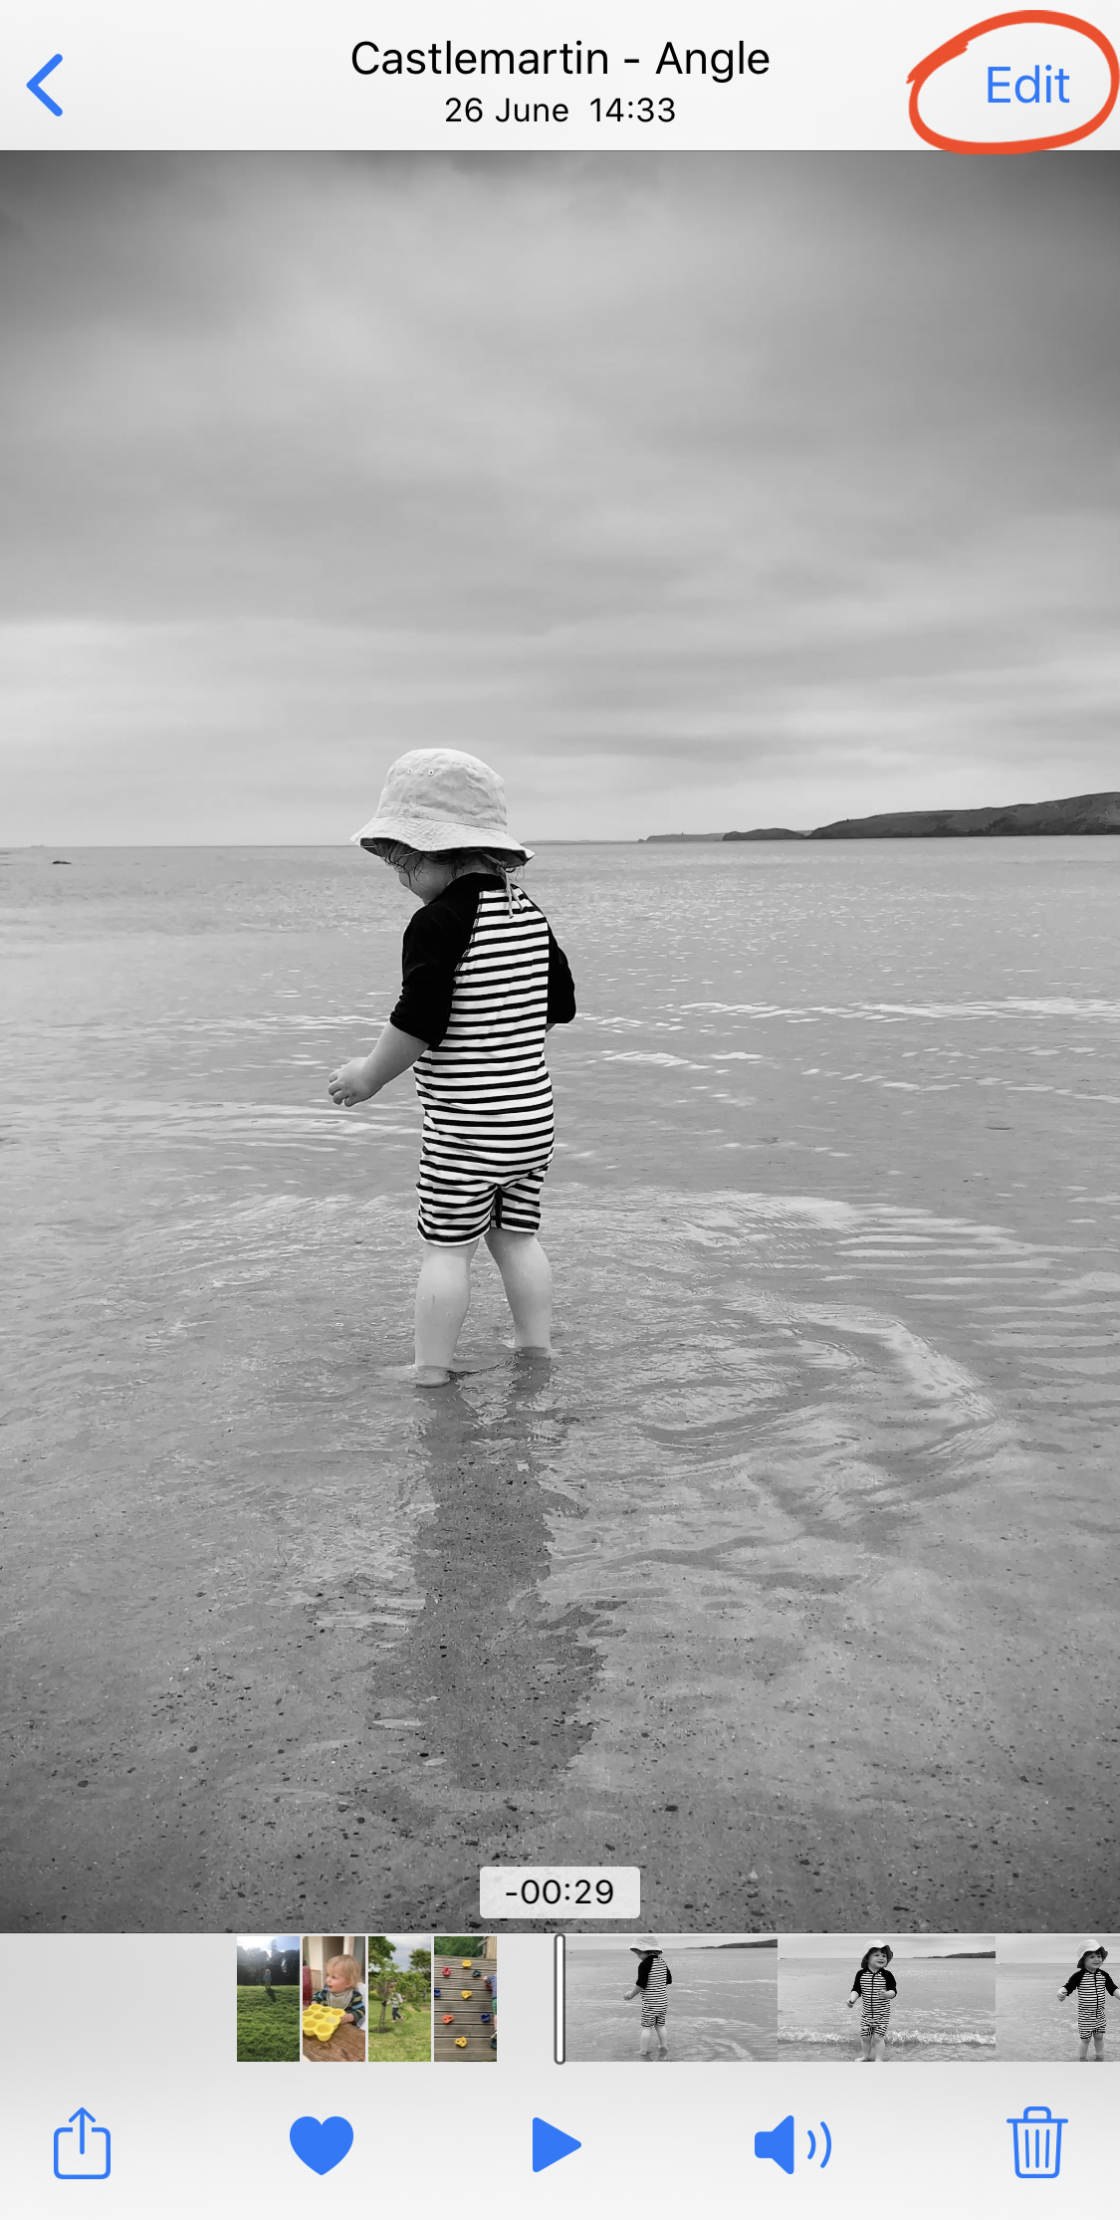
Simply unconstricted the video you want to edit, then tap Edit at the top right.
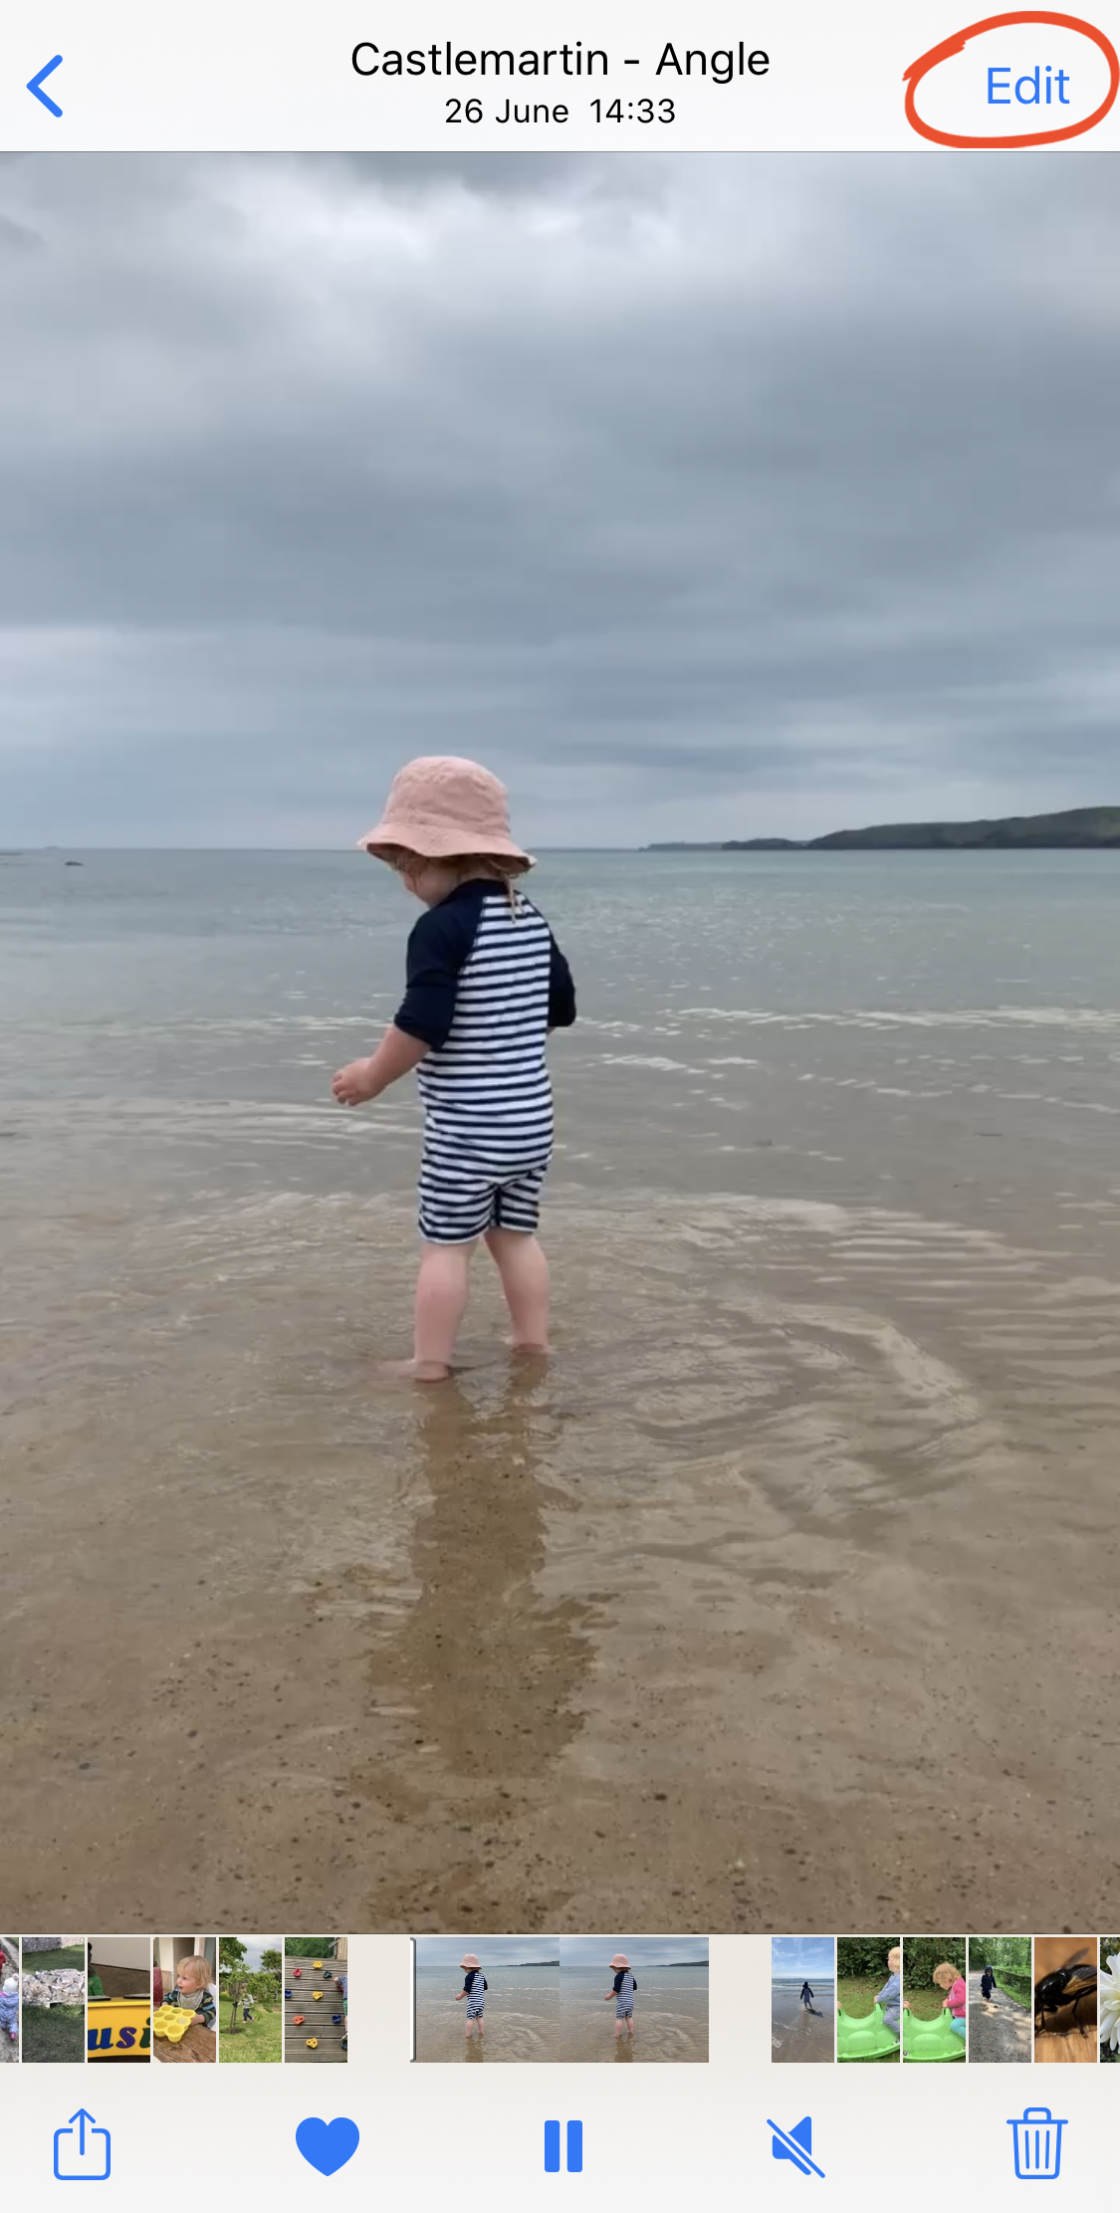
At the bottom of the screen, you'll encounter four icons. From left to right, these icons are:Video,Adjust,Filters, andCrop.
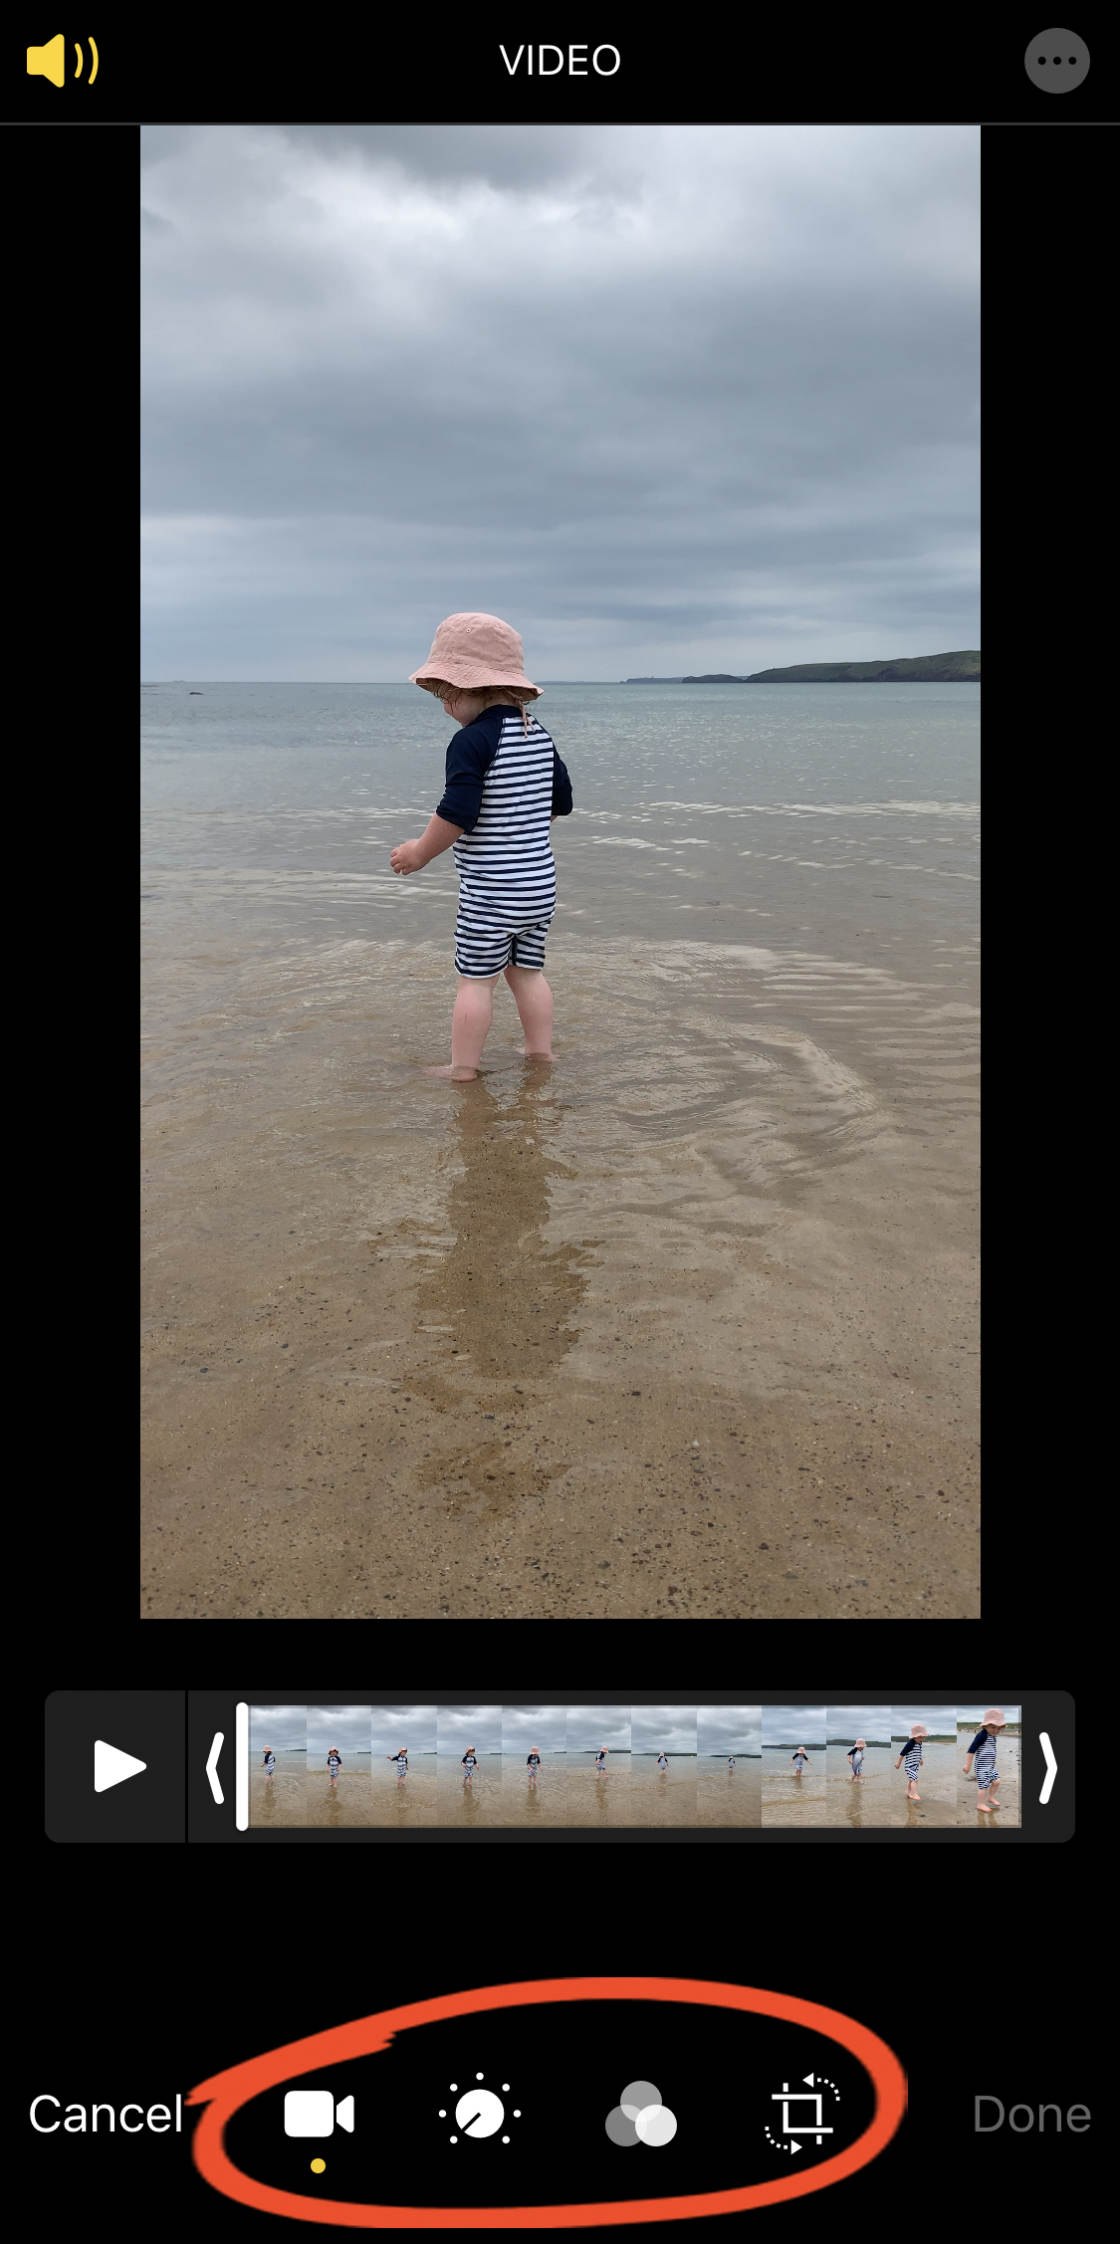
Translate on to discover how to make bonnie video edits using each of these tools.
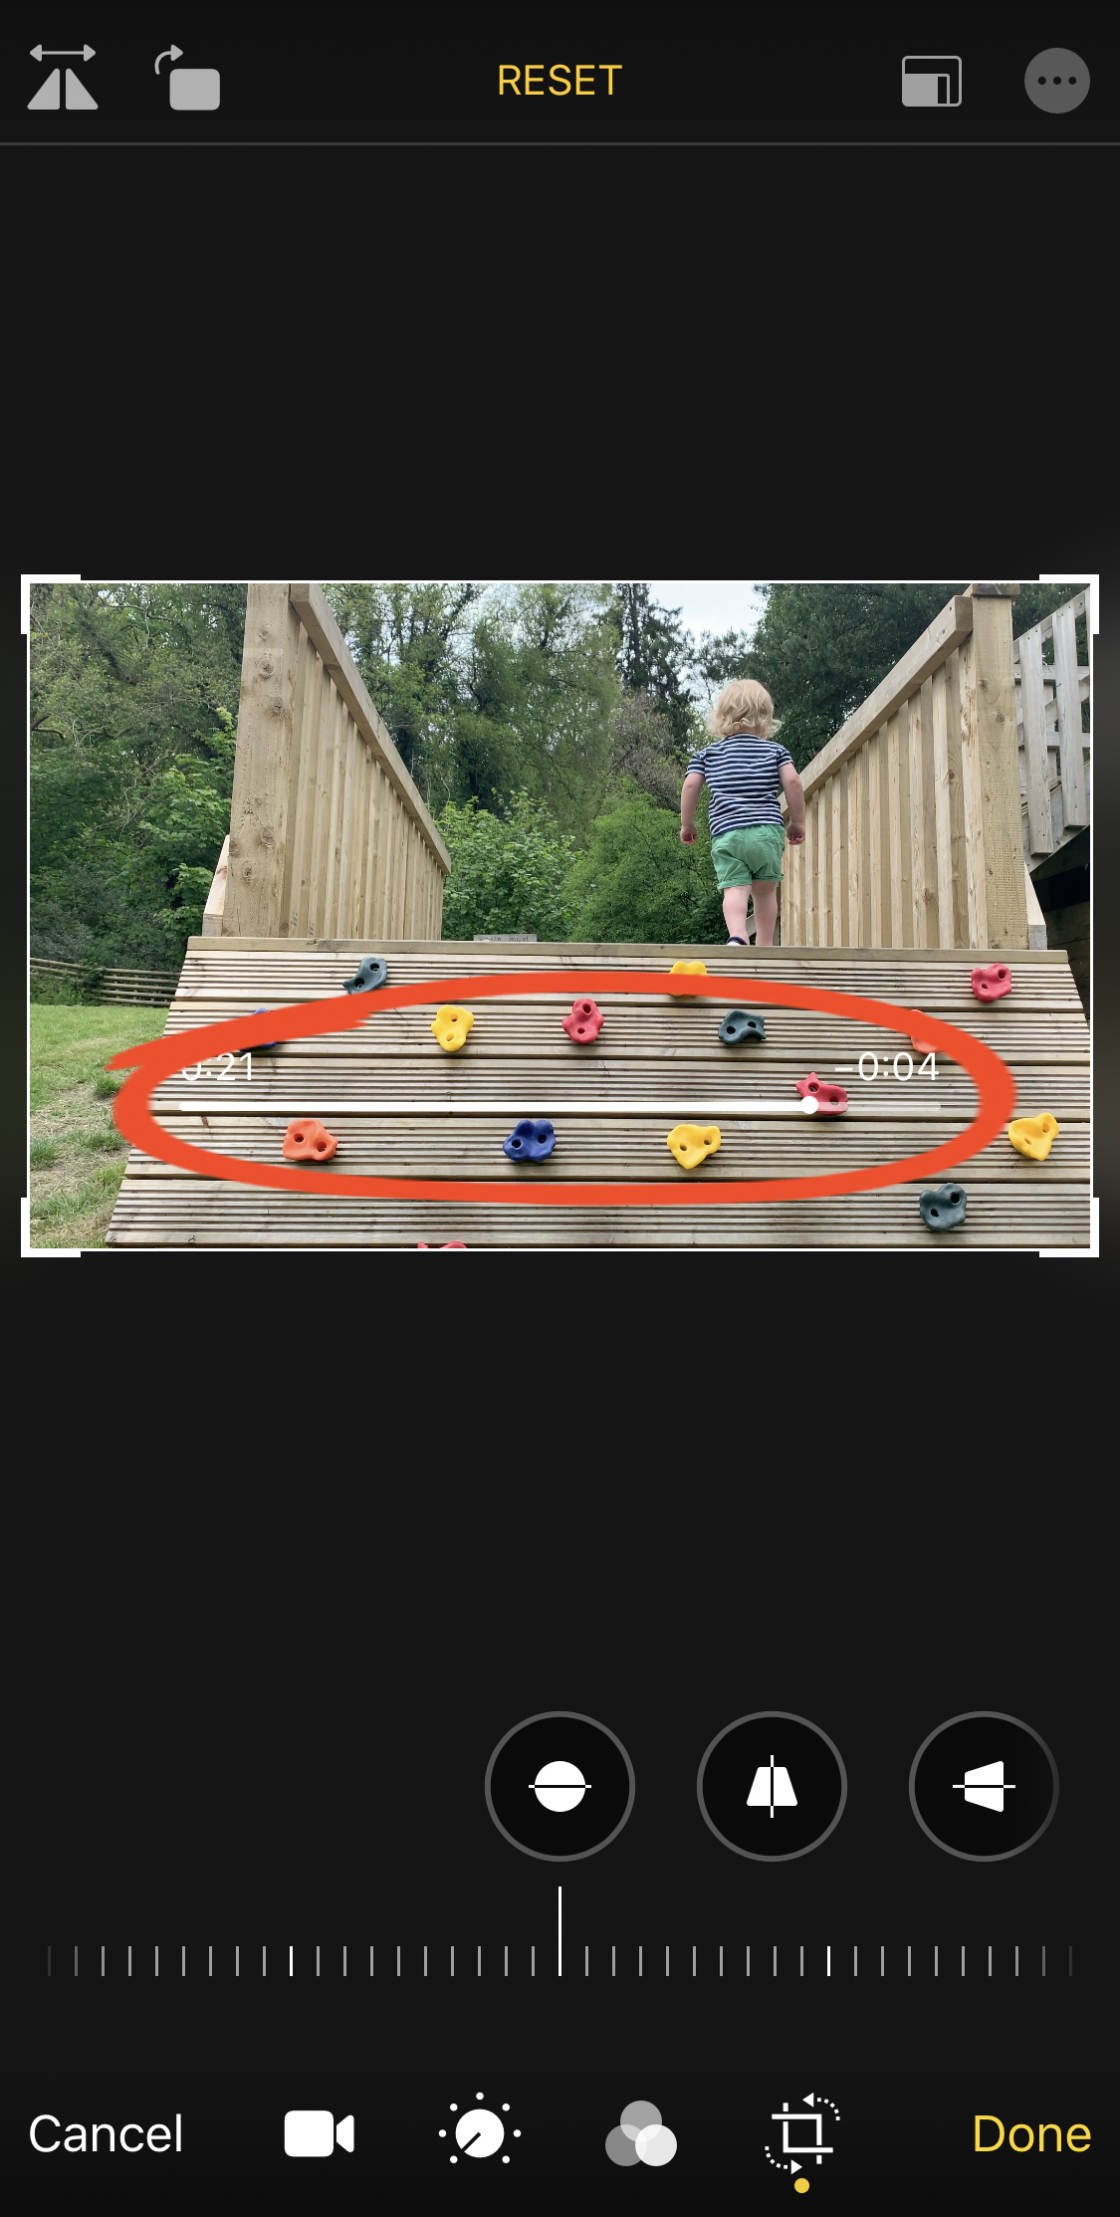
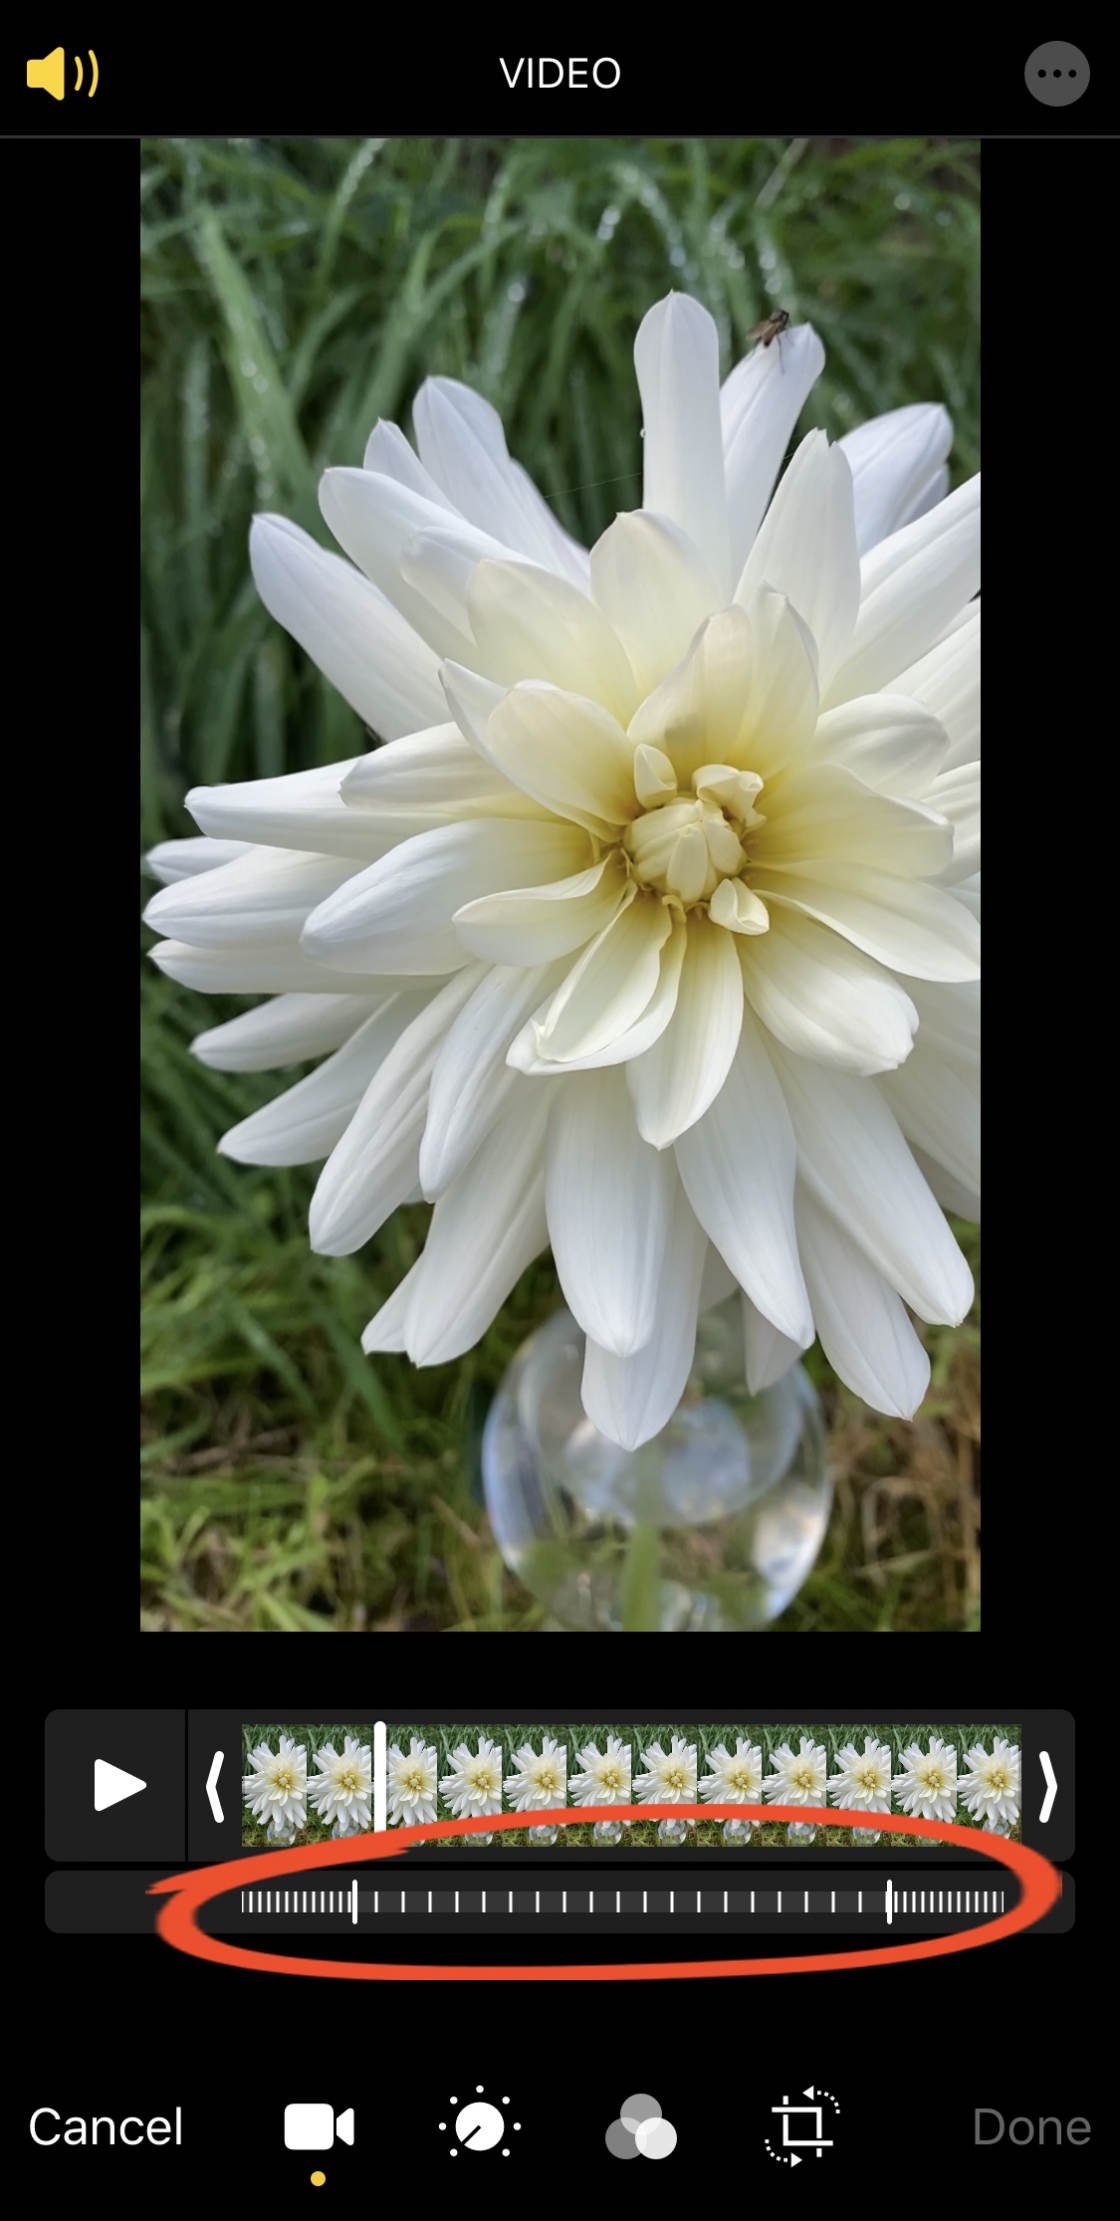
4. Trim Your Video
Do you want to withdraw subject matter from the beginning or ending of your video?
It's well-off to trim a video in the iPhone Photos app.
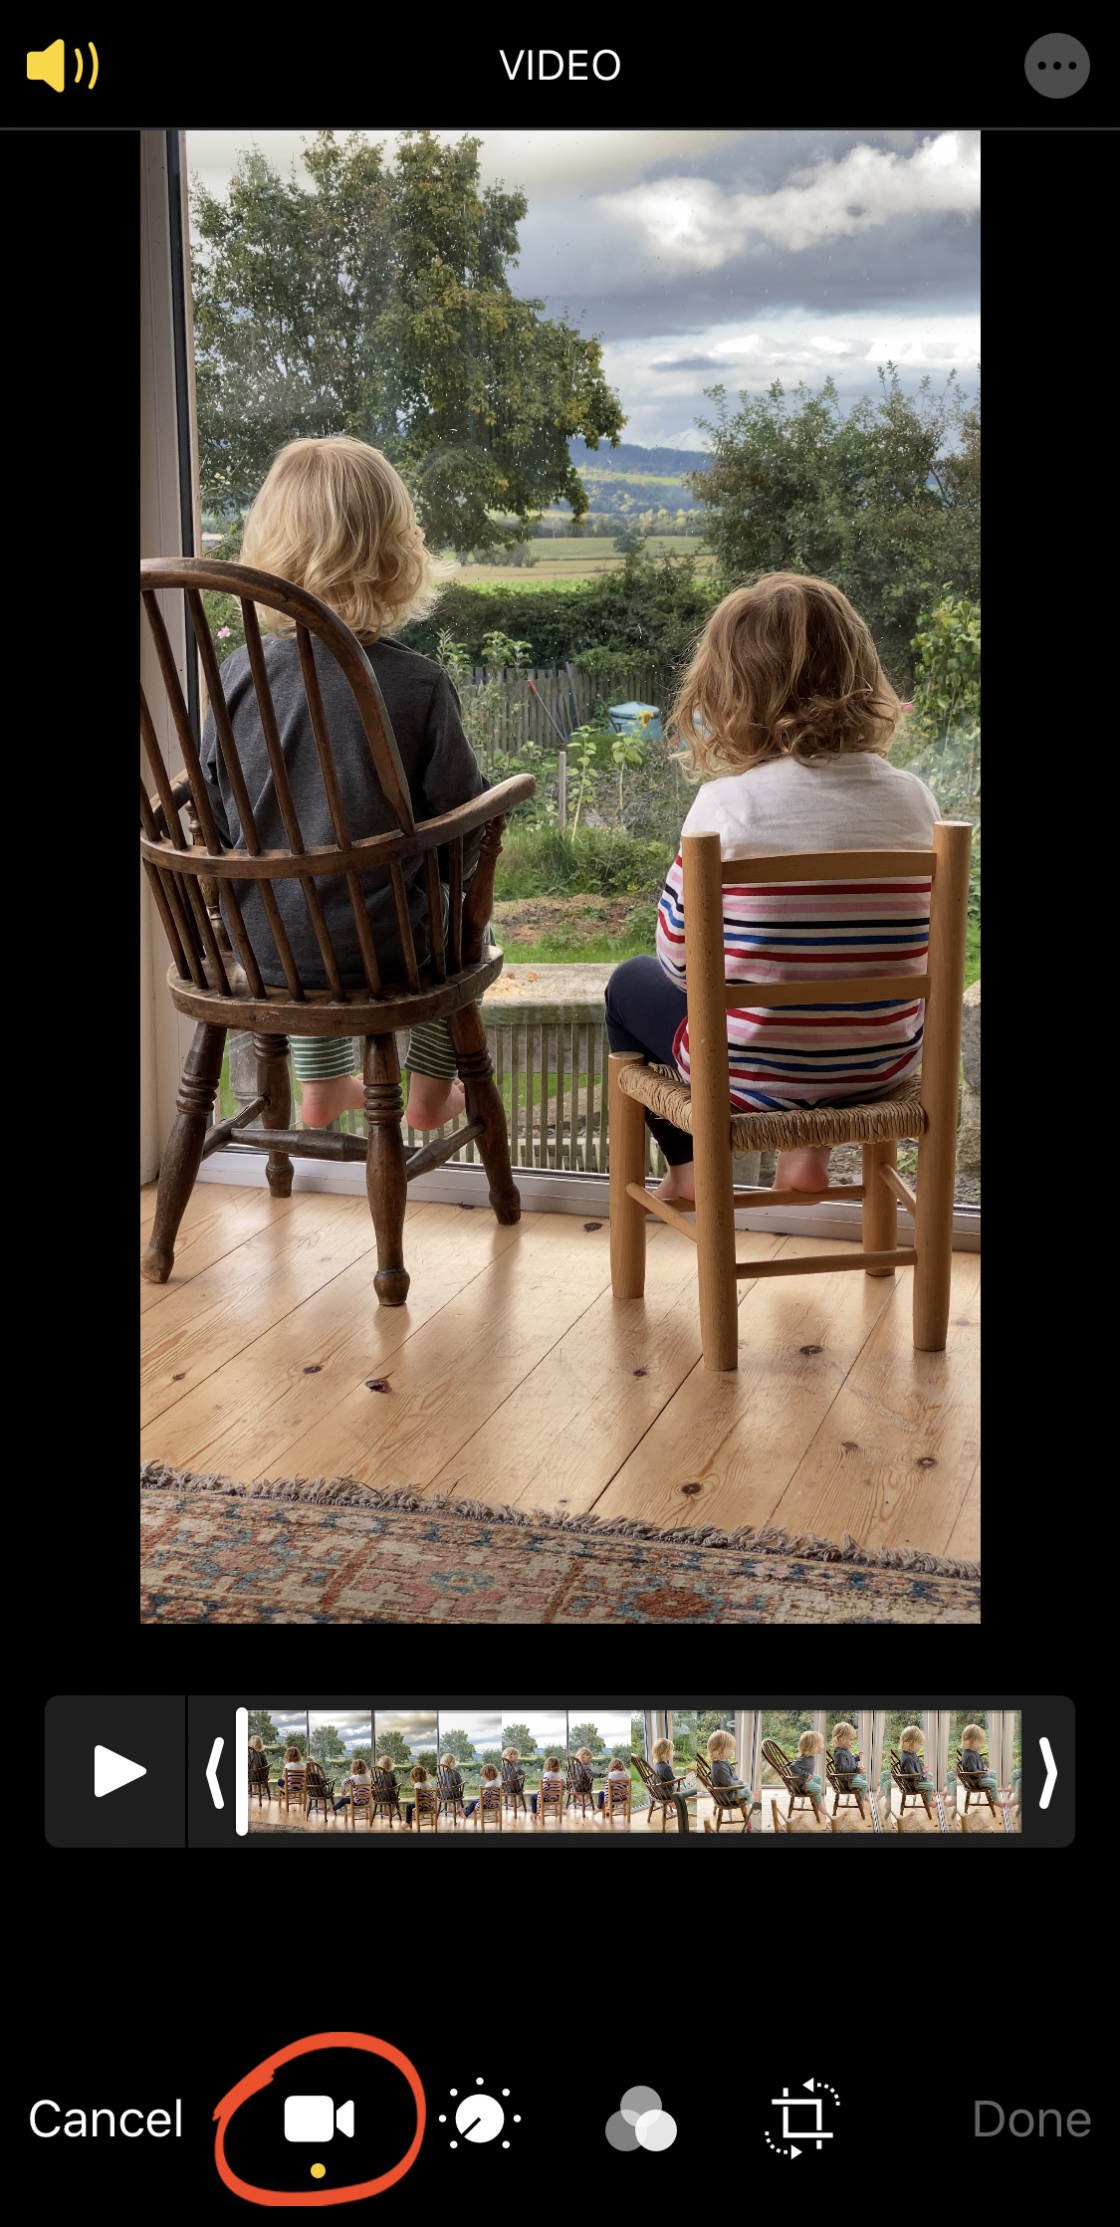
Ensure theVideo icon is selected at the bottom of the television editor in chief blind.
To trim the beginning of the video, knock the small arrow to the far left of the frame viewer and drag it to the right.
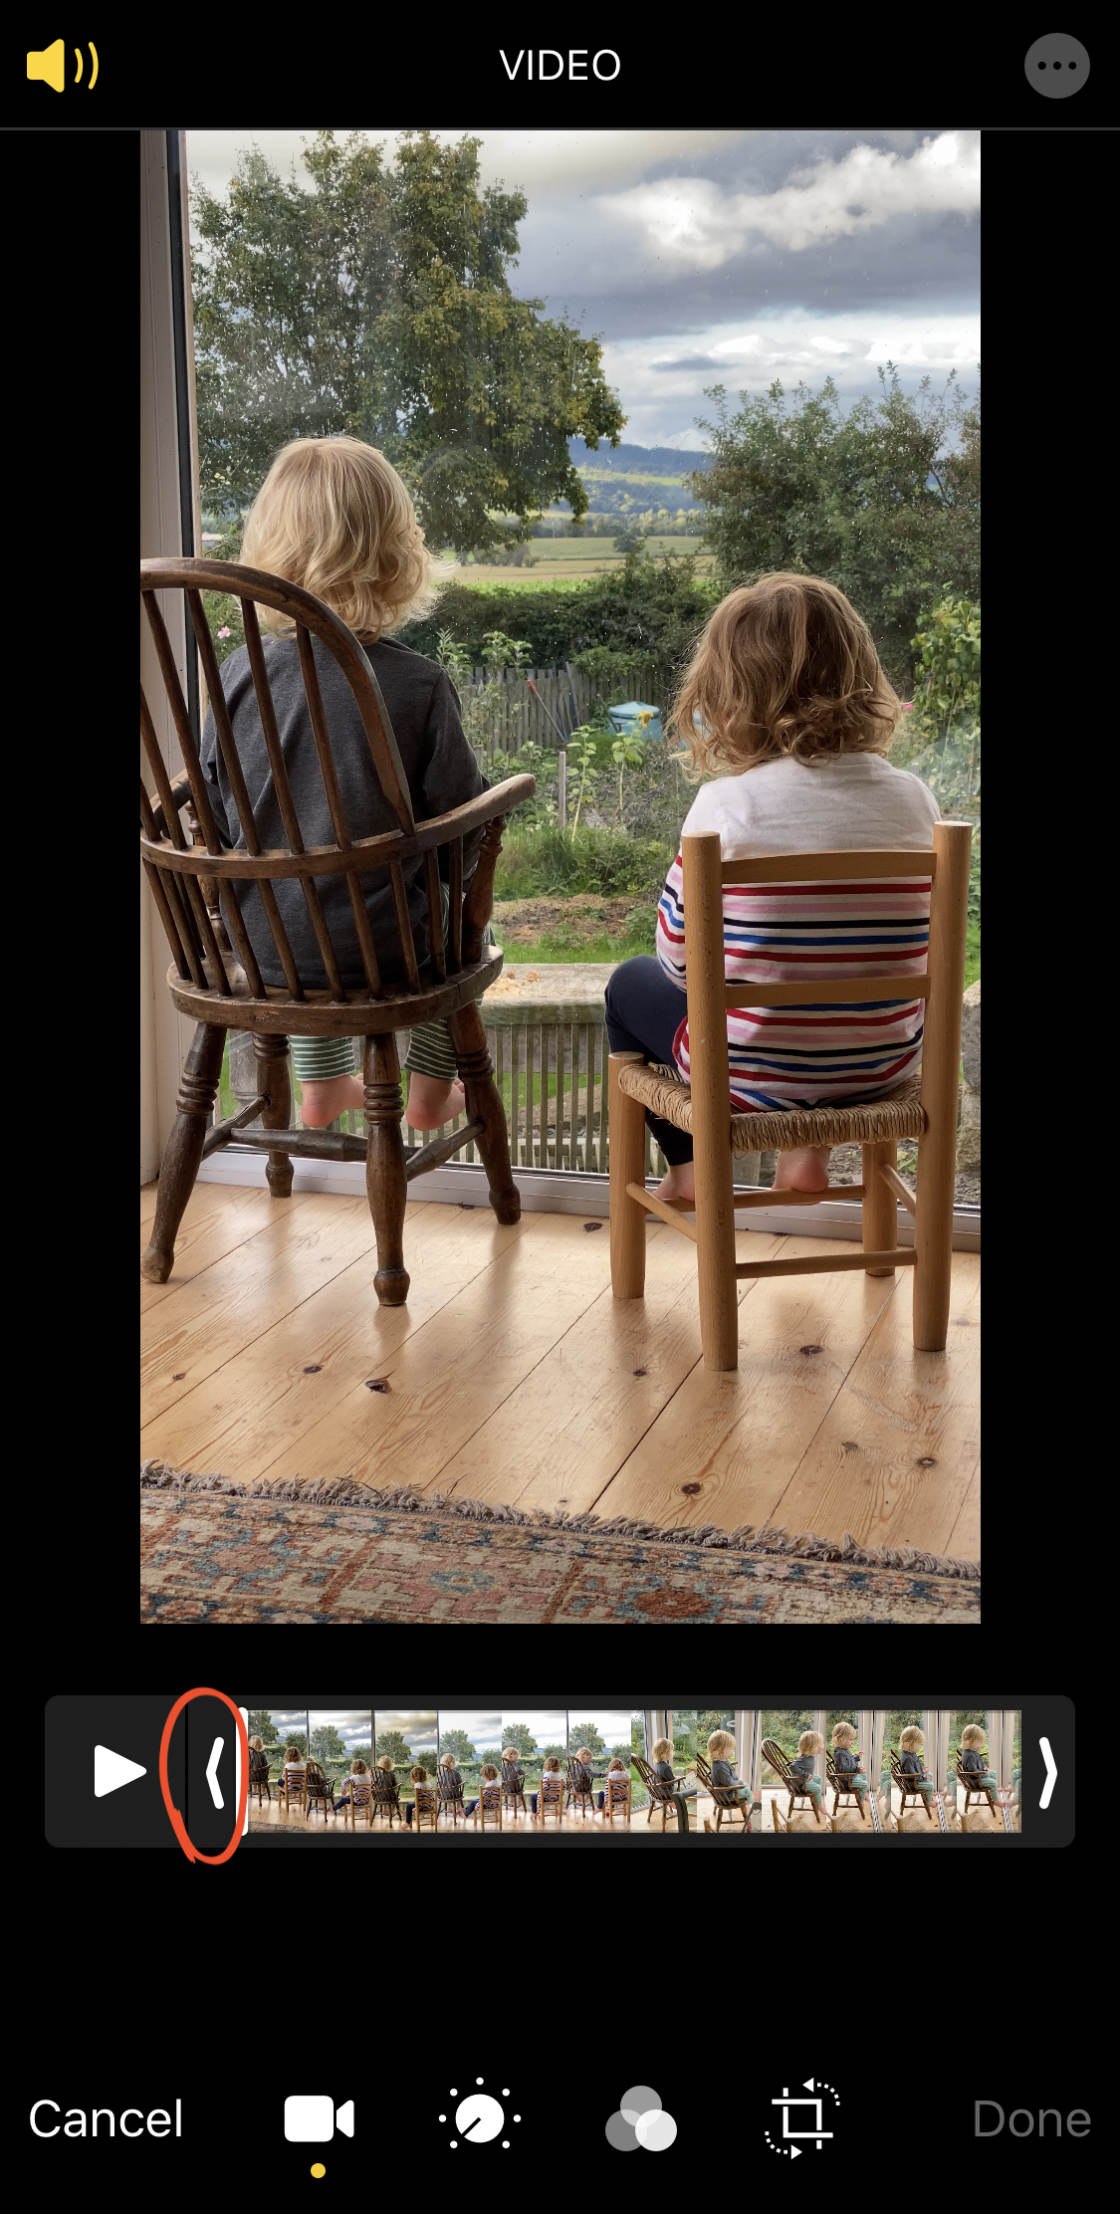
A yellow box indicates where the trimmed video will start and layover.
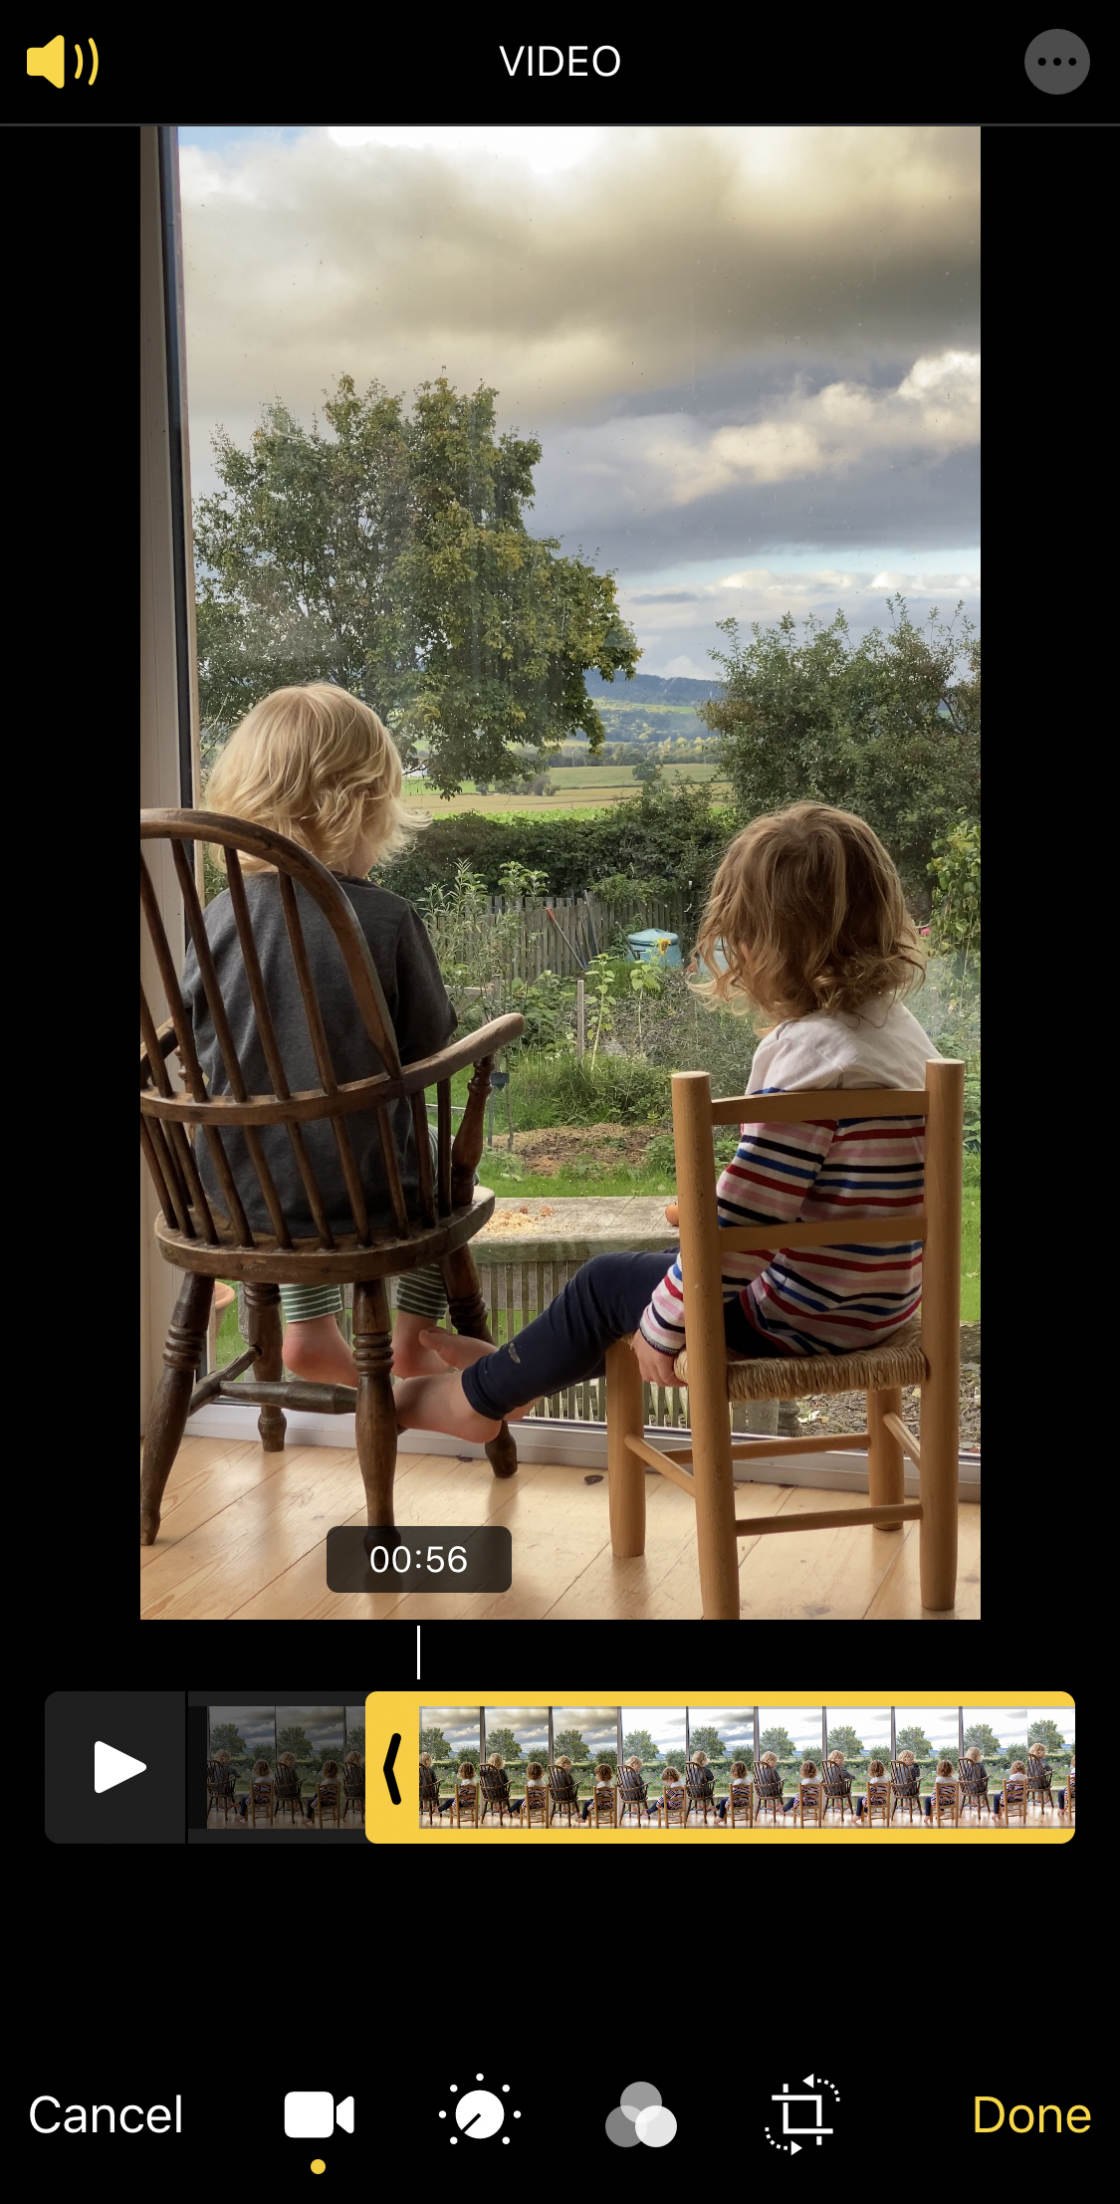
To trim the goal of the picture, puff the right-hand side of the frame viewer to the left.
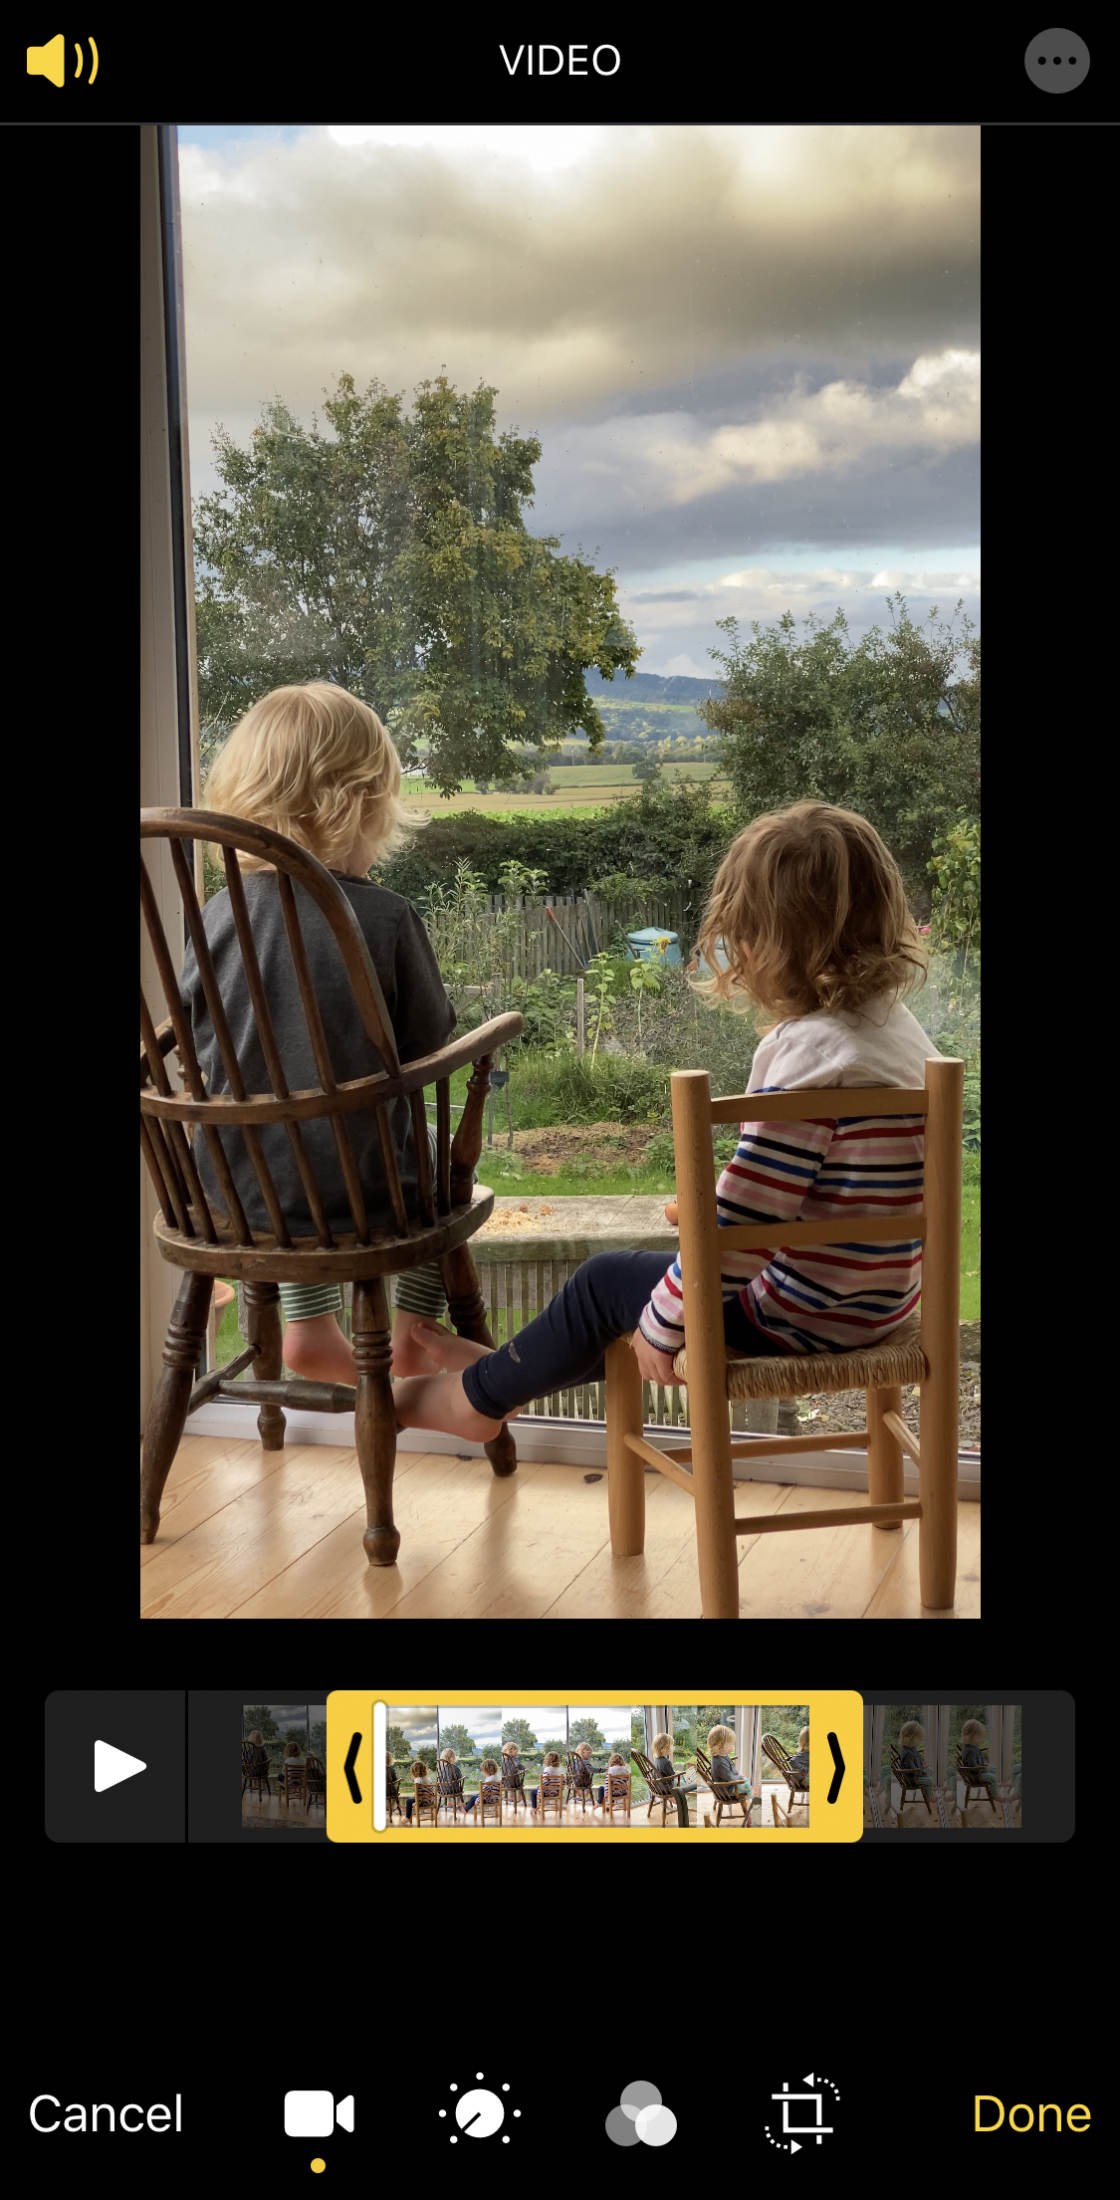
Tap theMeet ikon (white arrow) to preview the trimmed video.
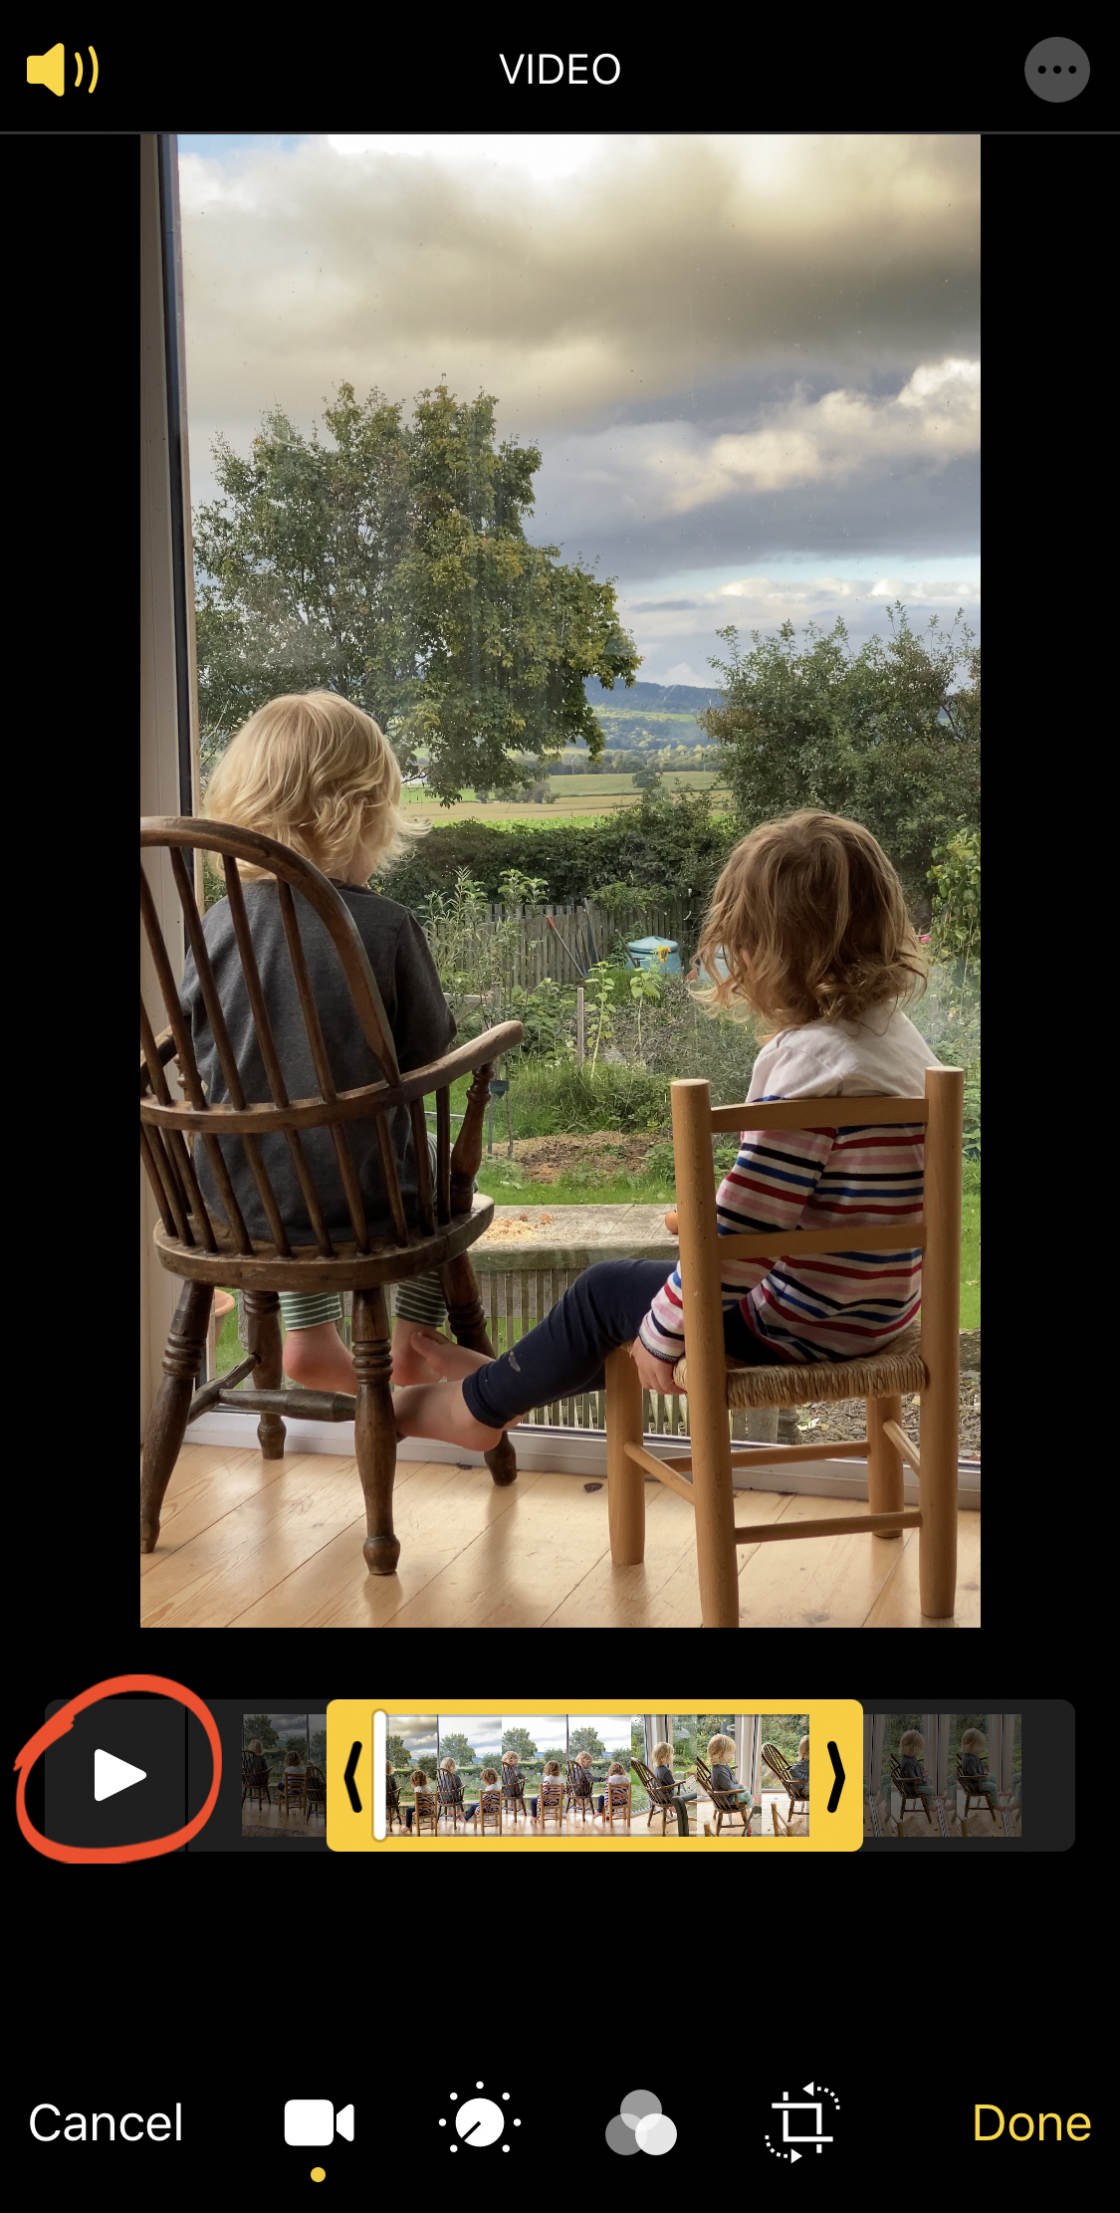
If you need to piddle adjustments to the start and stop clip, drag the edges of the cowardly corner.
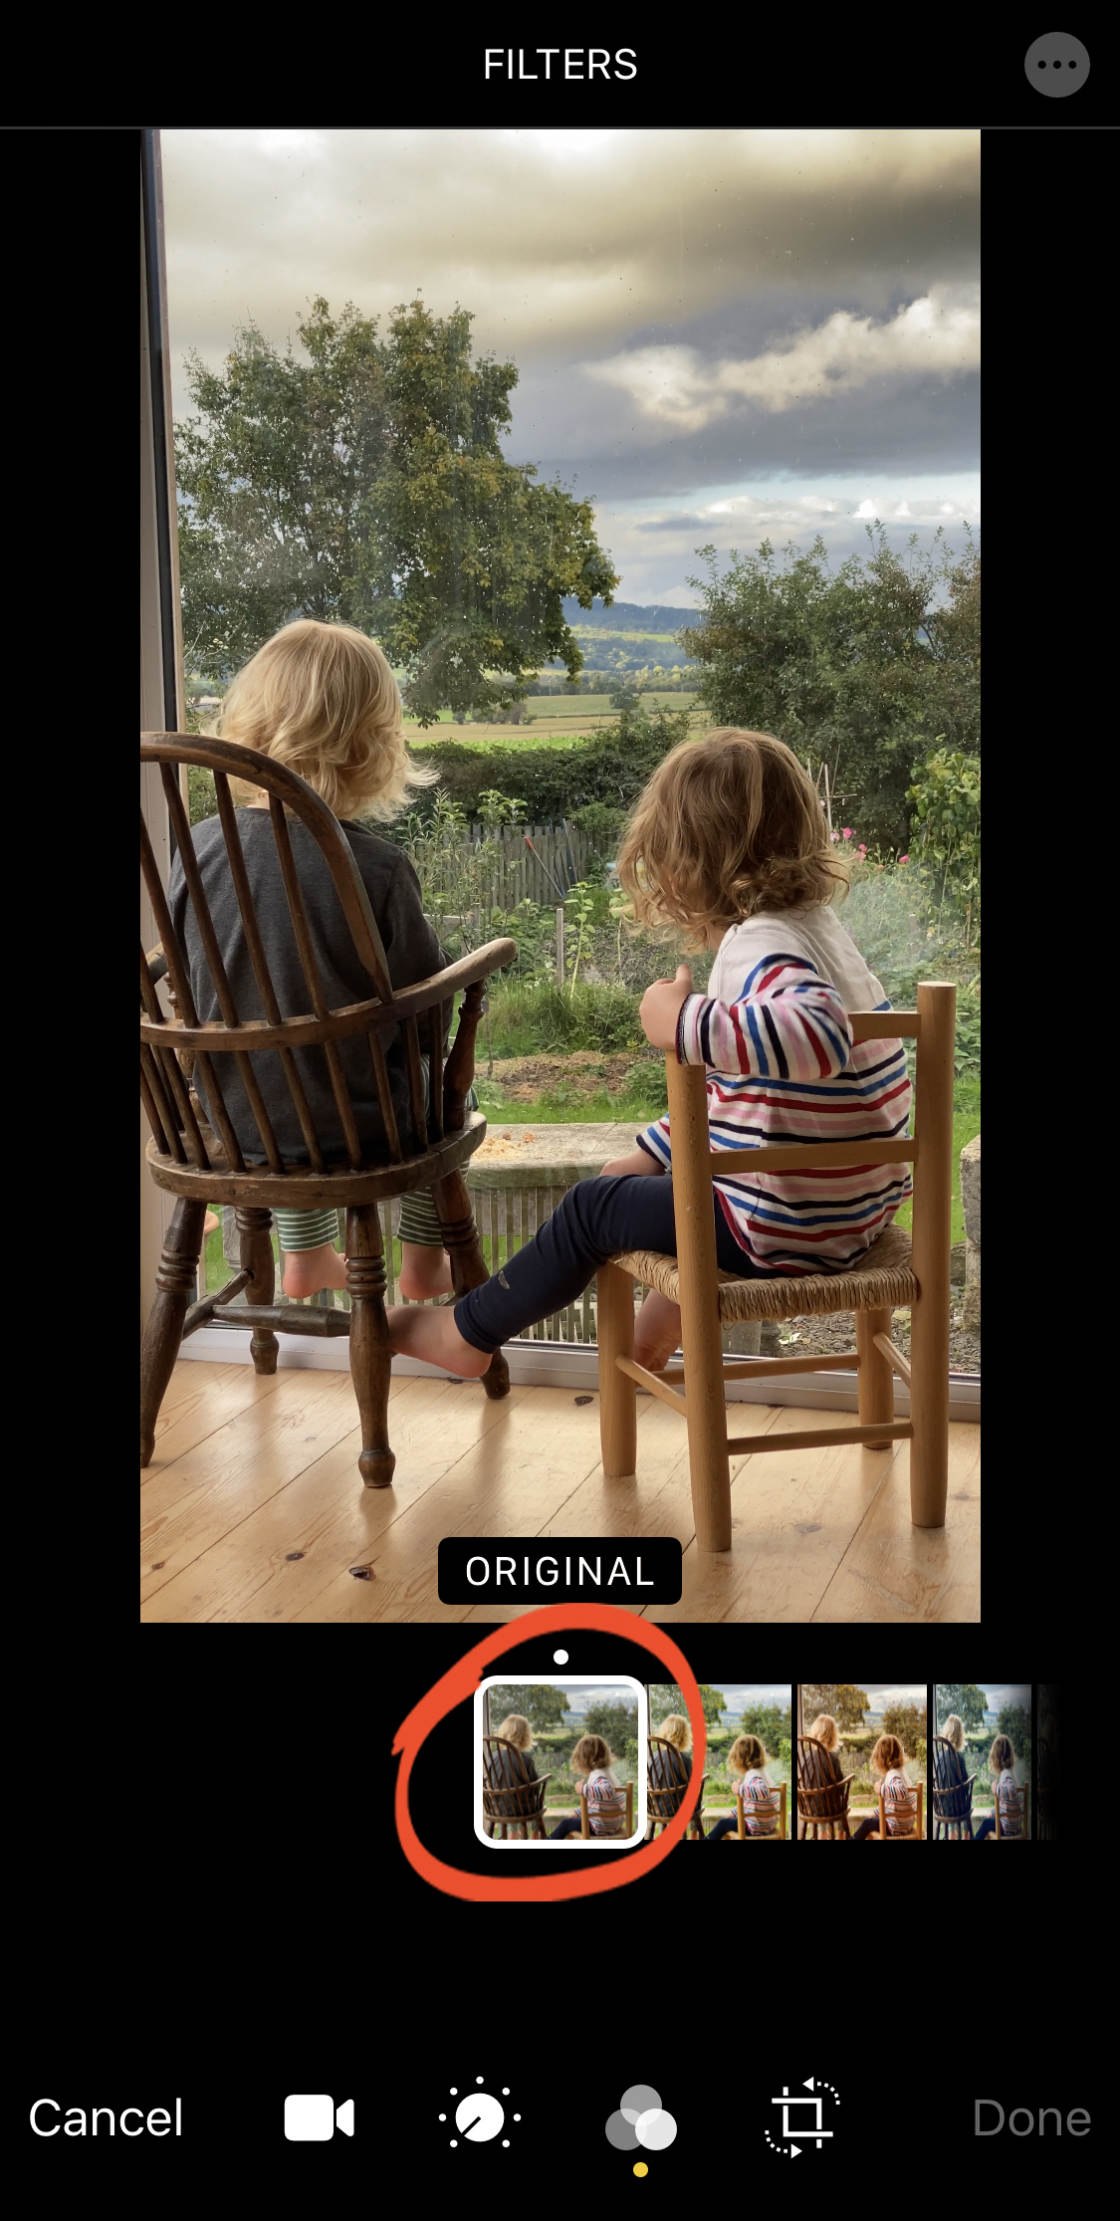
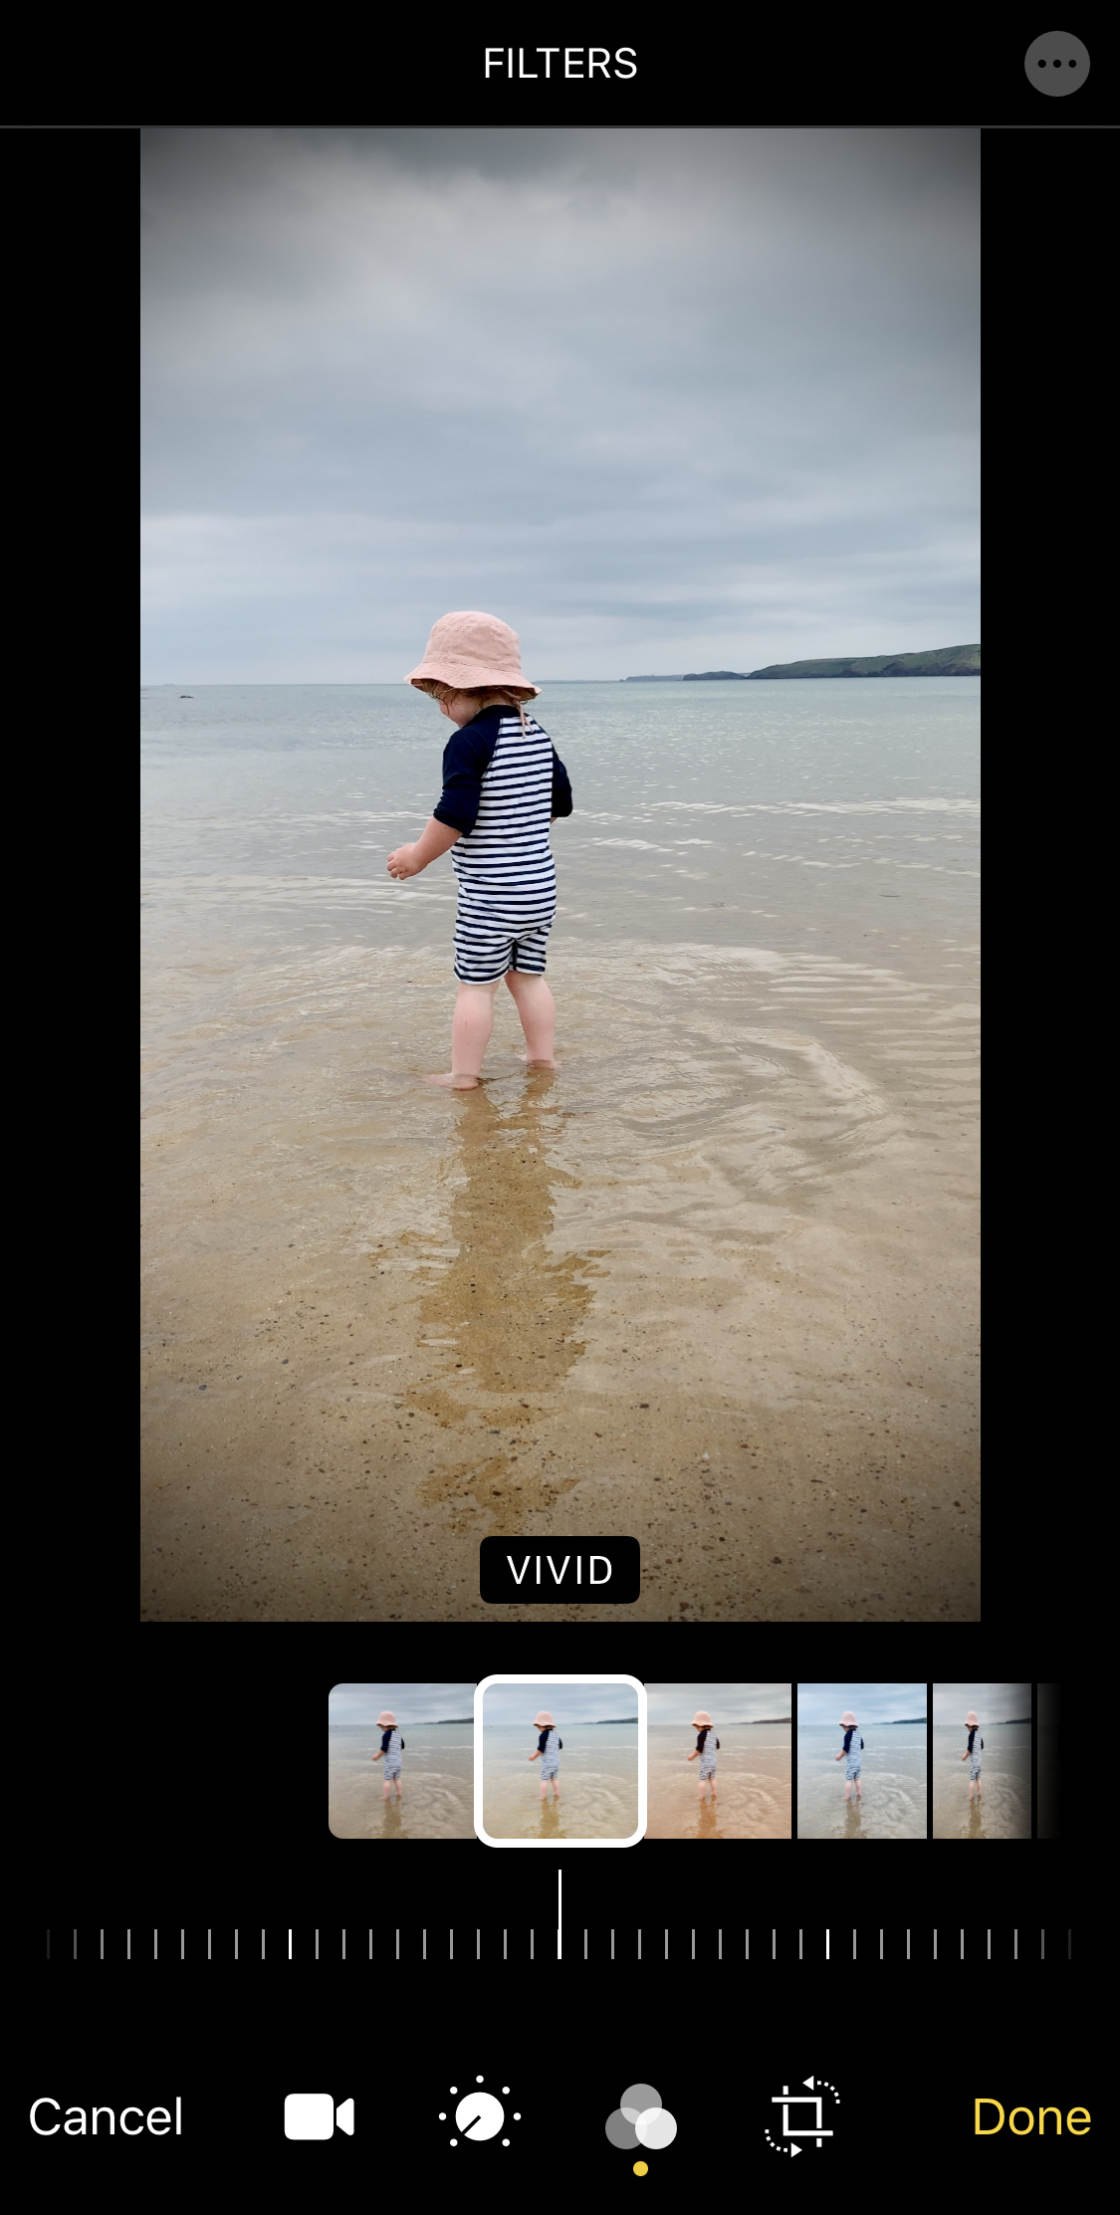
5. Lend oneself A Filter To Your Video
Filters make it quick and easy to change the wait and feel of your video.
You seat take from color or black-and-white filters to create the look you desire.
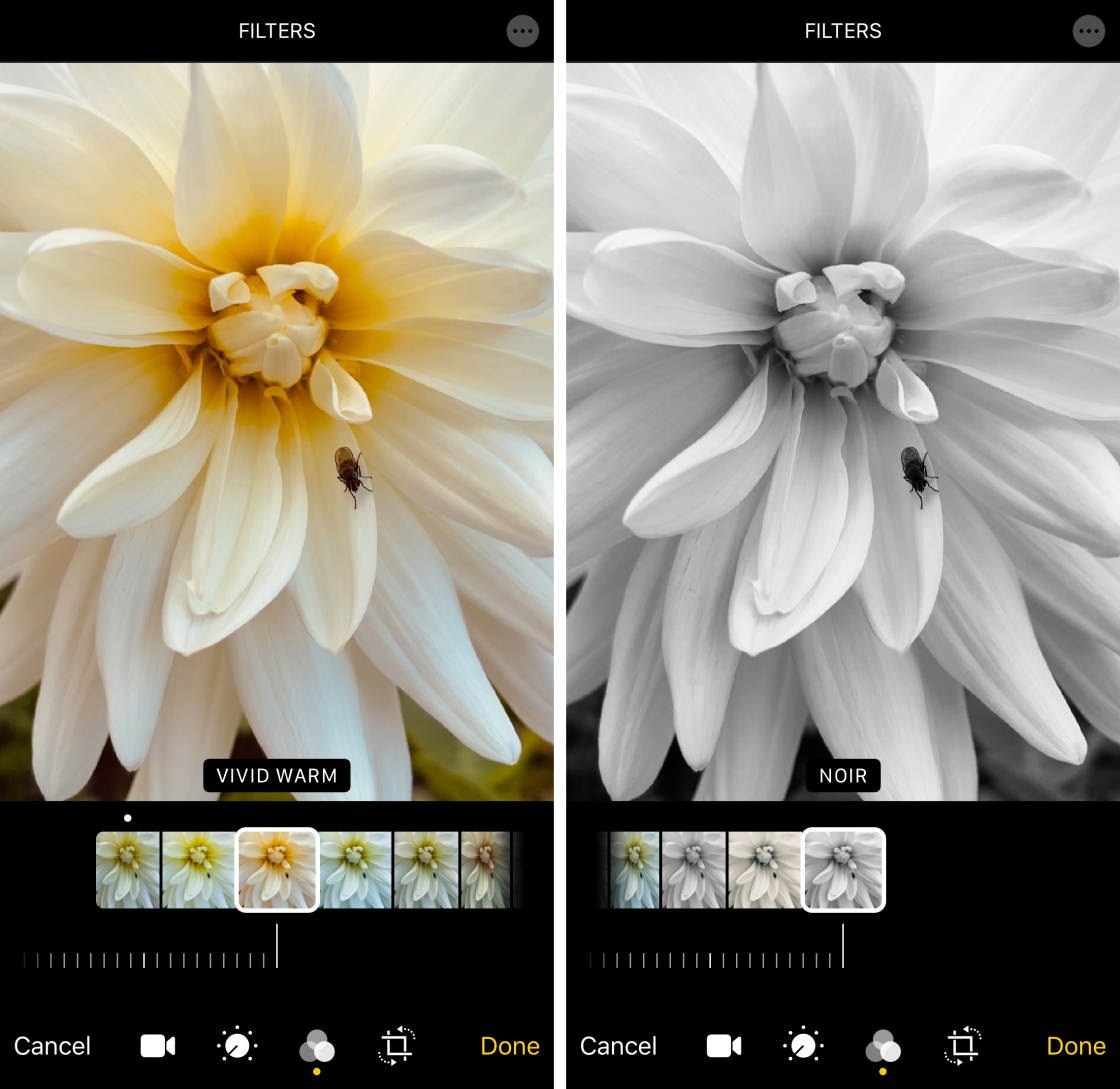
Tap theFilters icon (three circles) at the bottom of the video editor in chief screen door.

Swipe across the permeate thumbnails and watch how the colours in your video change.
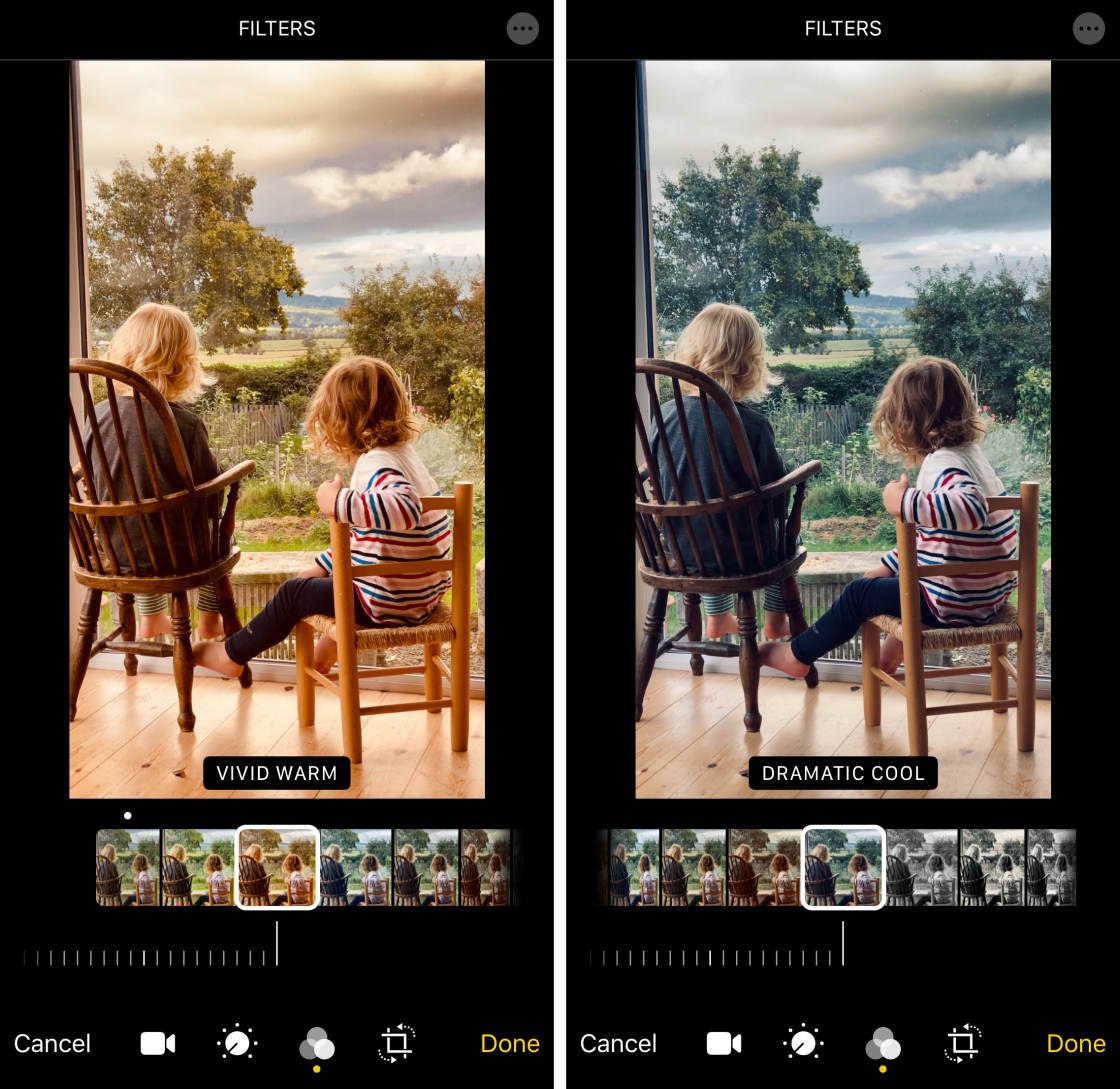
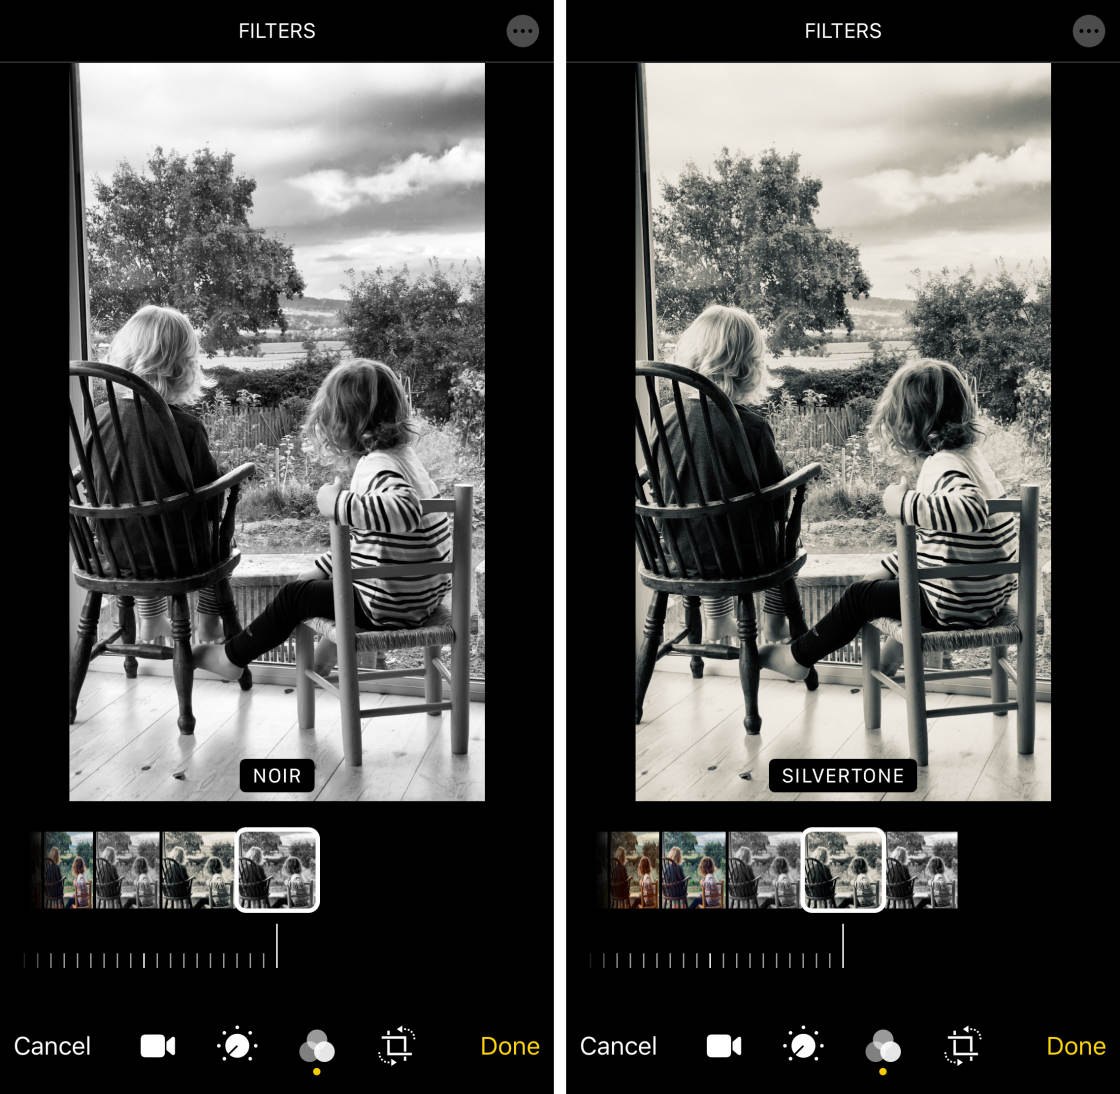
When you find a filter you like, use the slider to adjust the volume of the filter.
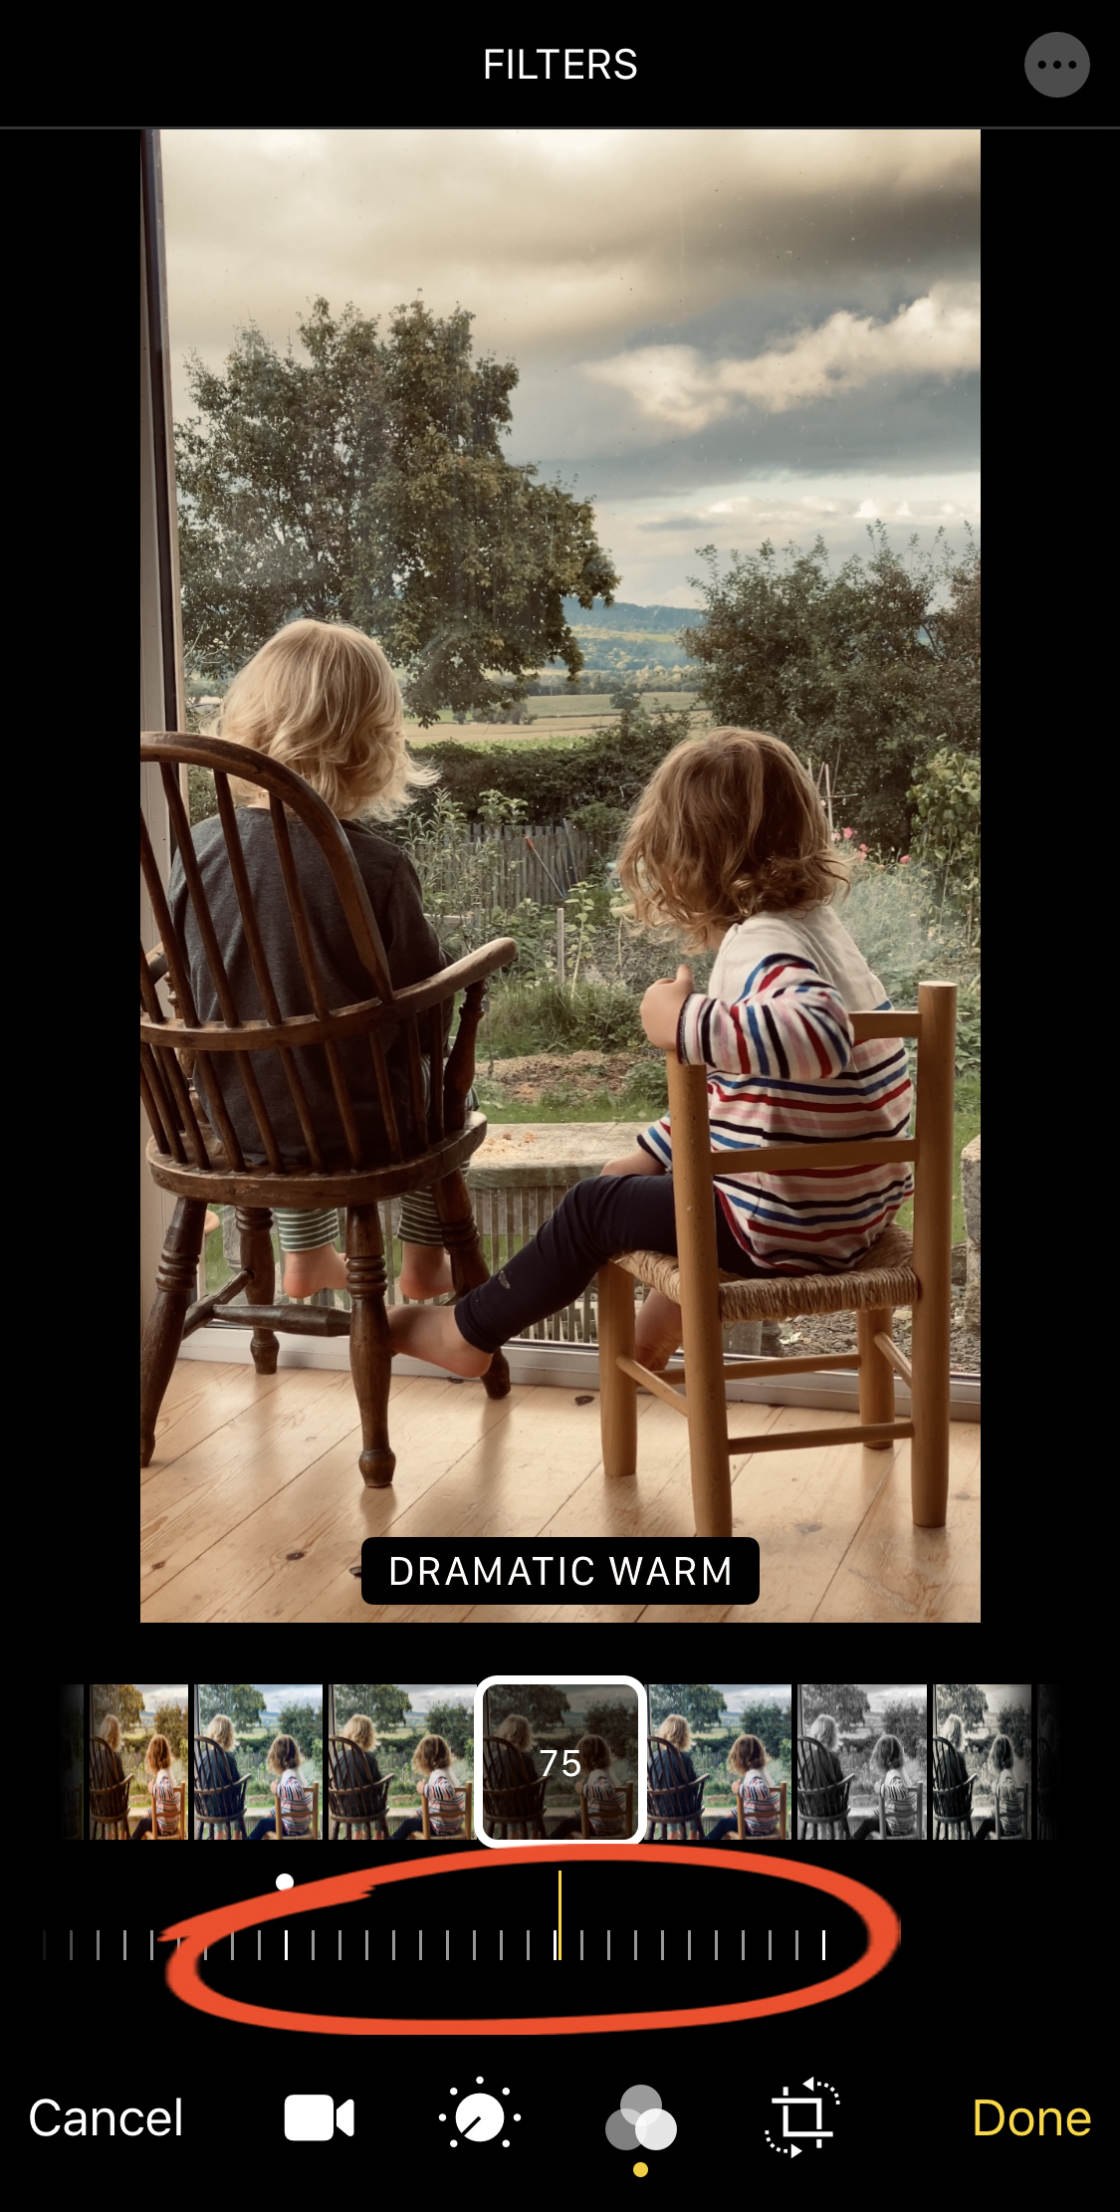
If you assume't want to apply a filter out to your picture, select the Original filter.
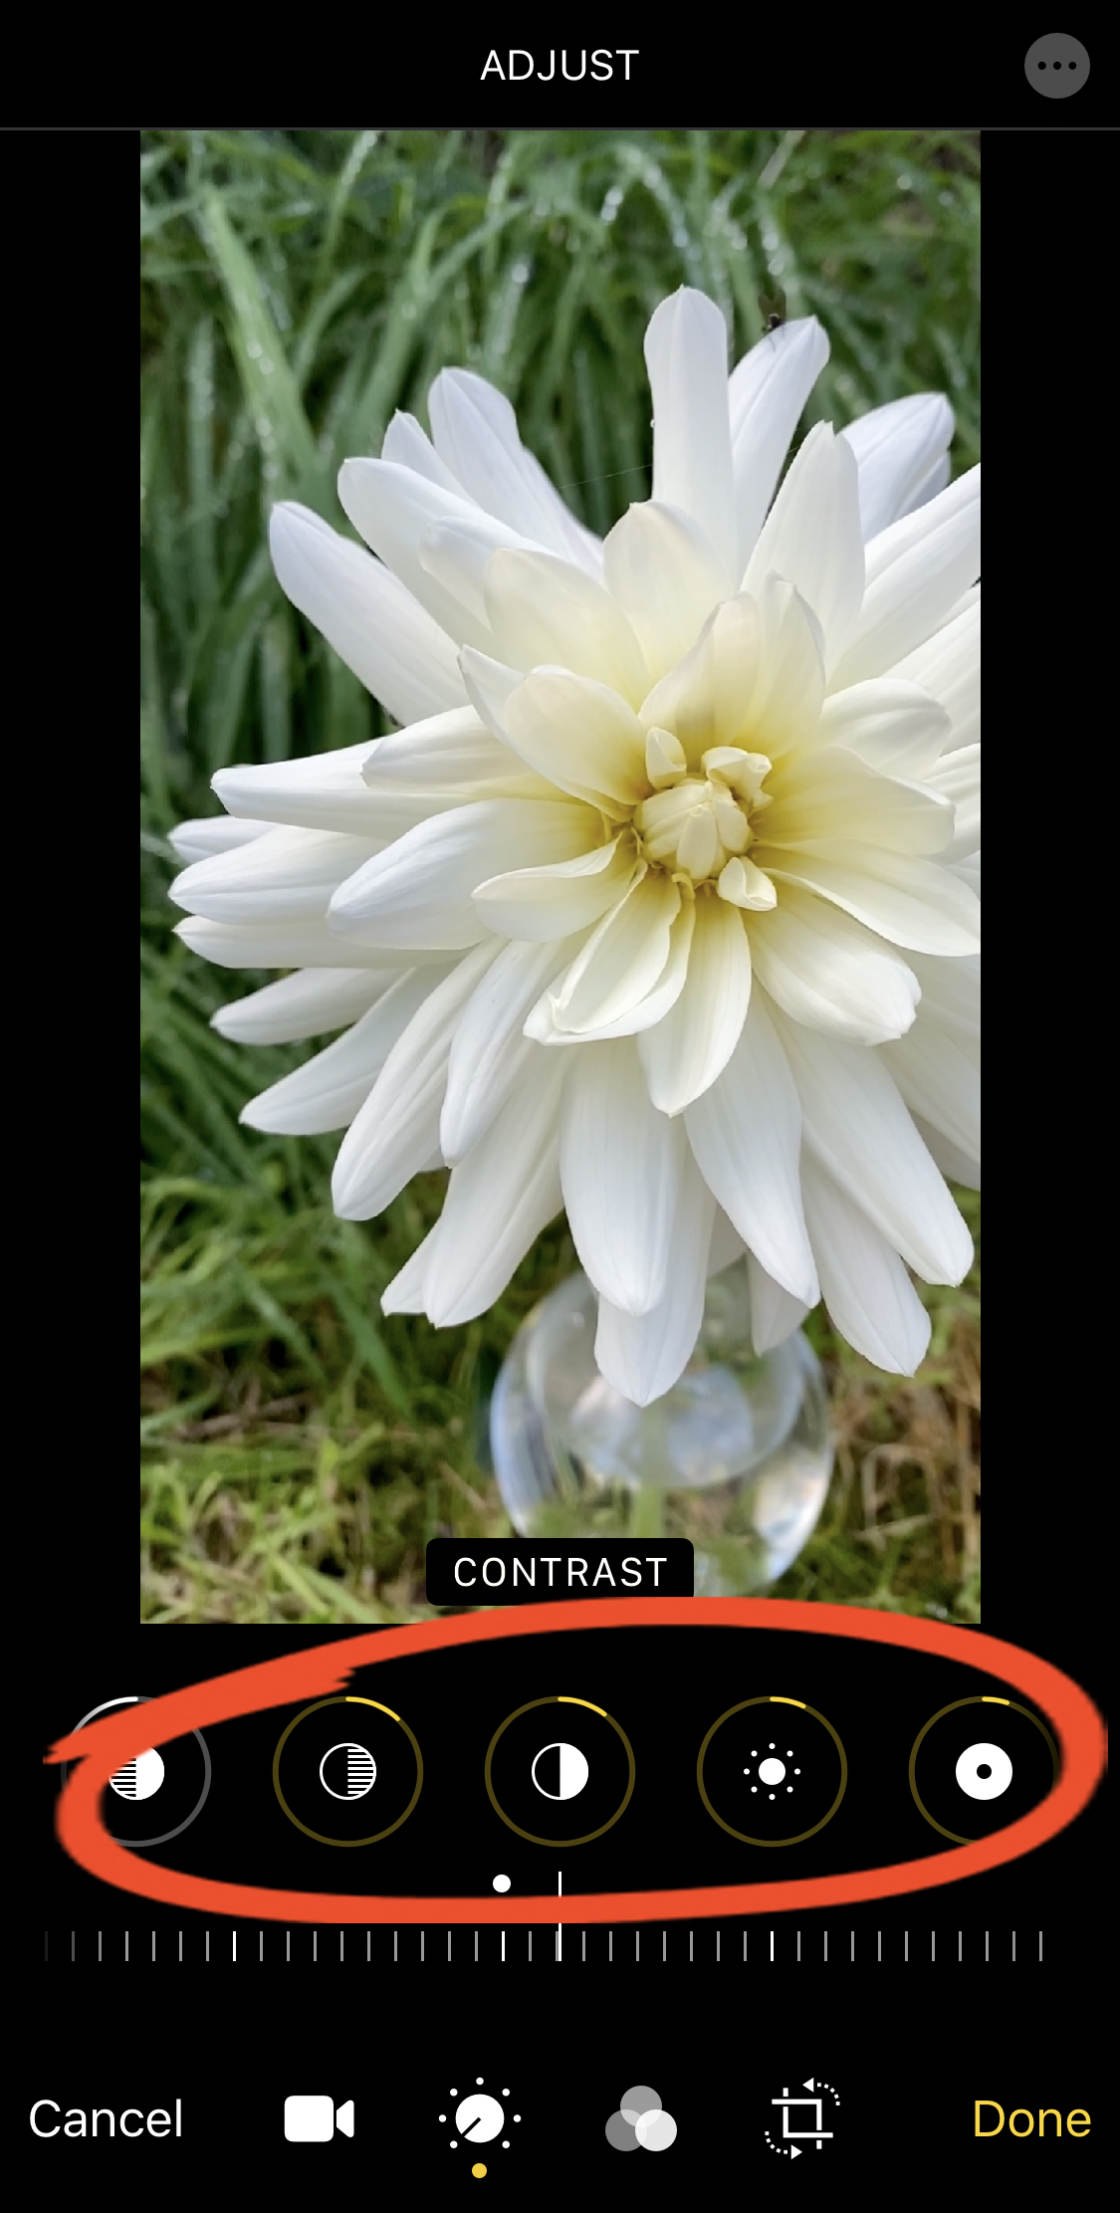
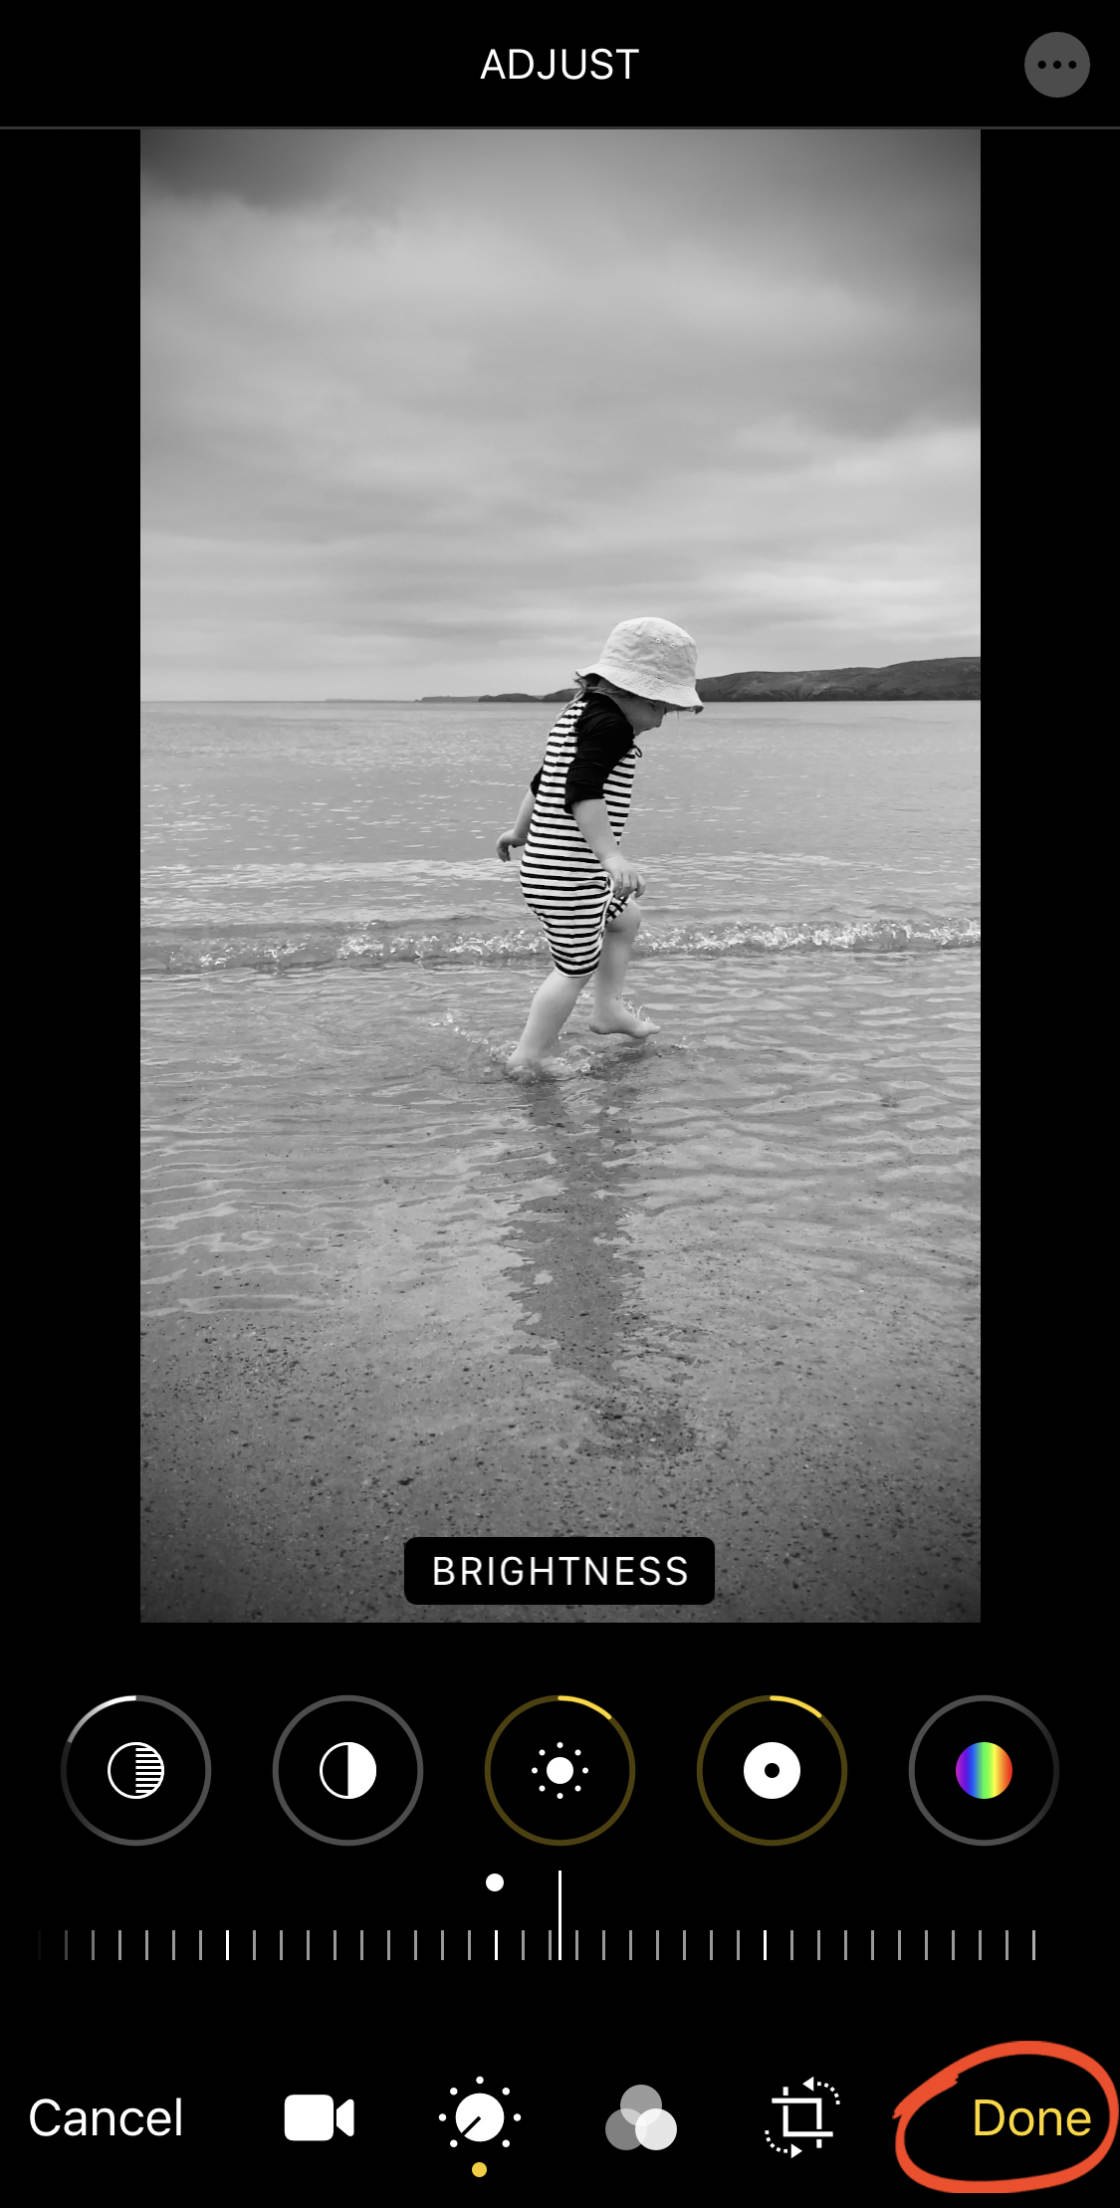
6. Adjust Tinge, Cleverness & Sharpness
The iPhone records awe-inspiring superior video. But you can often build it look even better by adjusting the colour, brightness, and sharpness.
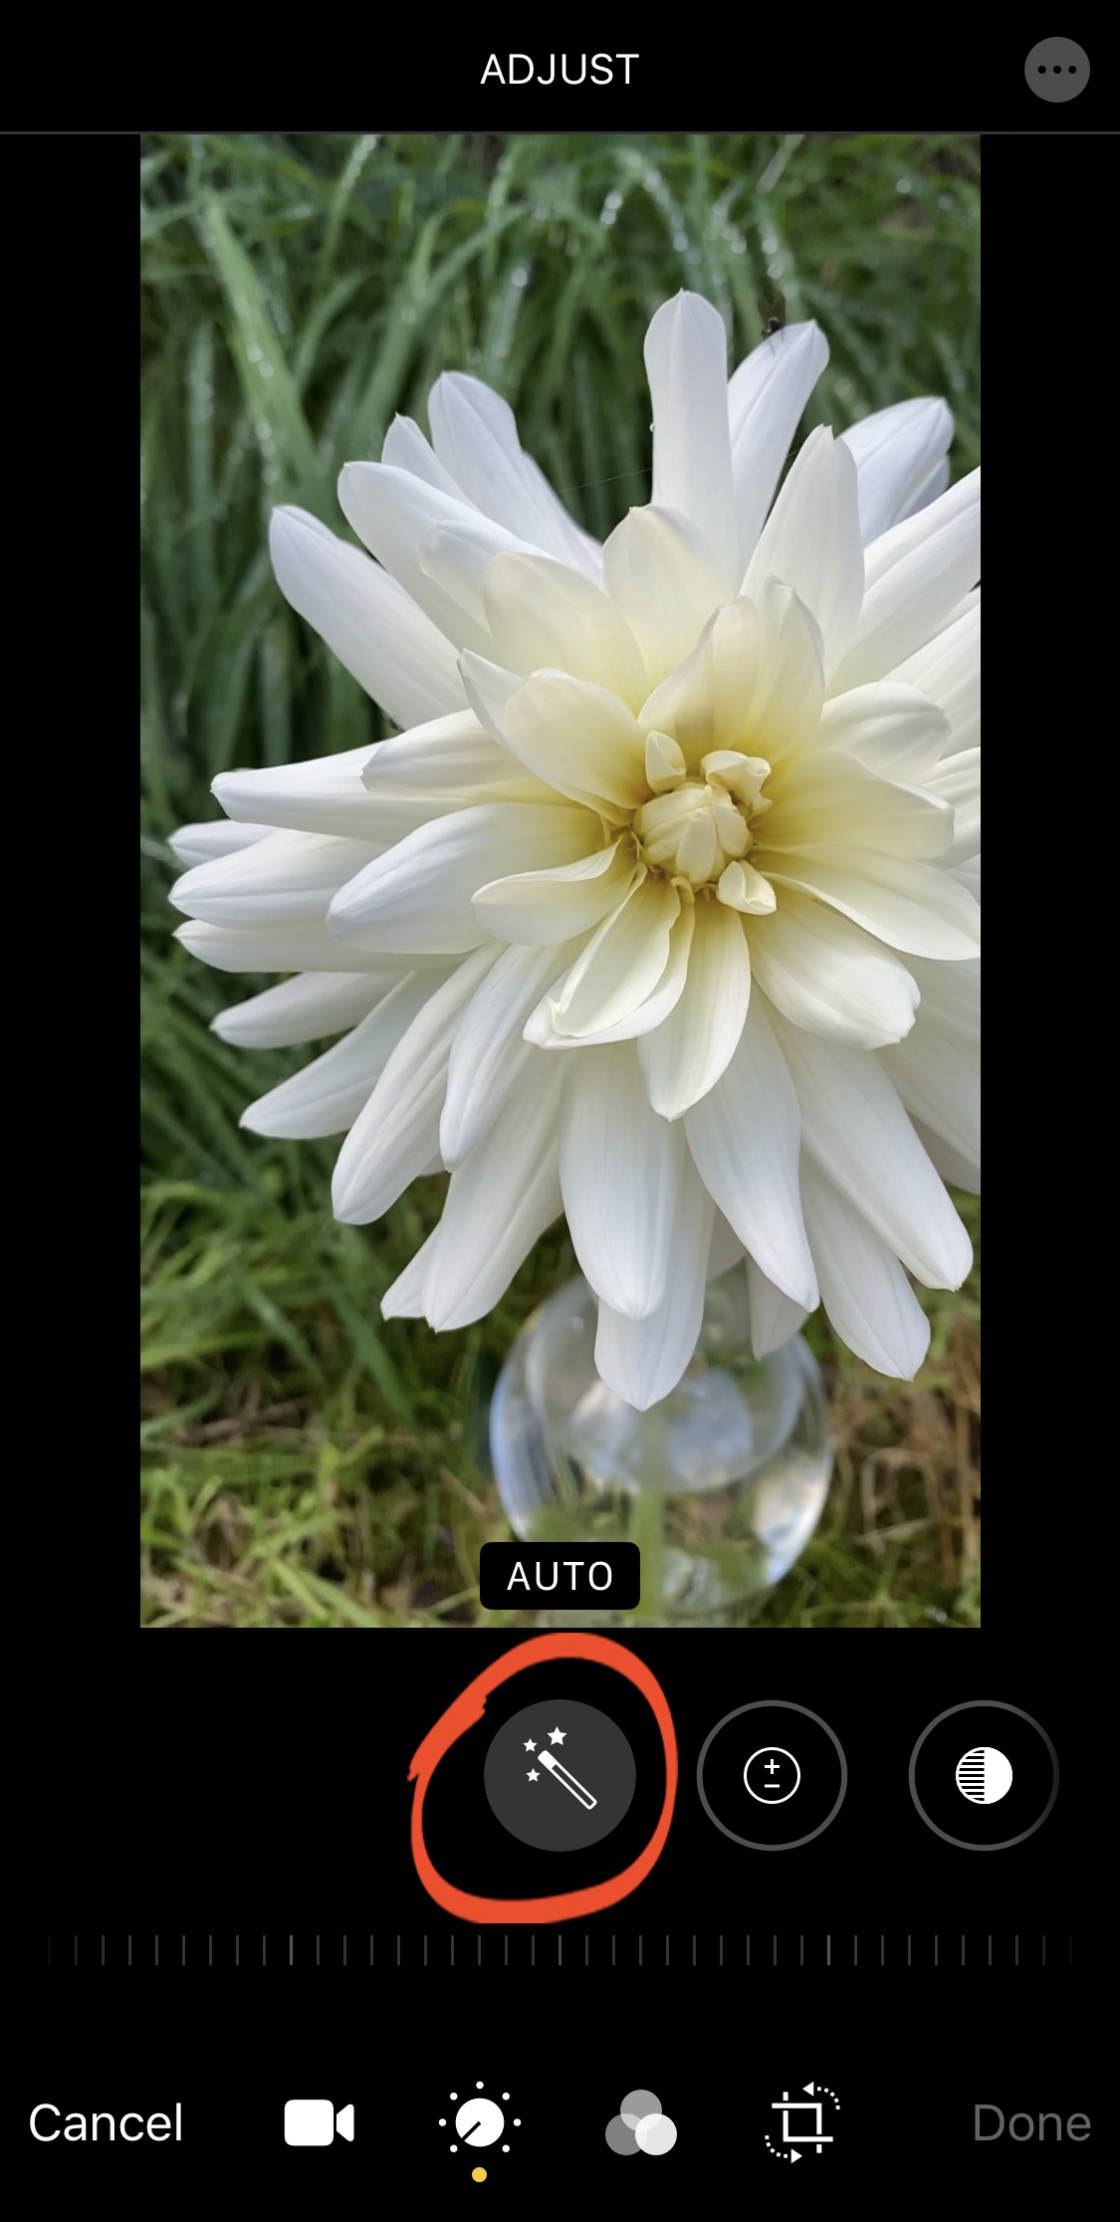
To throw adjustments, tap theAline icon (dial) at the bottomland of the video editor sort.
The adjustment icons appear beneath the video recording. Nobble crossways to see them complete.
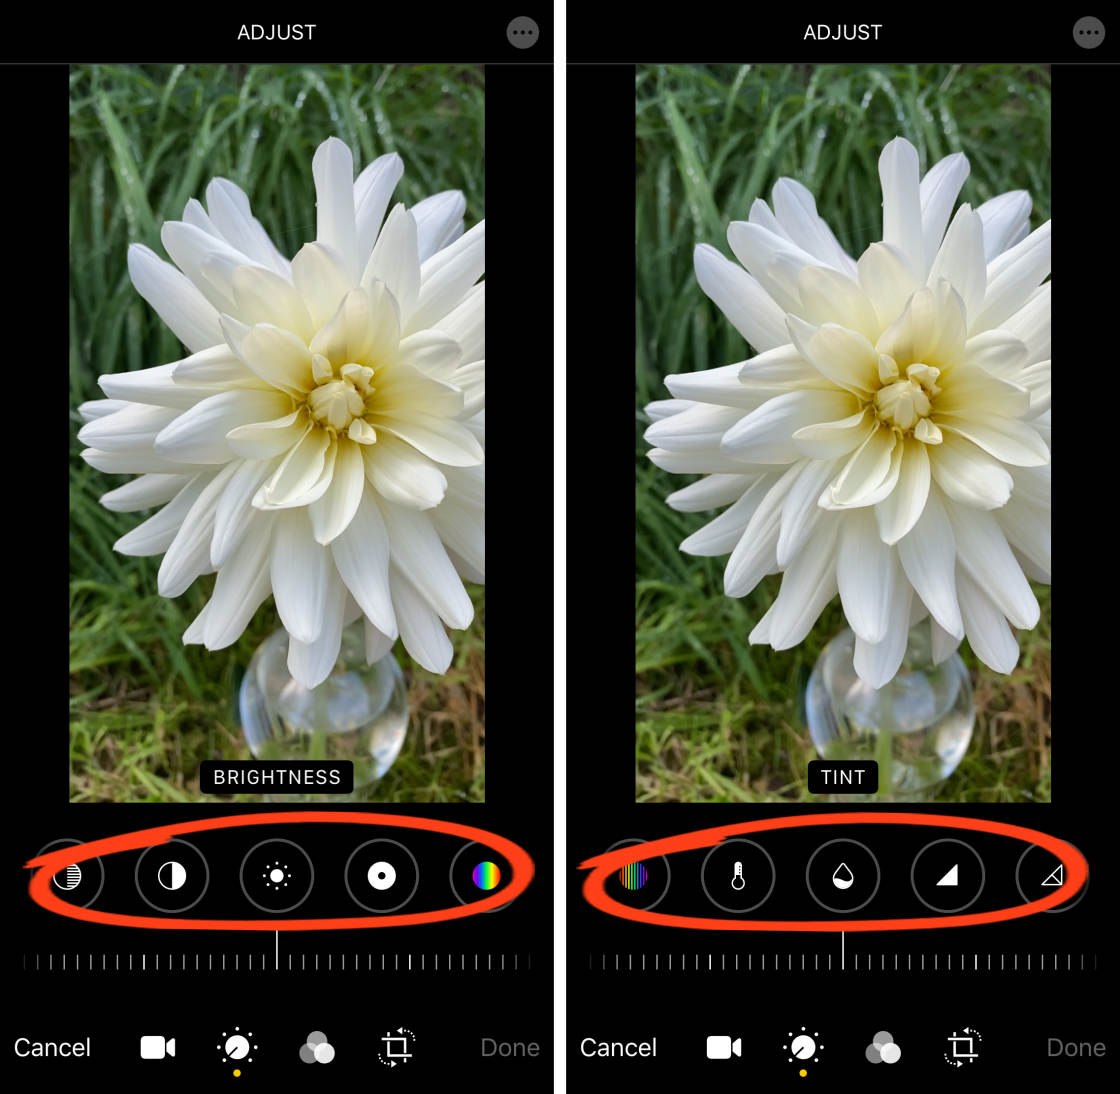
When you apply an adjustment to a video recording, all frames in the video will be elocutionary. In other words, the effect is practical to the entire video.
Read on to pick up how each of the adjustment tools leave affect your video footage.
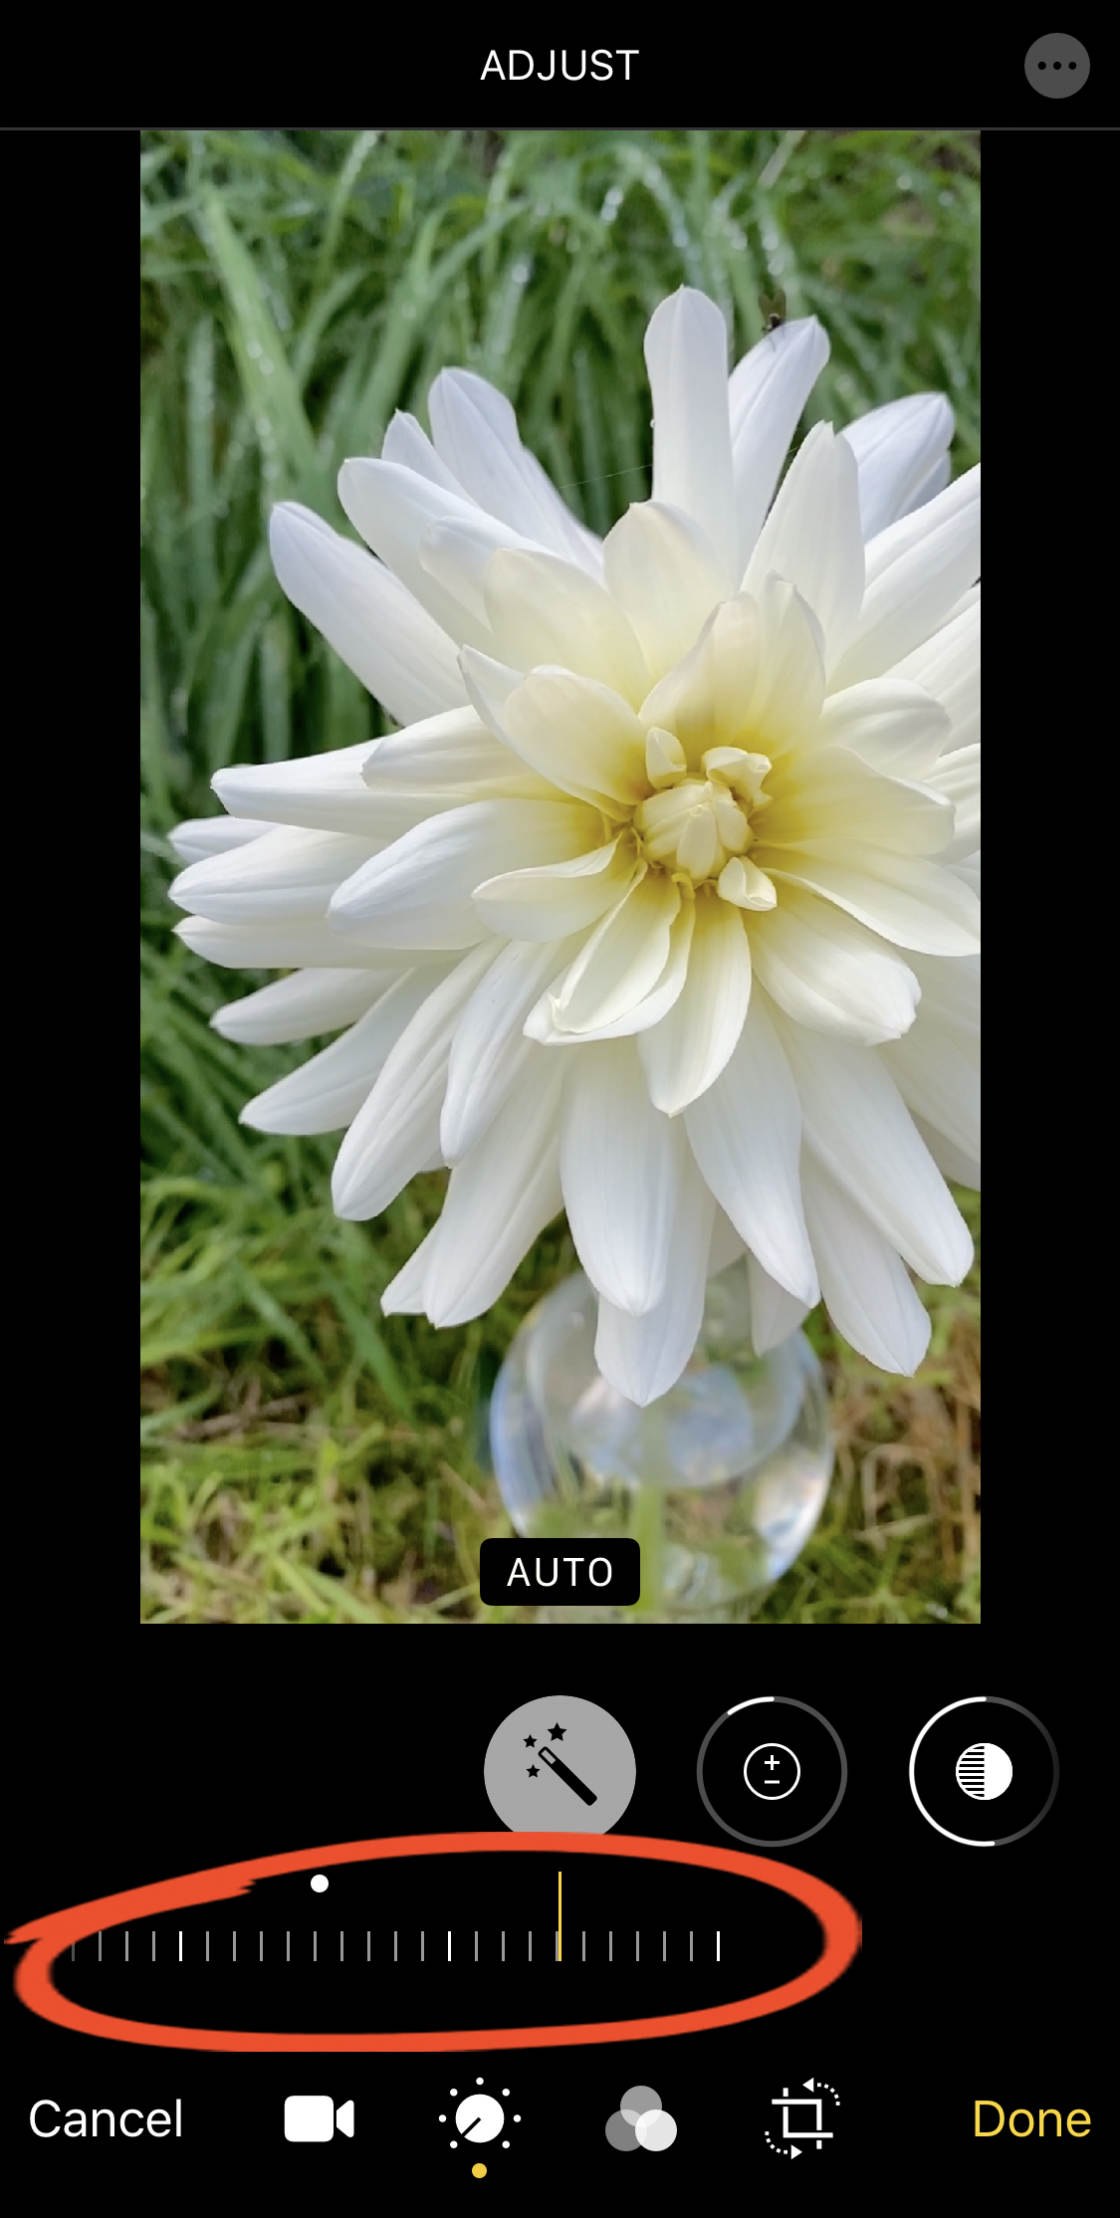
6.1 Auto Adjust
The Auto tool mechanically adjusts the colors and light of your video.
When you tap theAuto button, the icon turns pale grayish to indicate that IT's switched on.
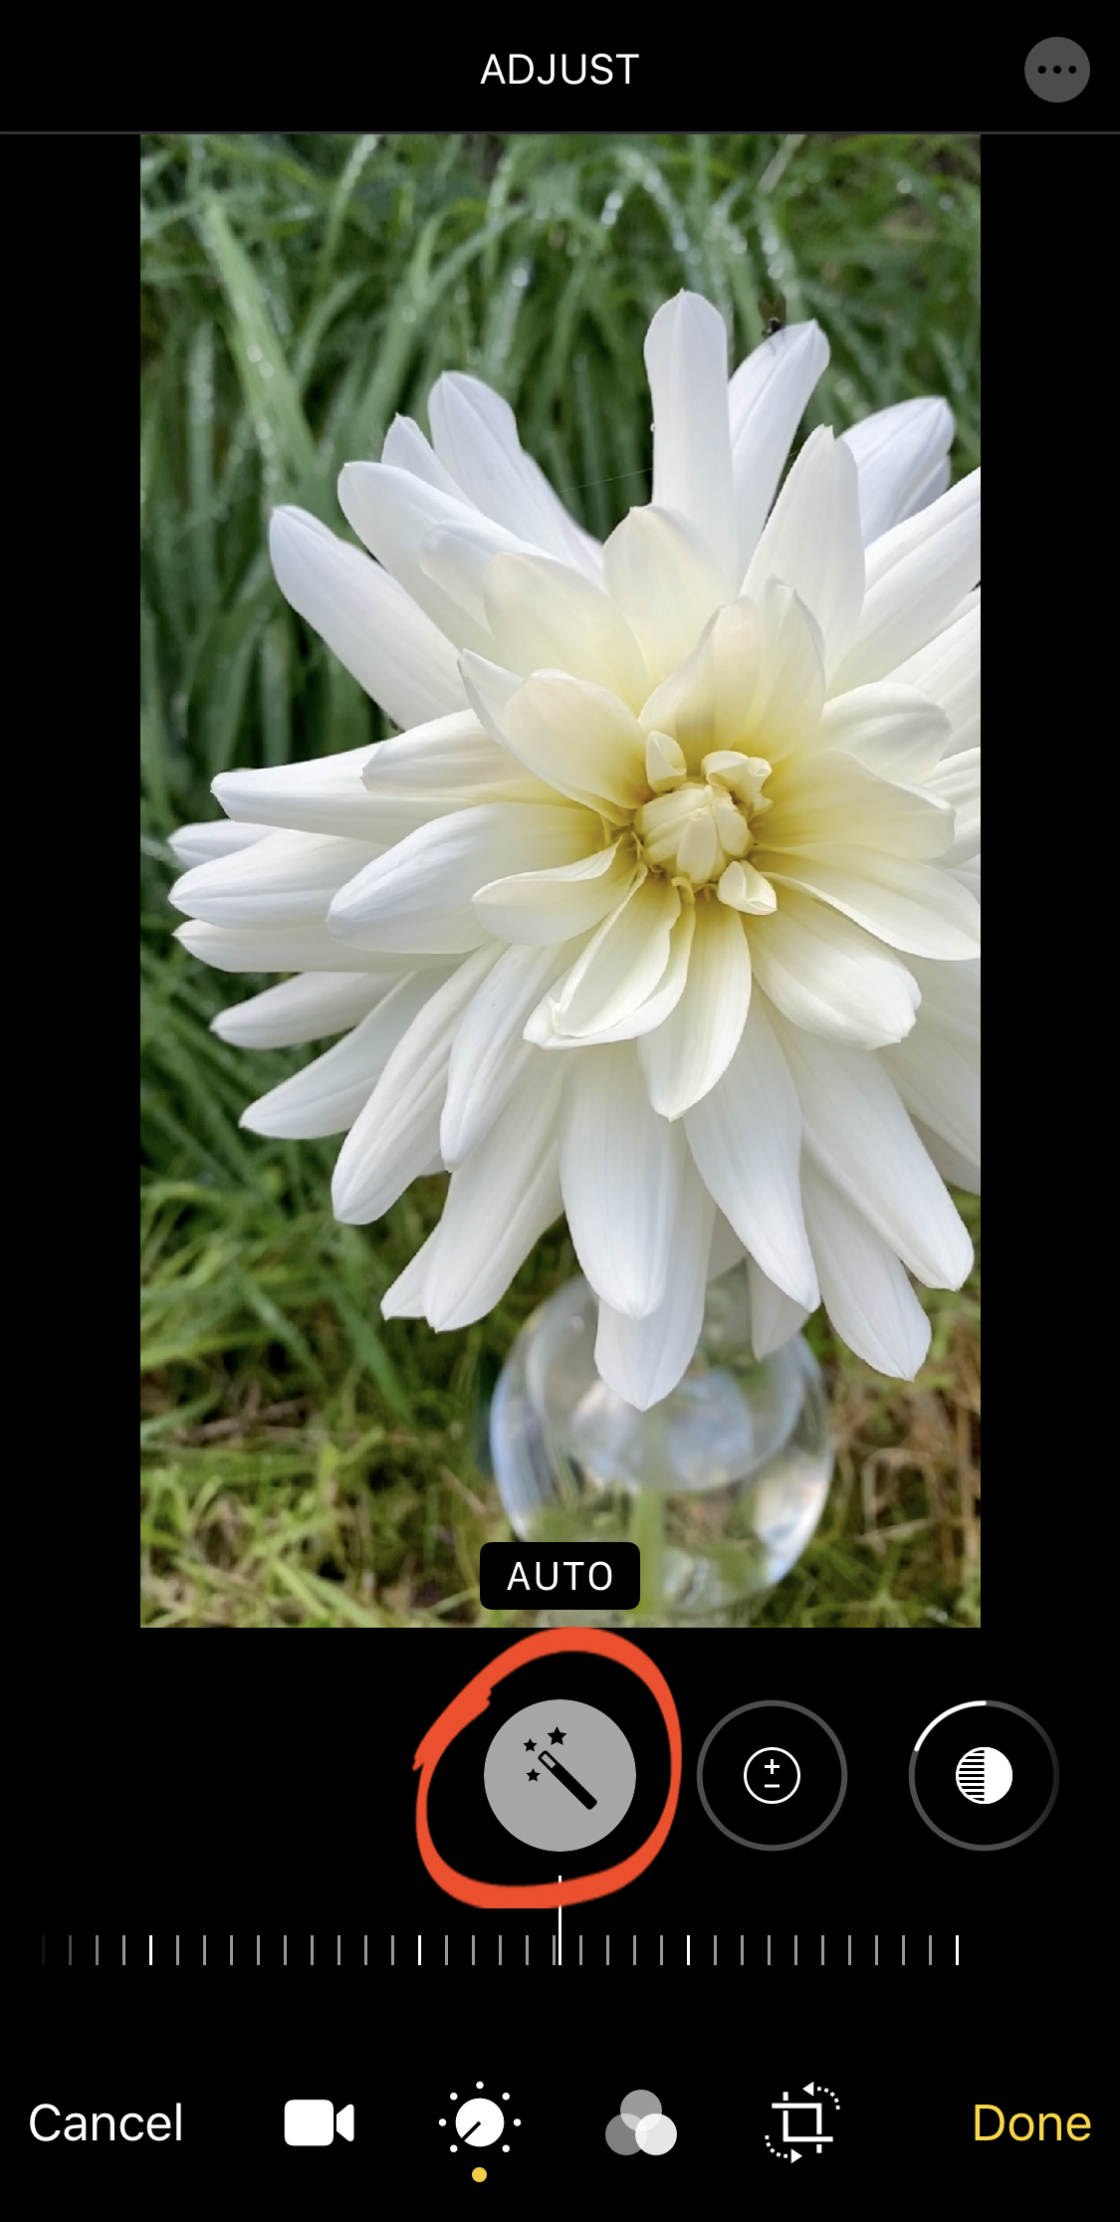
You can use the skidder at the bottom of the screen to adjust the strength of the automatic edit.
If you cabbage across the adjustment icons, you crapper run into which adjustments have been applied away the Auto stage setting. A bold line on the circle round an icon indicates that it has been misused.
If you bid, you can close-grained-air the Auto adjustment using somebody alteration tools. Just knock an adjustment tool and use the slider to adjust its strength.
To take away the Auto adjustment from your video, spigot the Auto icon indeed it turns dark Grey.
At once let's research the manual of arms adjustment tools located to the right of the Auto tool.
6.2 Exposure
The Exposure tool brightens or darkens the video.
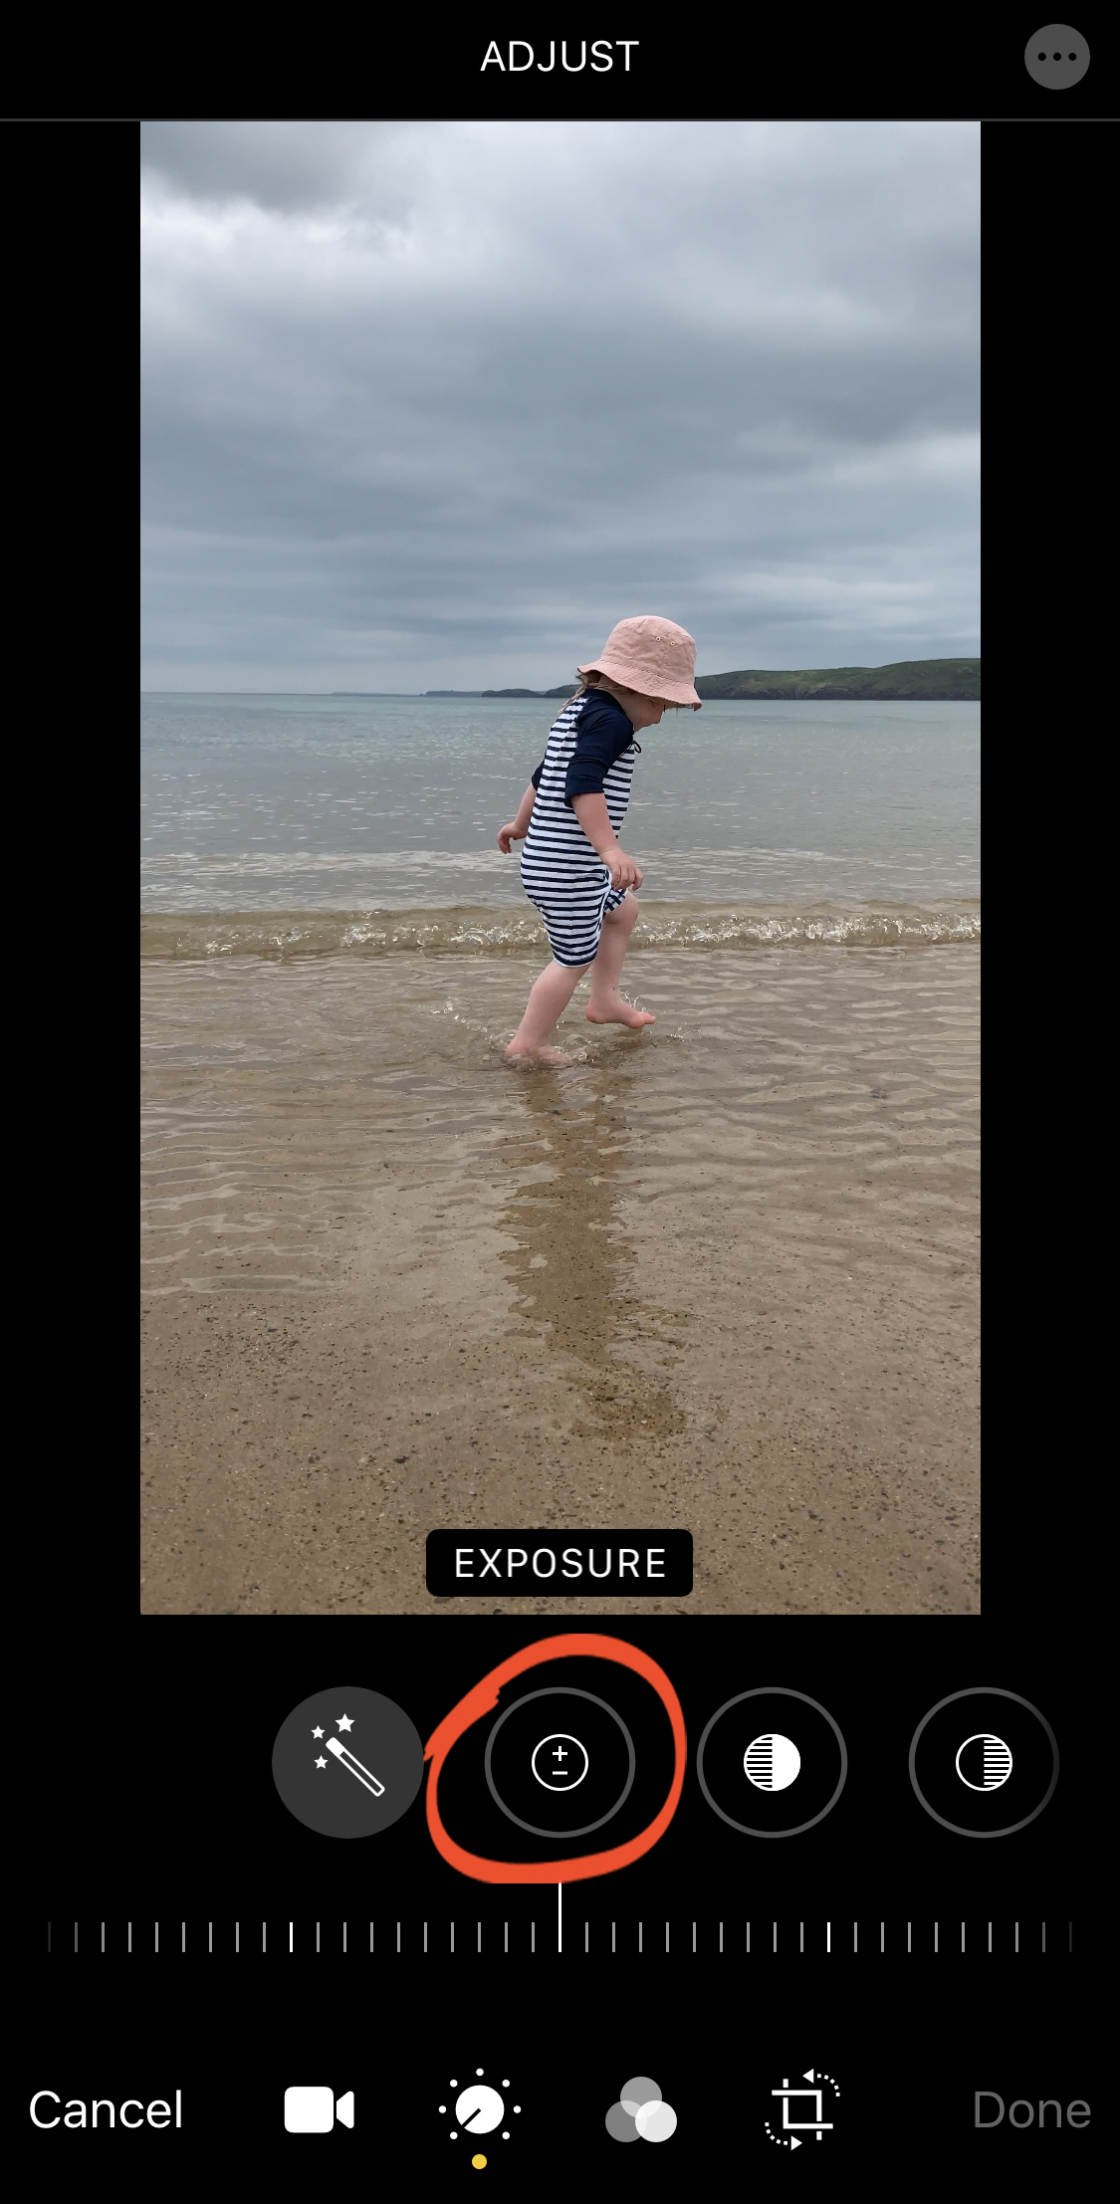
Drag the luger right to brighten the video, OR port to darken it.
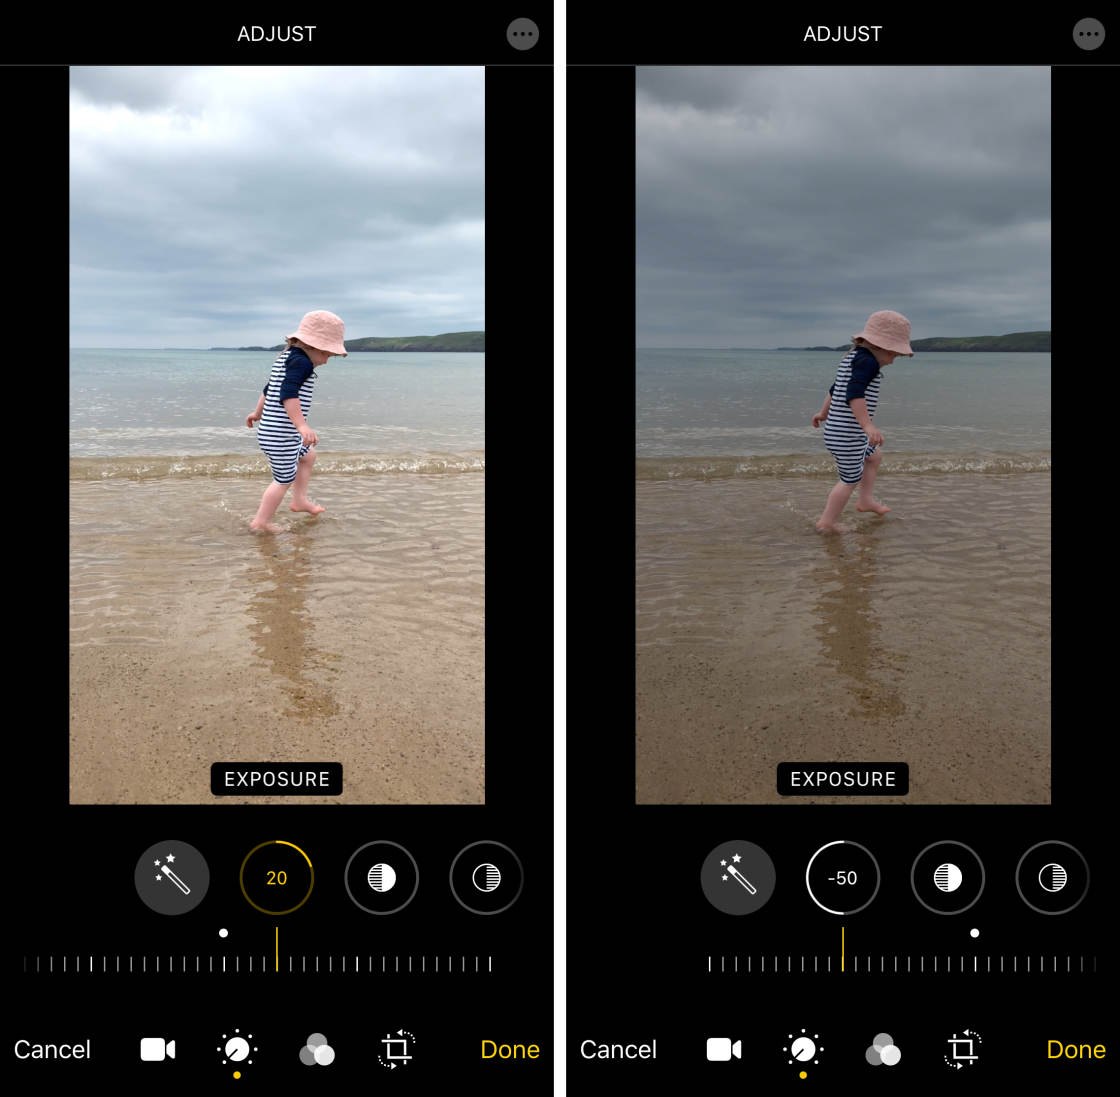
The Exposure instrument has a heavier bias towards the highlights. So the brightly tones in your video are affected more than the dark tones.
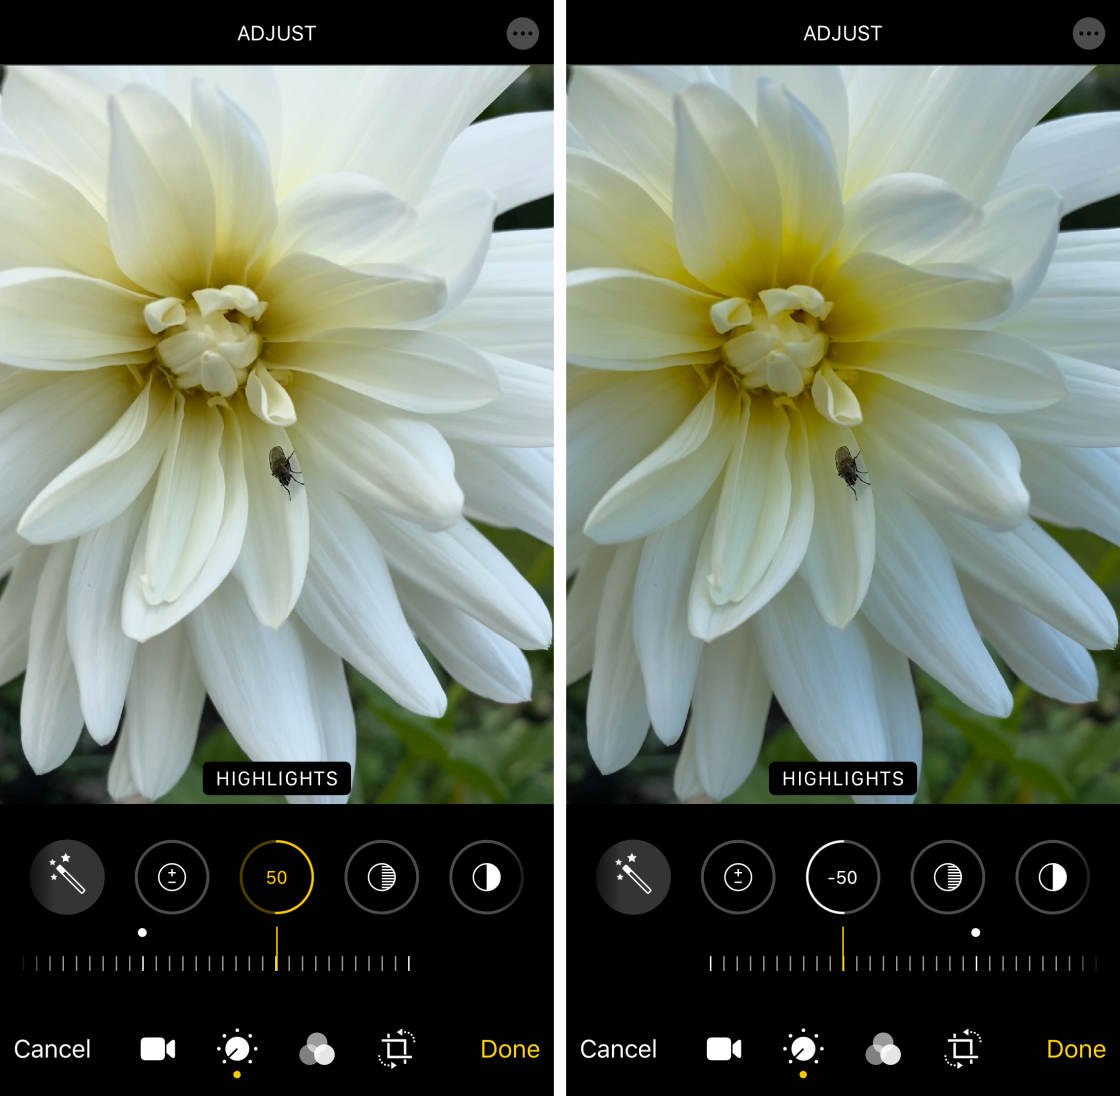
6.3 Highlights
The Highlights puppet adjusts the light of the fulgent areas in your video.
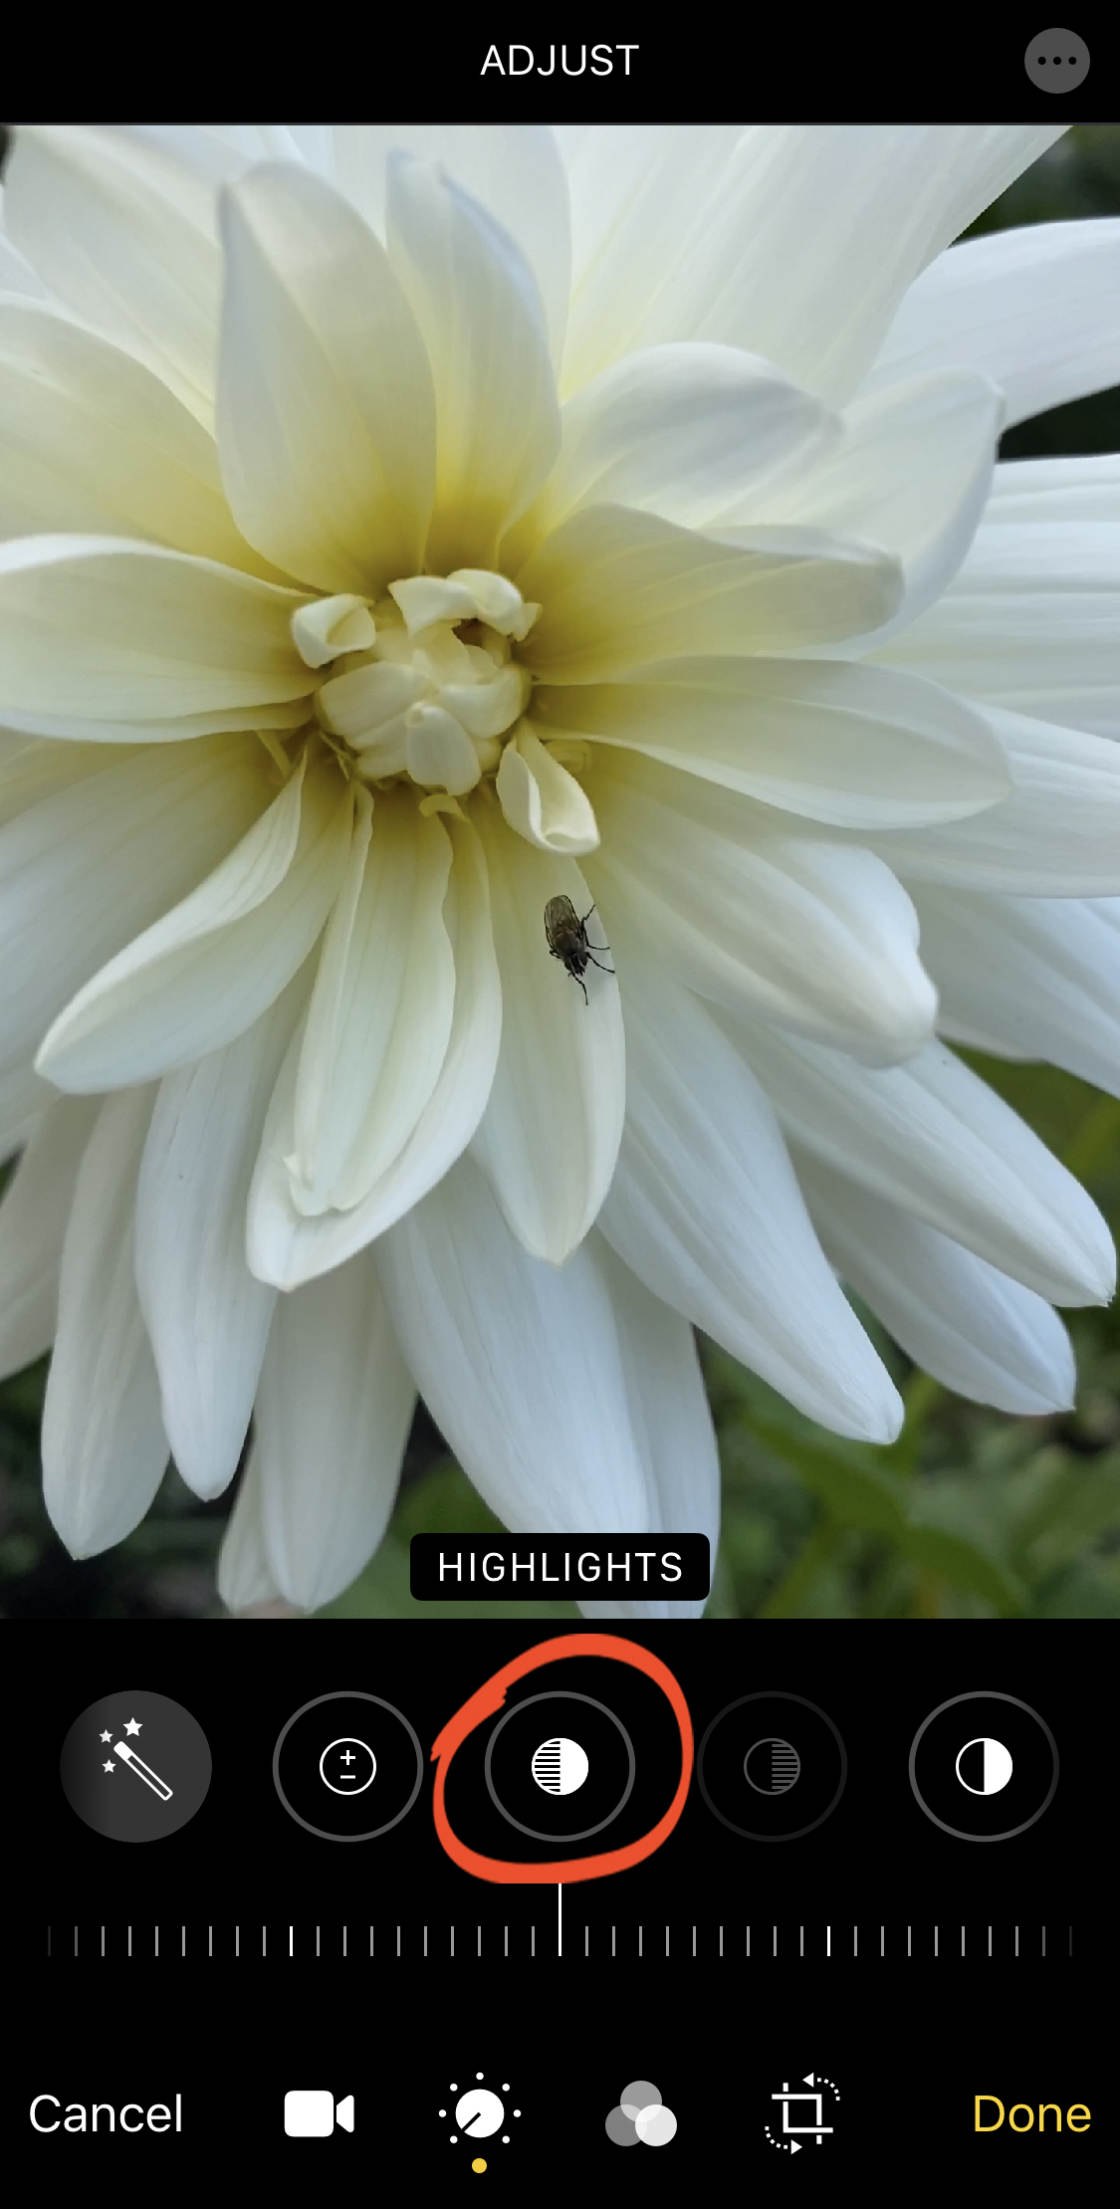
Drag the slider right to clear the highlights, or left to darken them.
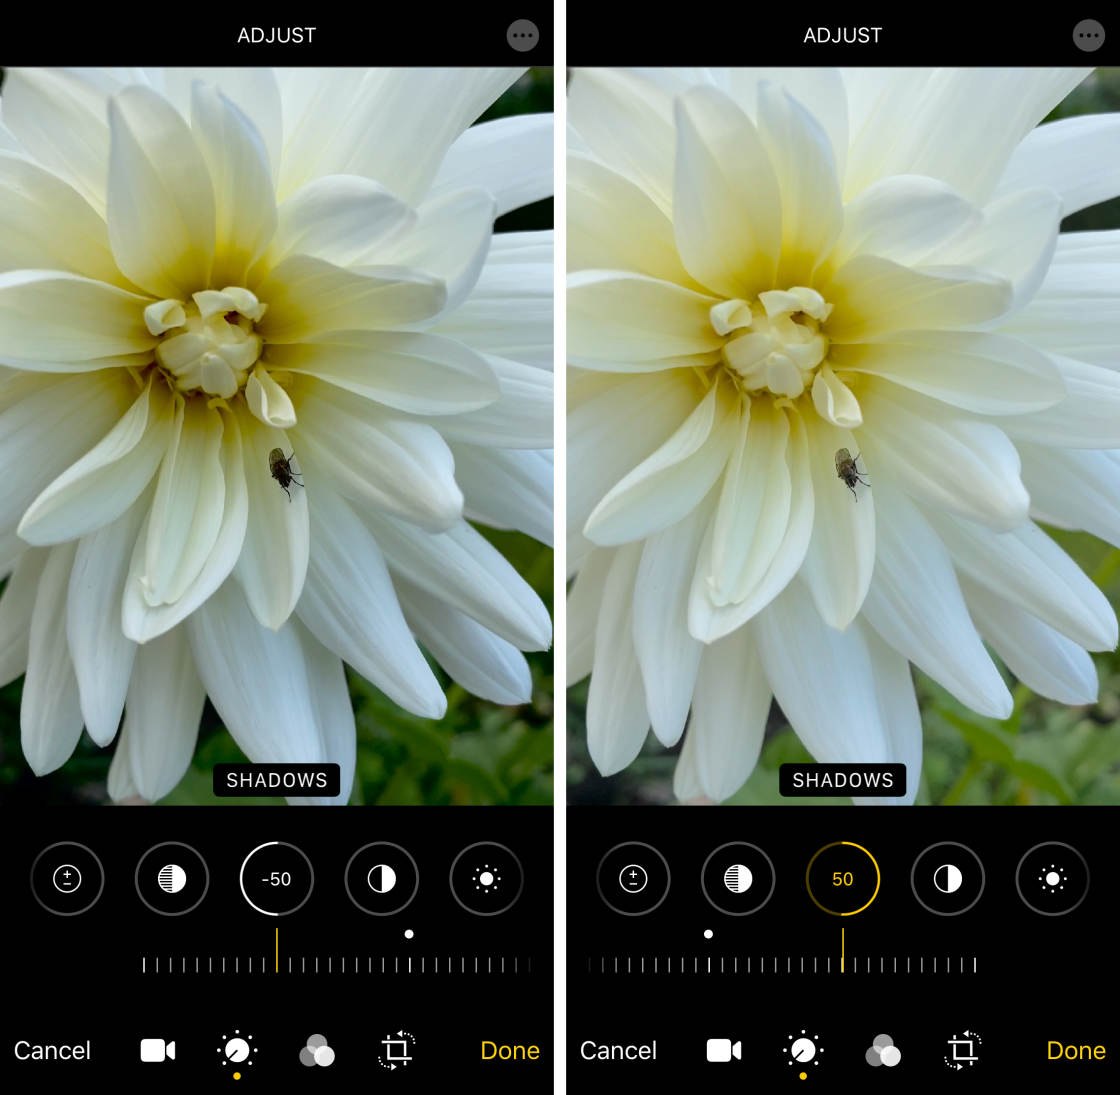
6.4 Shadows
The Shadows creature adjusts the light of the dark areas in your video.
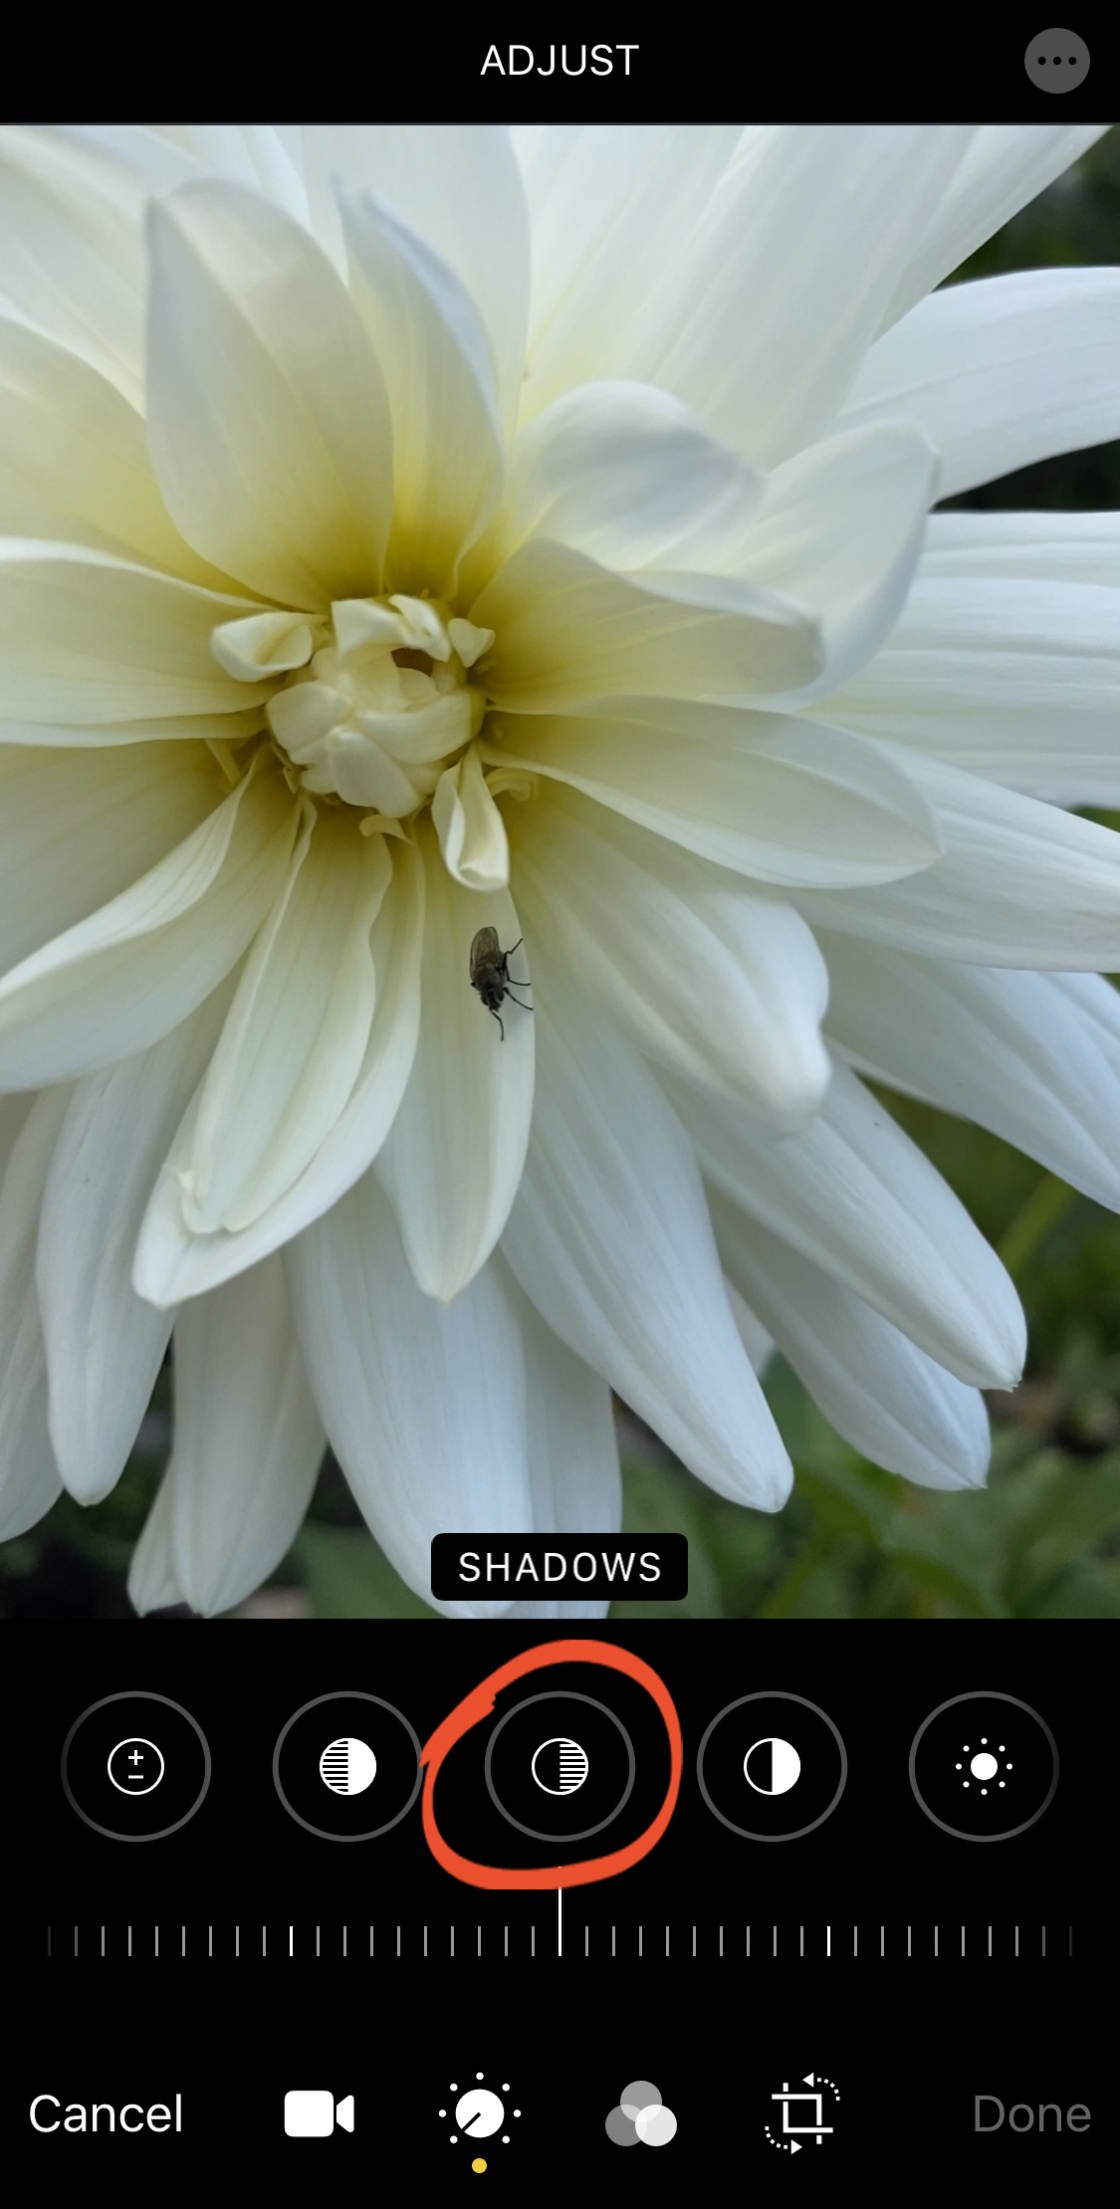
Drag the slider left to darken the shadows, or right to lighten them.
6.5 Direct contrast
TheContrast tool adjusts the contrast between the glorious and non-white tones in your video.
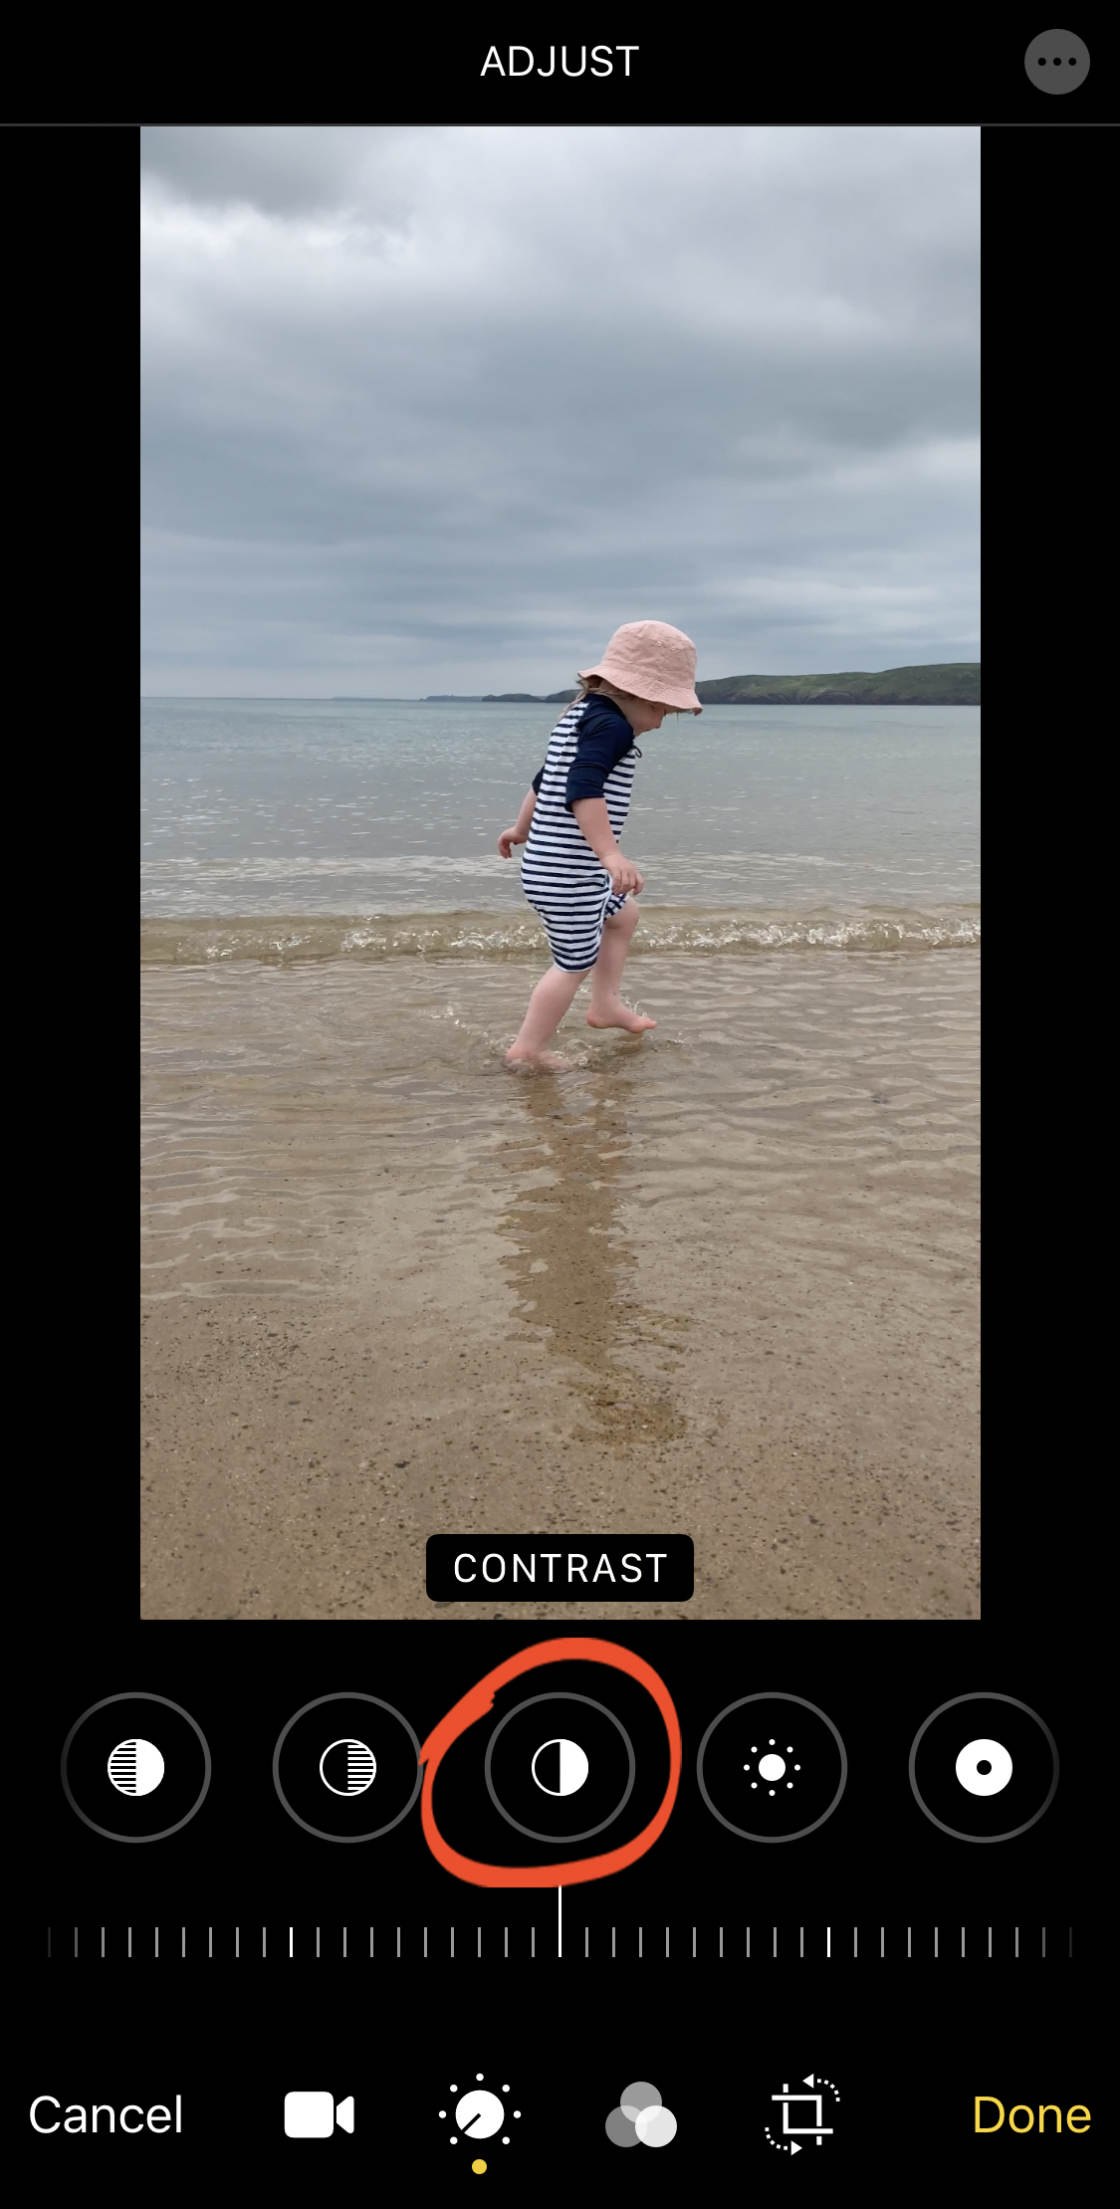
Increasing contrast makes the shadows darker and the highlights brighter. Reducing contrast makes the shadows brighter and the highlights darker.
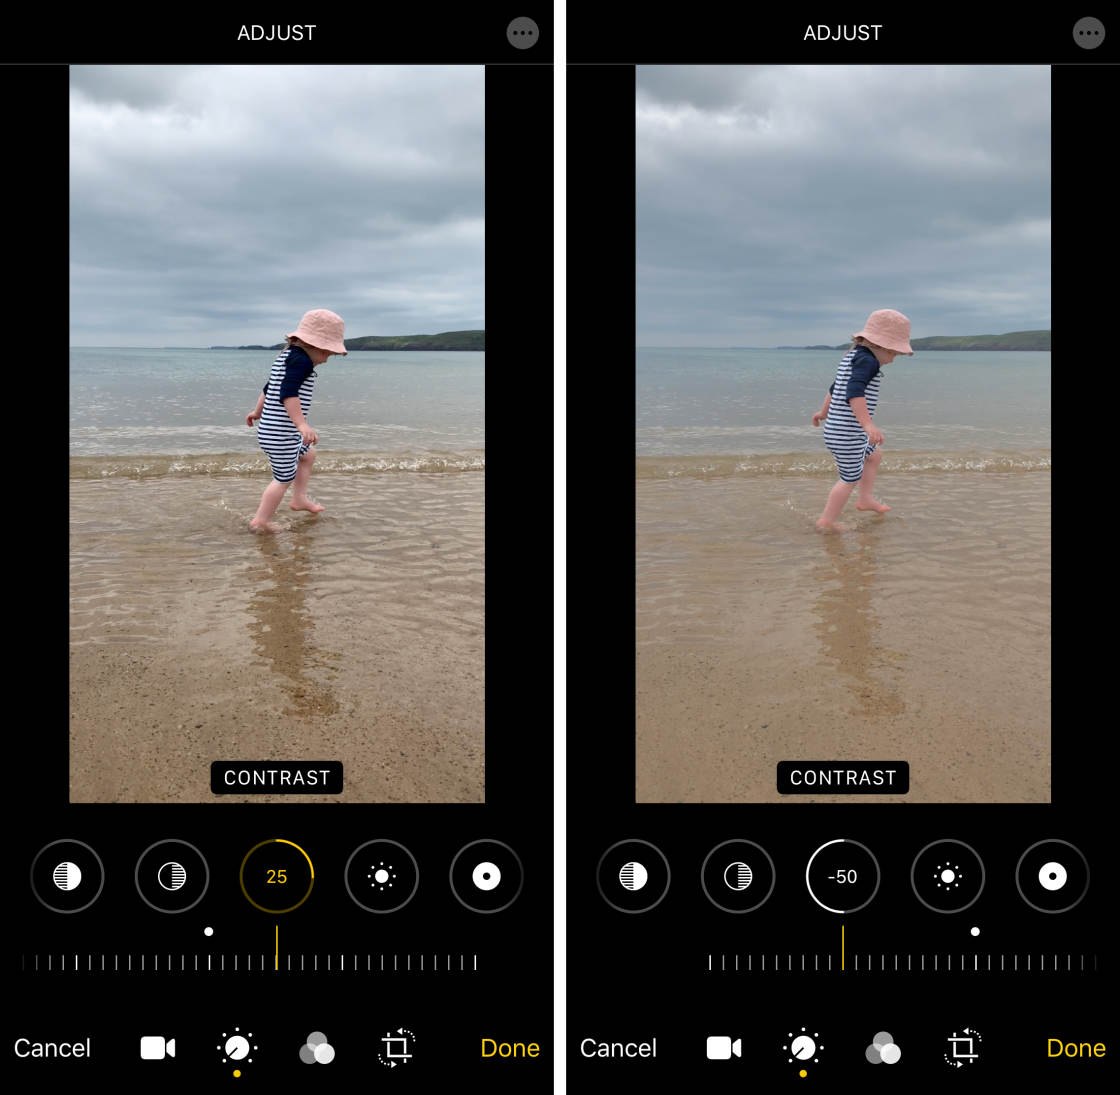
In general, lowering the contrast doesn't feel thoroughly. Increasing the contrast a little fleck can make the video look sharper.
6.6 Brightness
The Brightness level tool brightens surgery darkens the telecasting (but in a slightly different fashio from the Exposure tool).
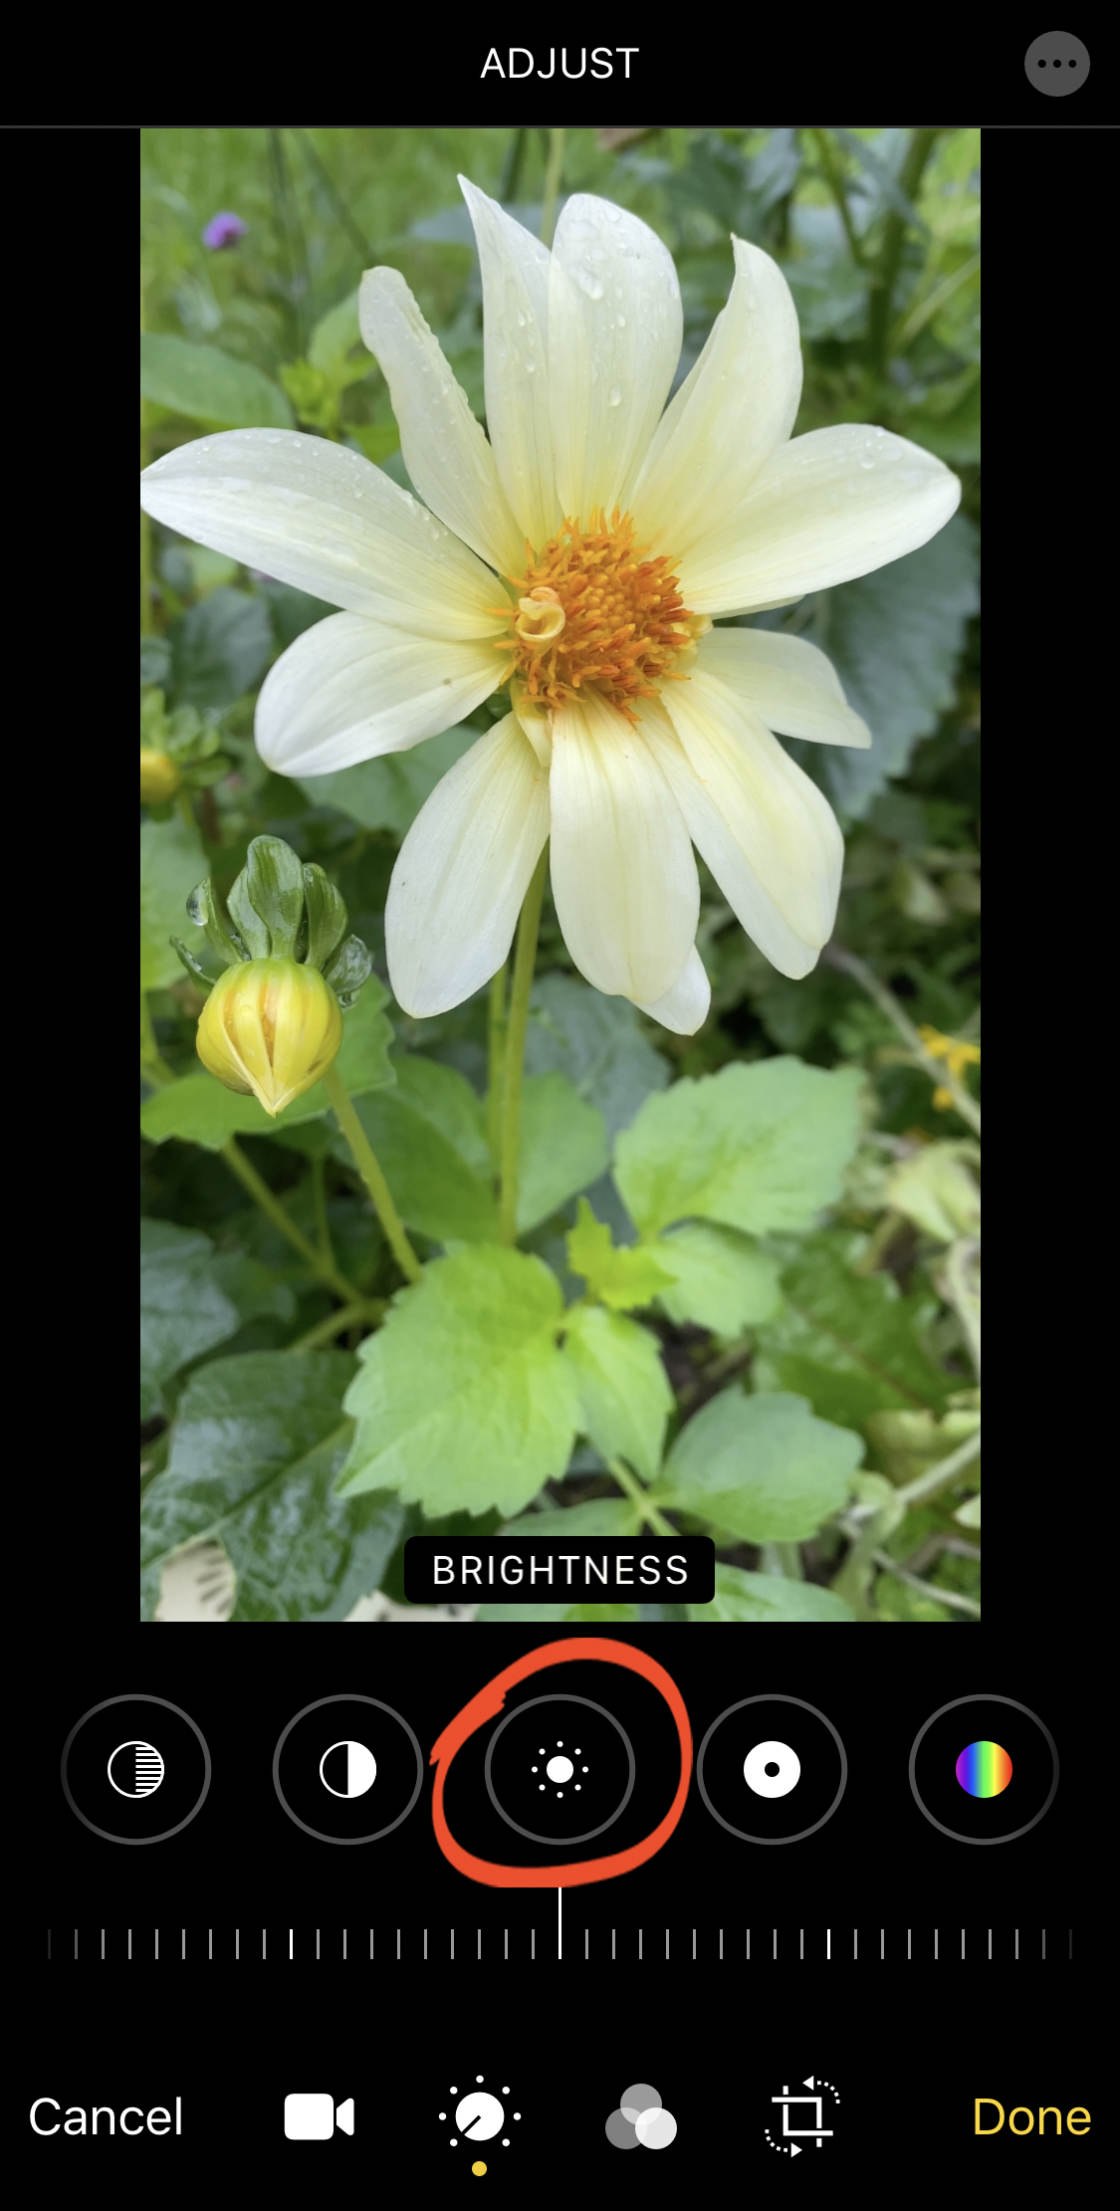
Puff the slider correctly to brighten the video, or left to darken IT.
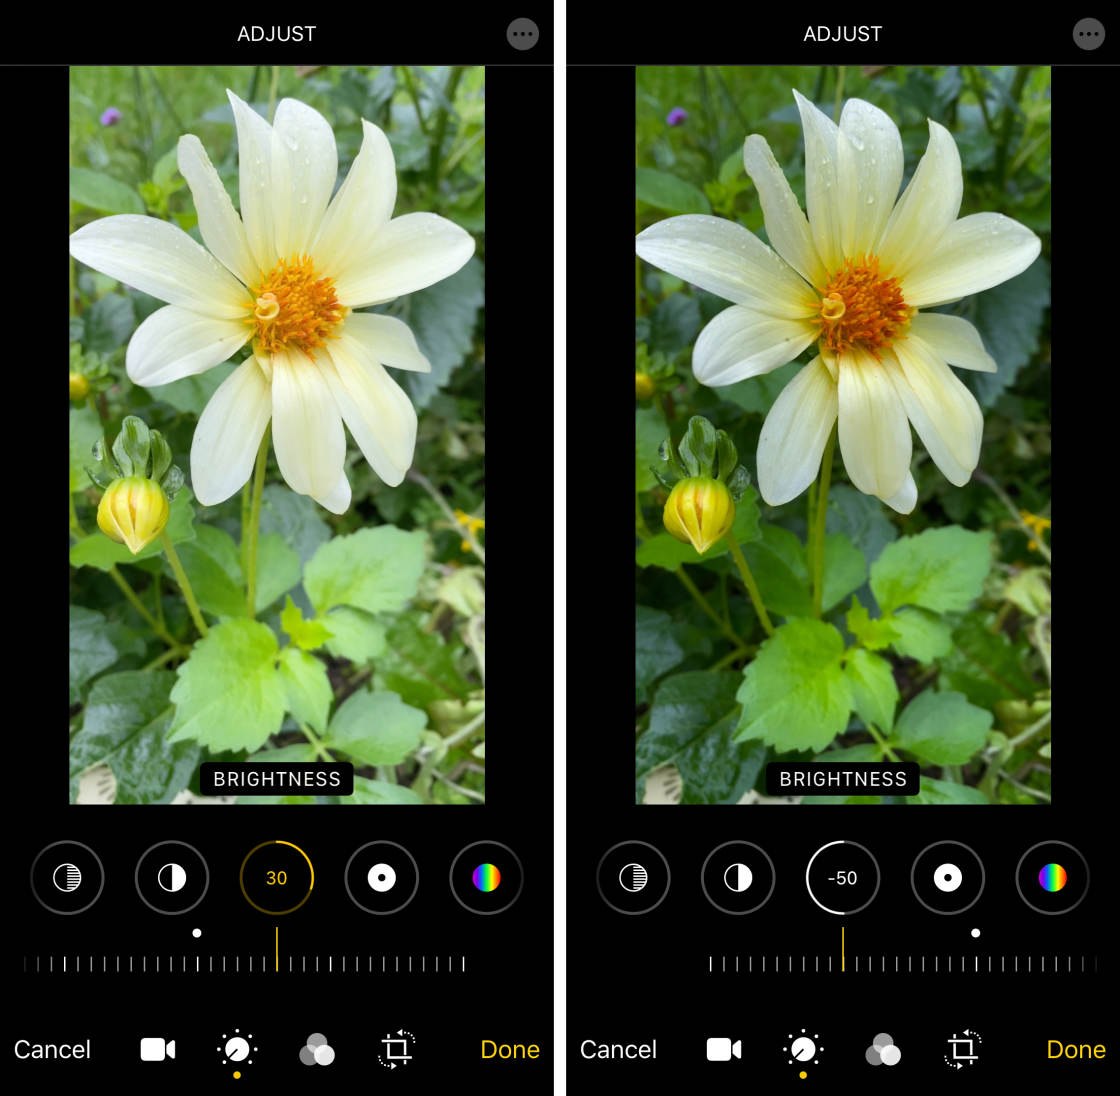
The Brightness tool around has a slightly heavier bias towards the shadows and midtones. So the uncomprehensible and medium tones are hokey more than the bright tones.
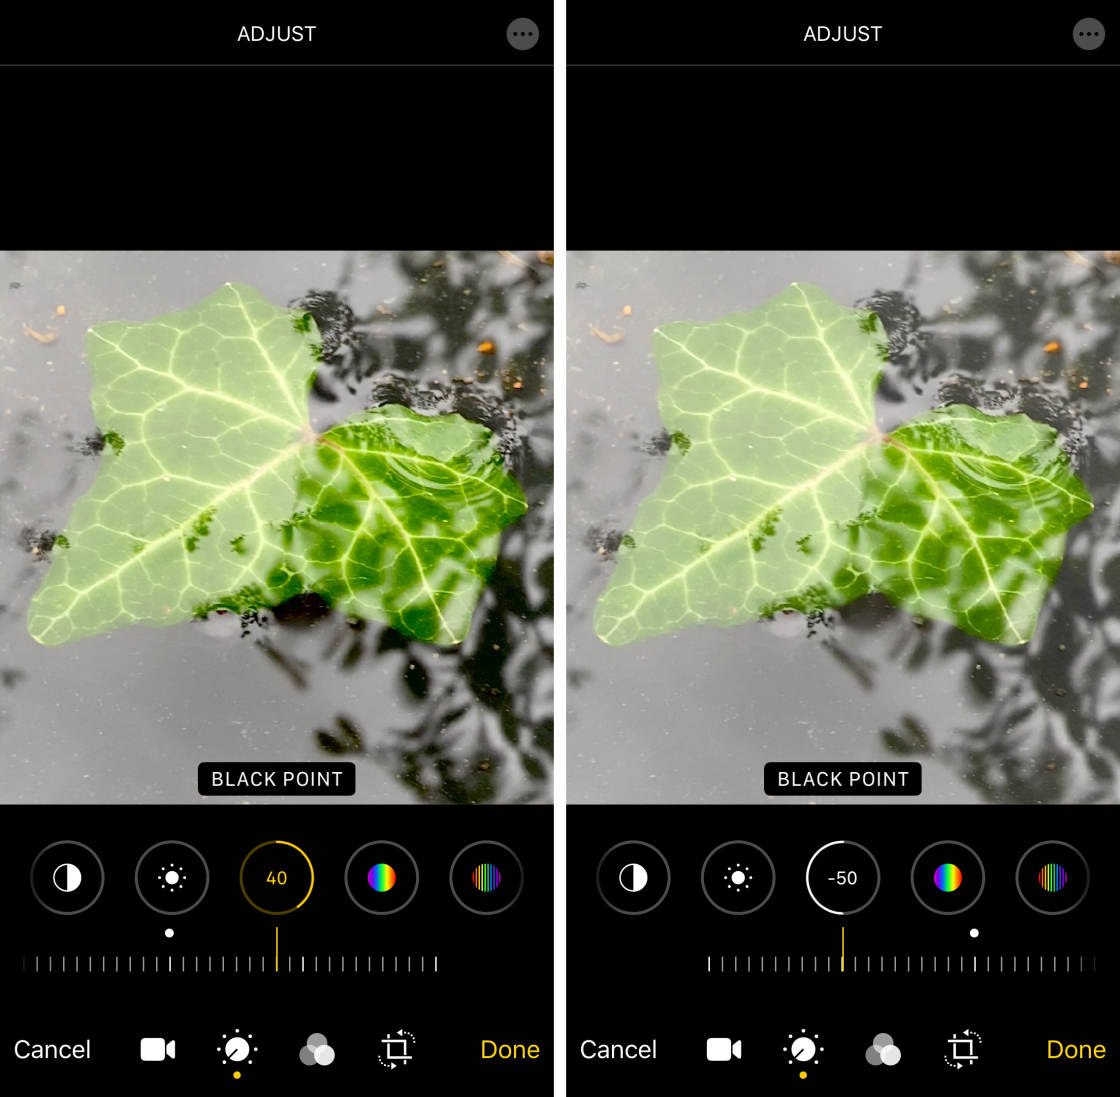
6.7 Black Point
TheBlack Point tool affects the cleverness of only the darkest tones in your video.
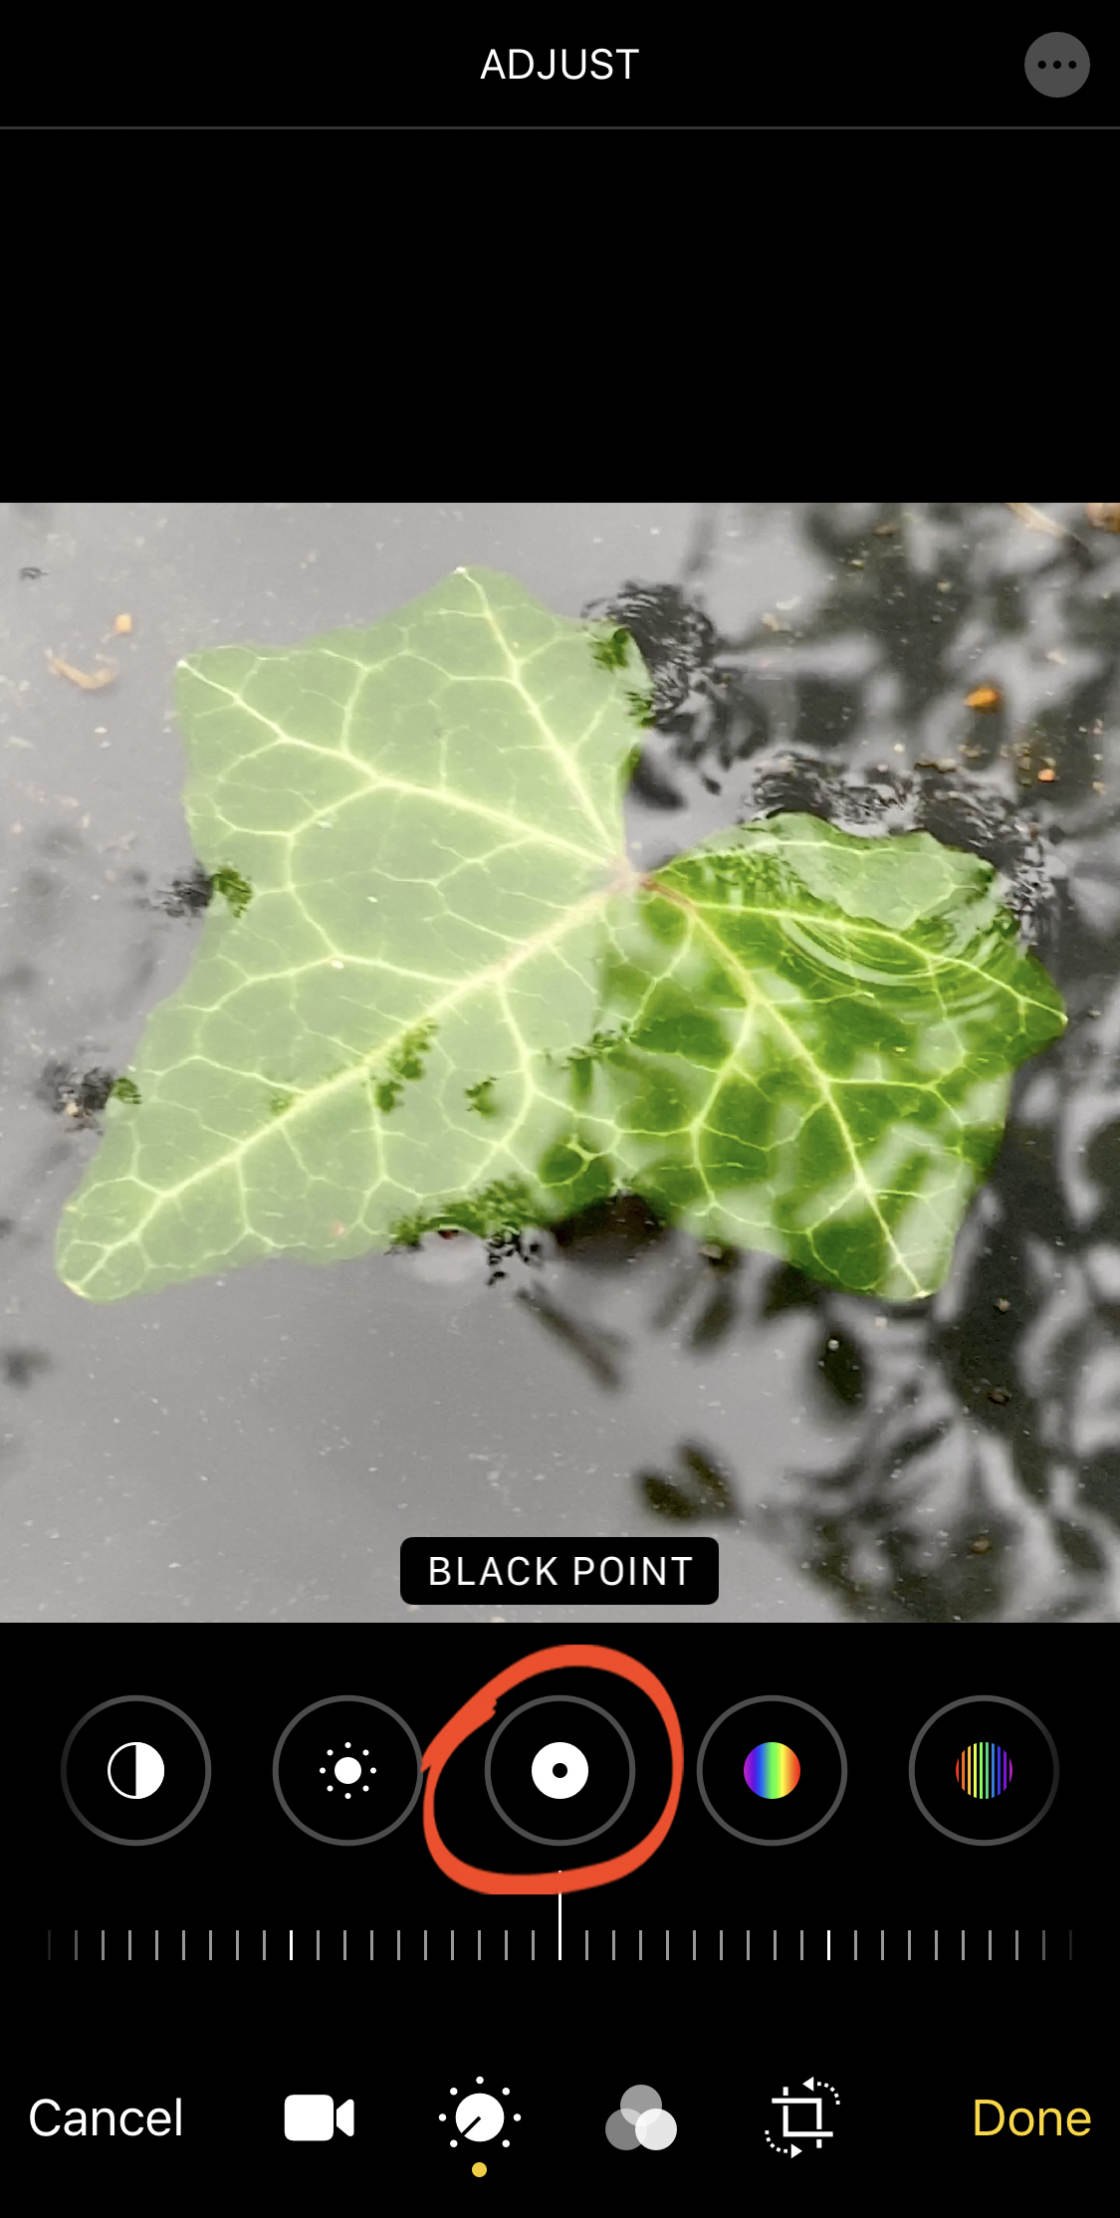
If your video lacks deep blacks, sweep up the slider to the exact to make the darkest areas come out black. Dragging to the left can brand the colors in your video look faded.
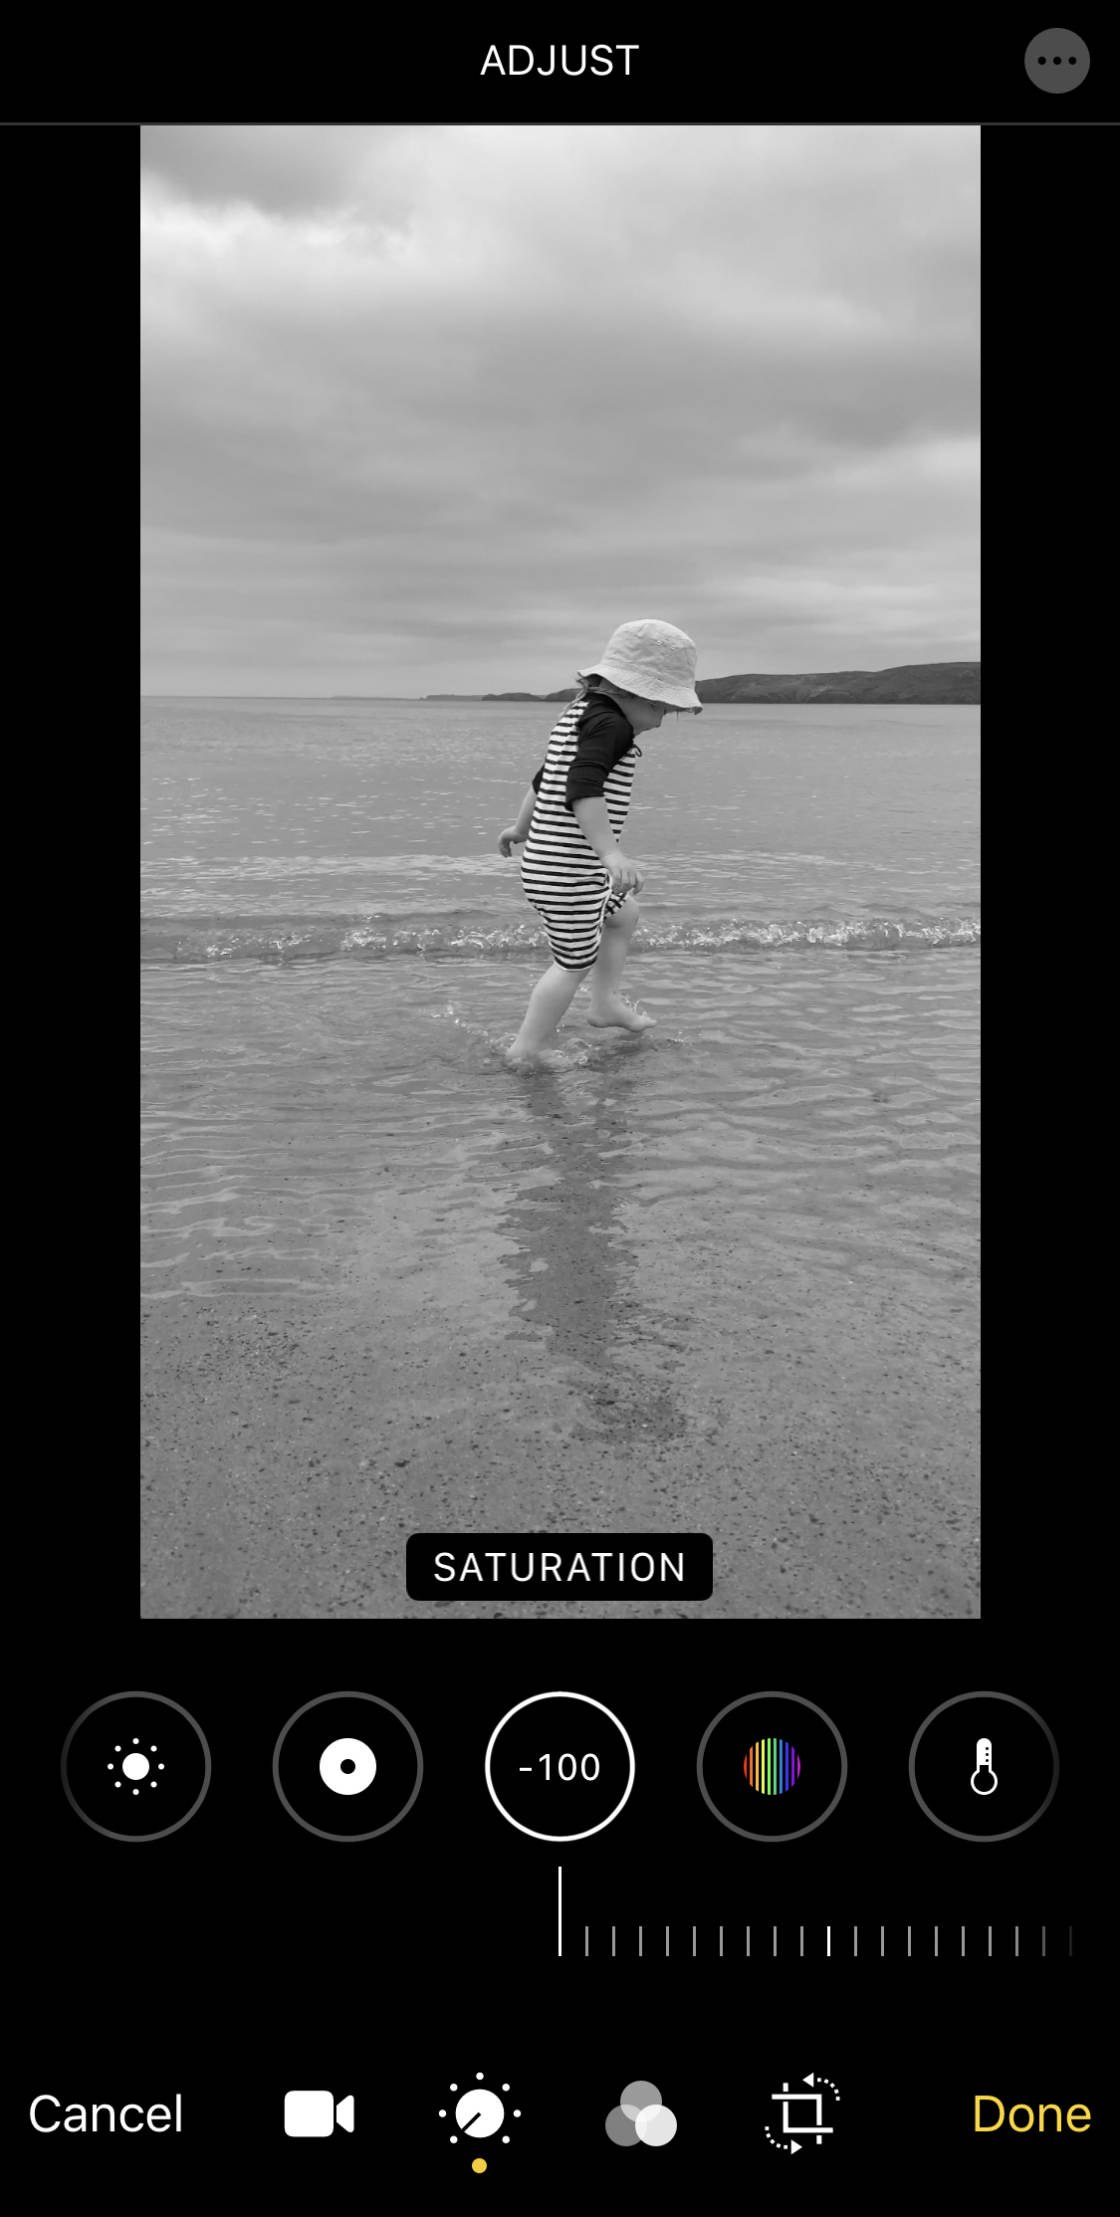
6.8 Impregnation
TheSaturation tool makes the colors in your video roughly vibrant.
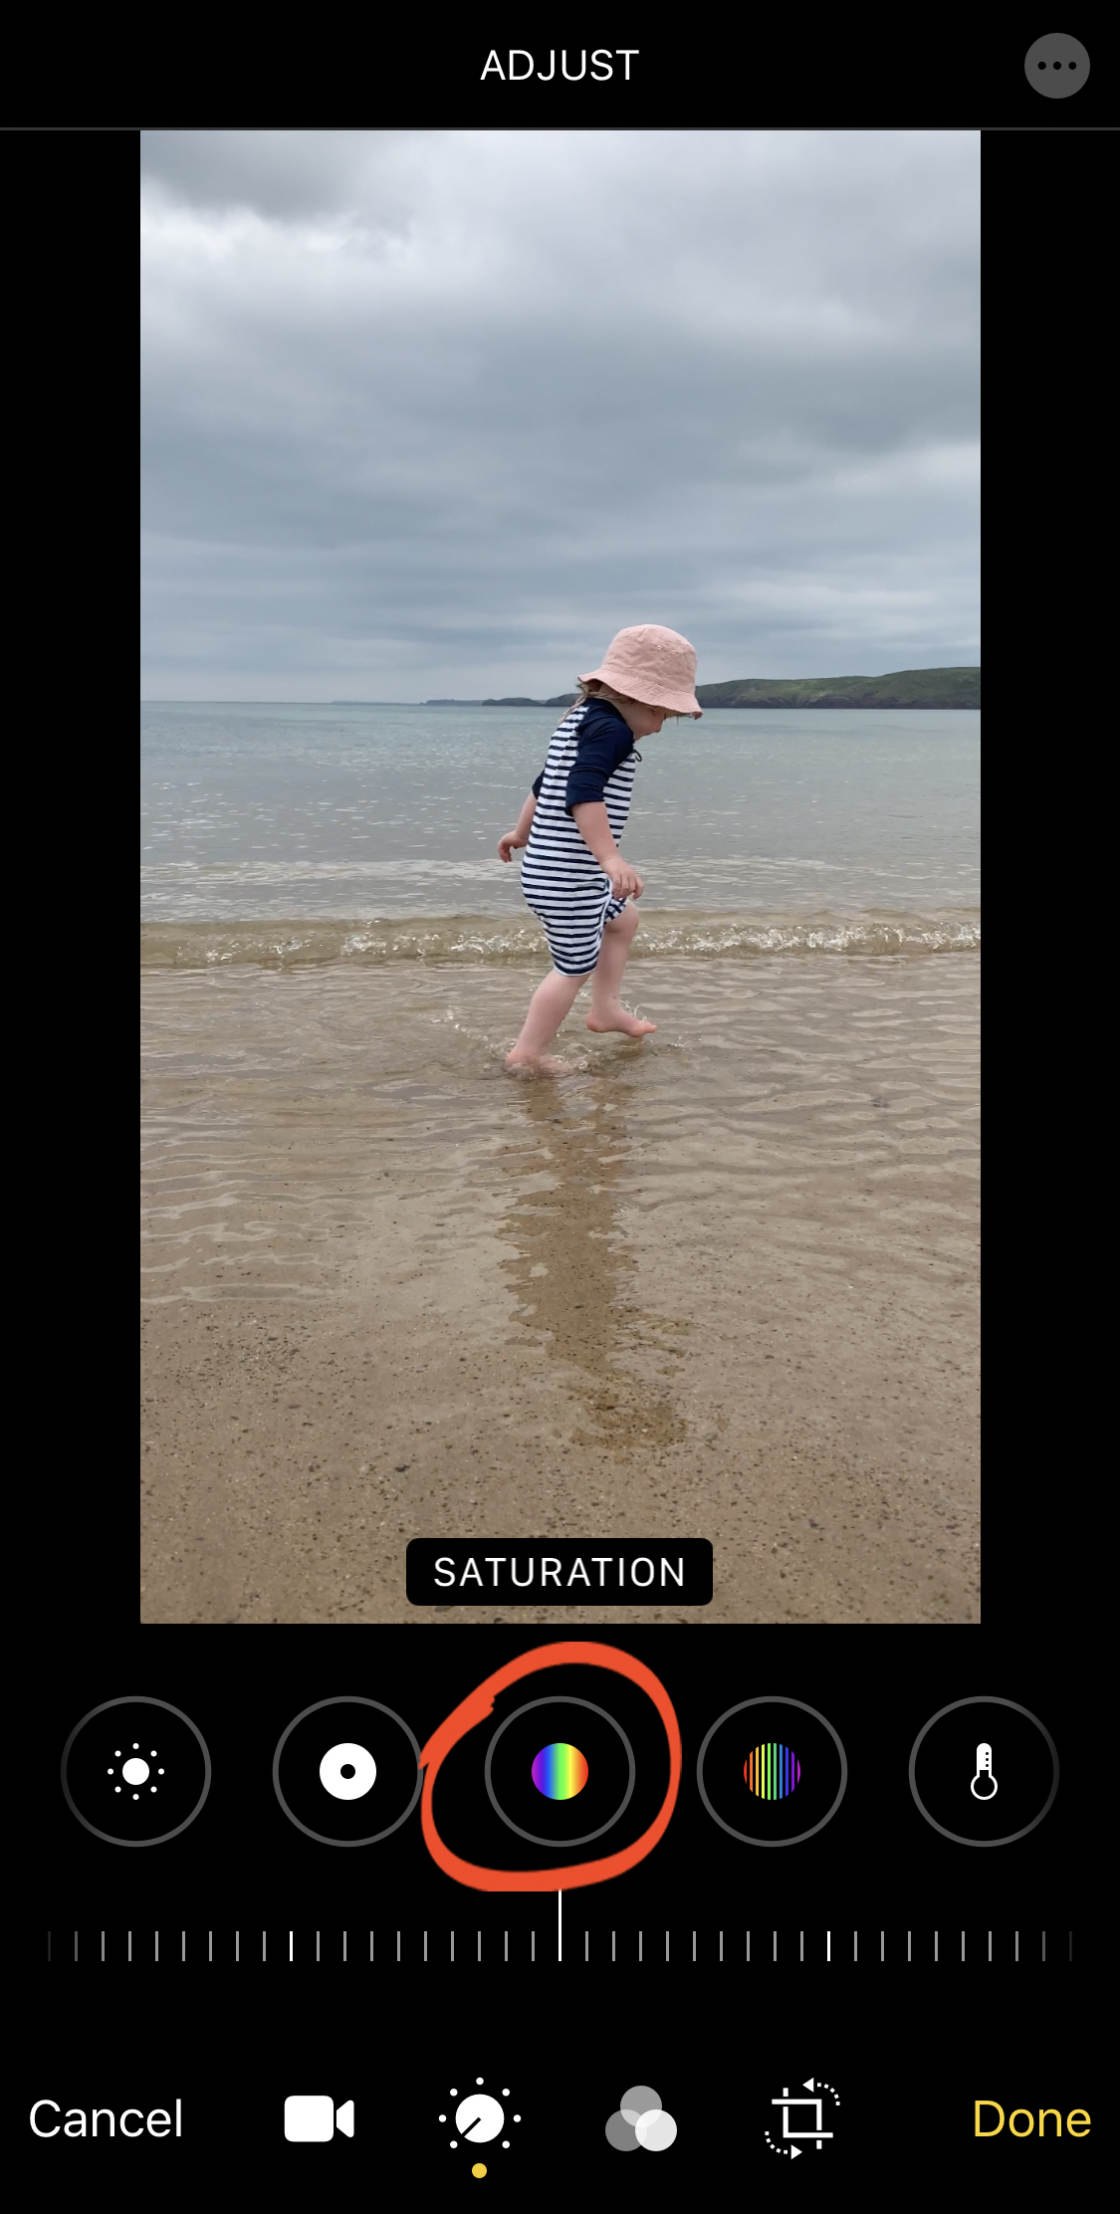
Drag the slipper right to make the colors more vibrant, or left to make them more subdued.
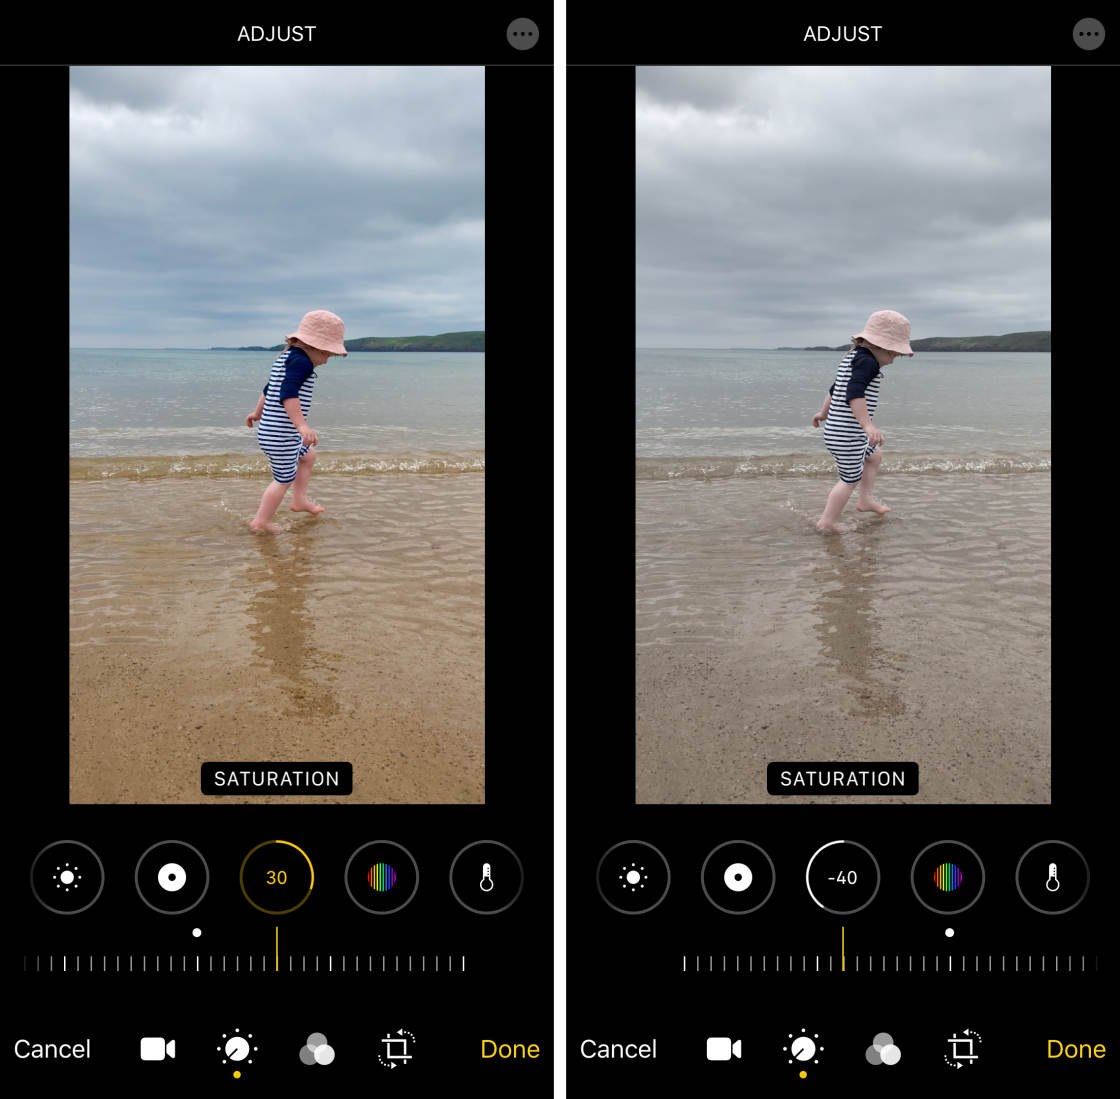
Be conscientious non to over-impregnate the colors as they'll look unnatural if they're too vibrant.
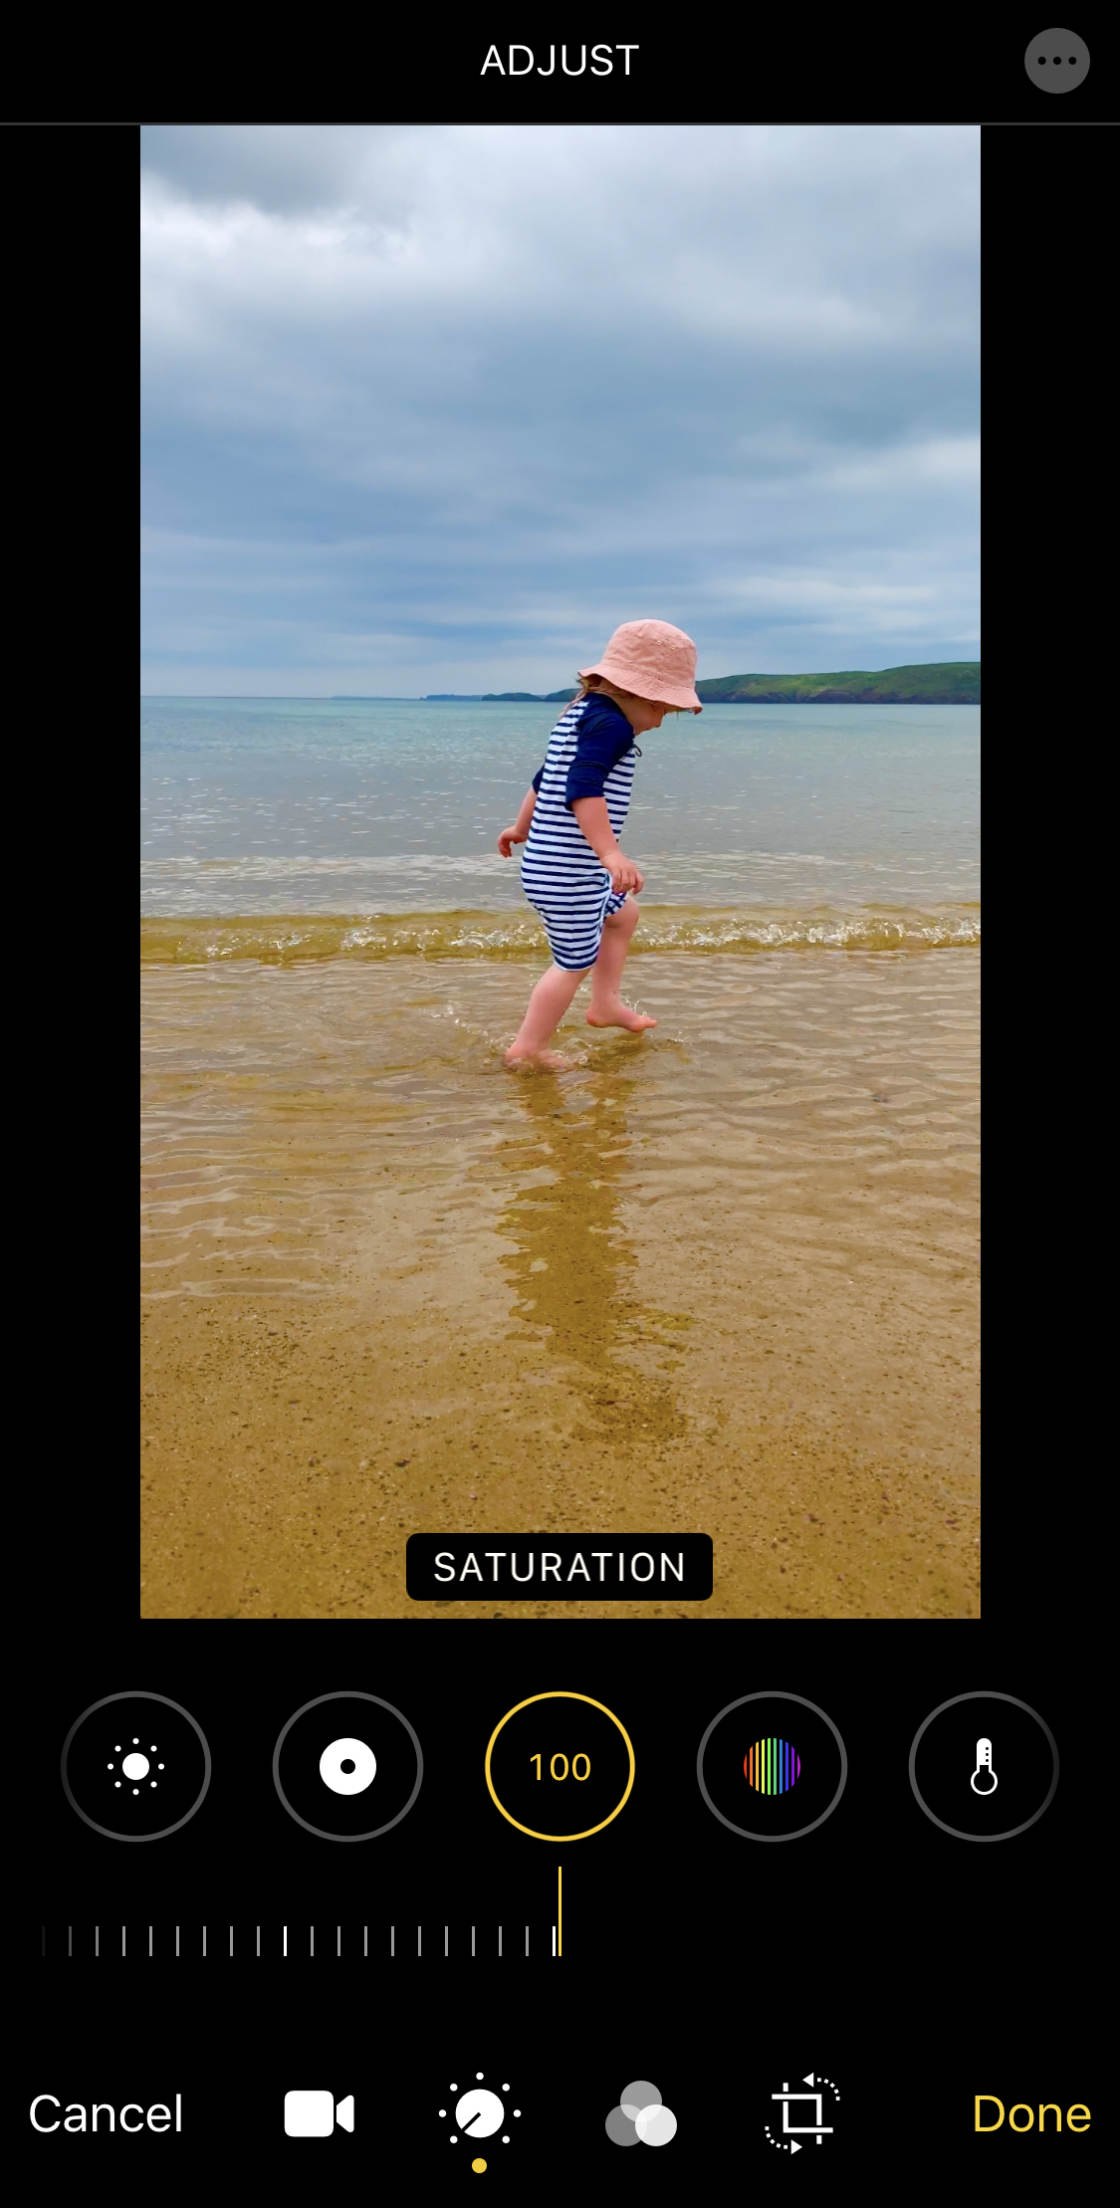
Setting theSaturation Pseudemys scripta to -100 volition remove all color, creating a black and covered television.
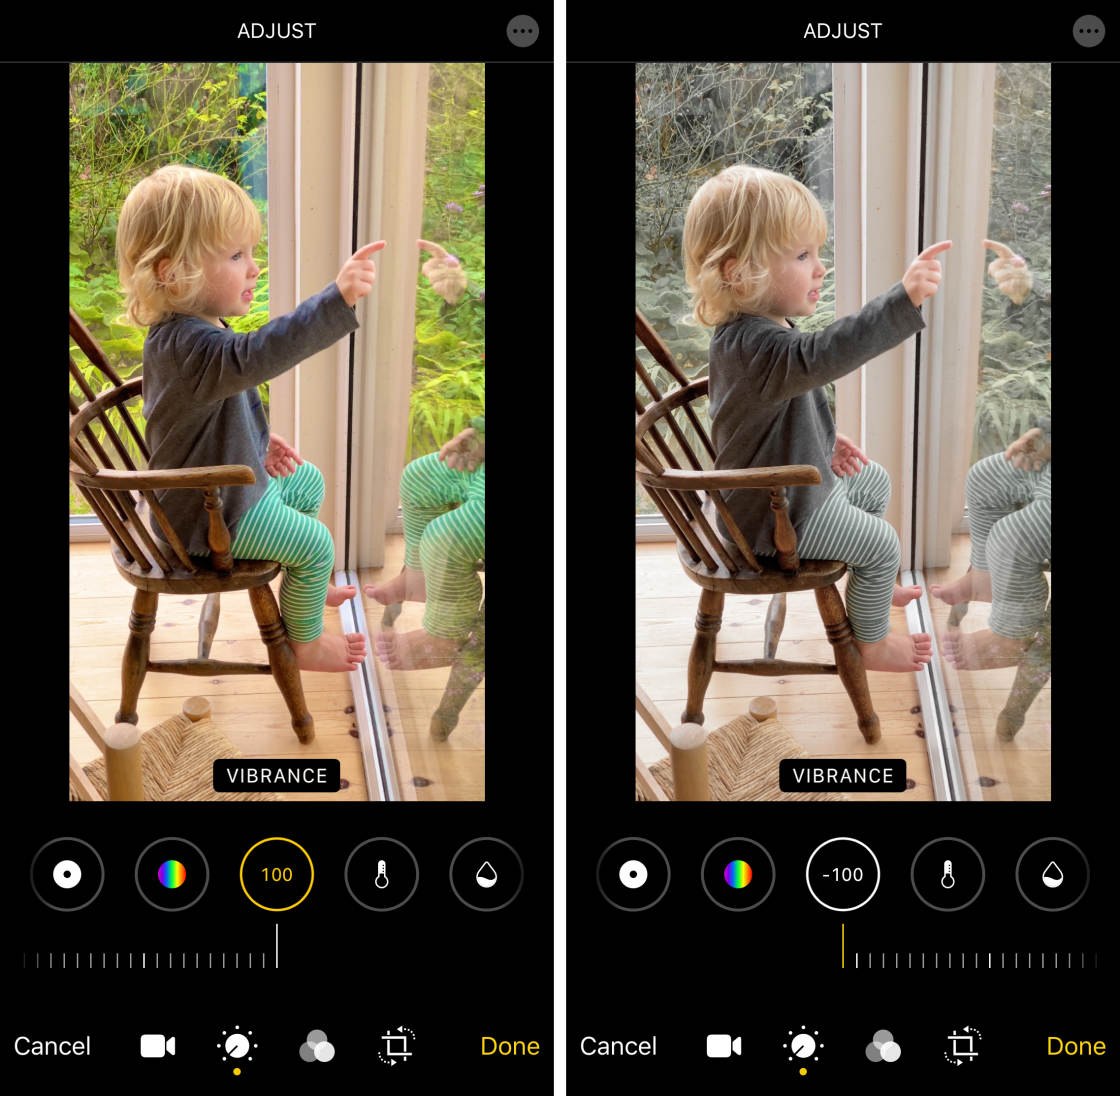
6.9 Vibrance
TheVibrance tool boosts muted colours to make them richer without touching skin tones and pure colors.
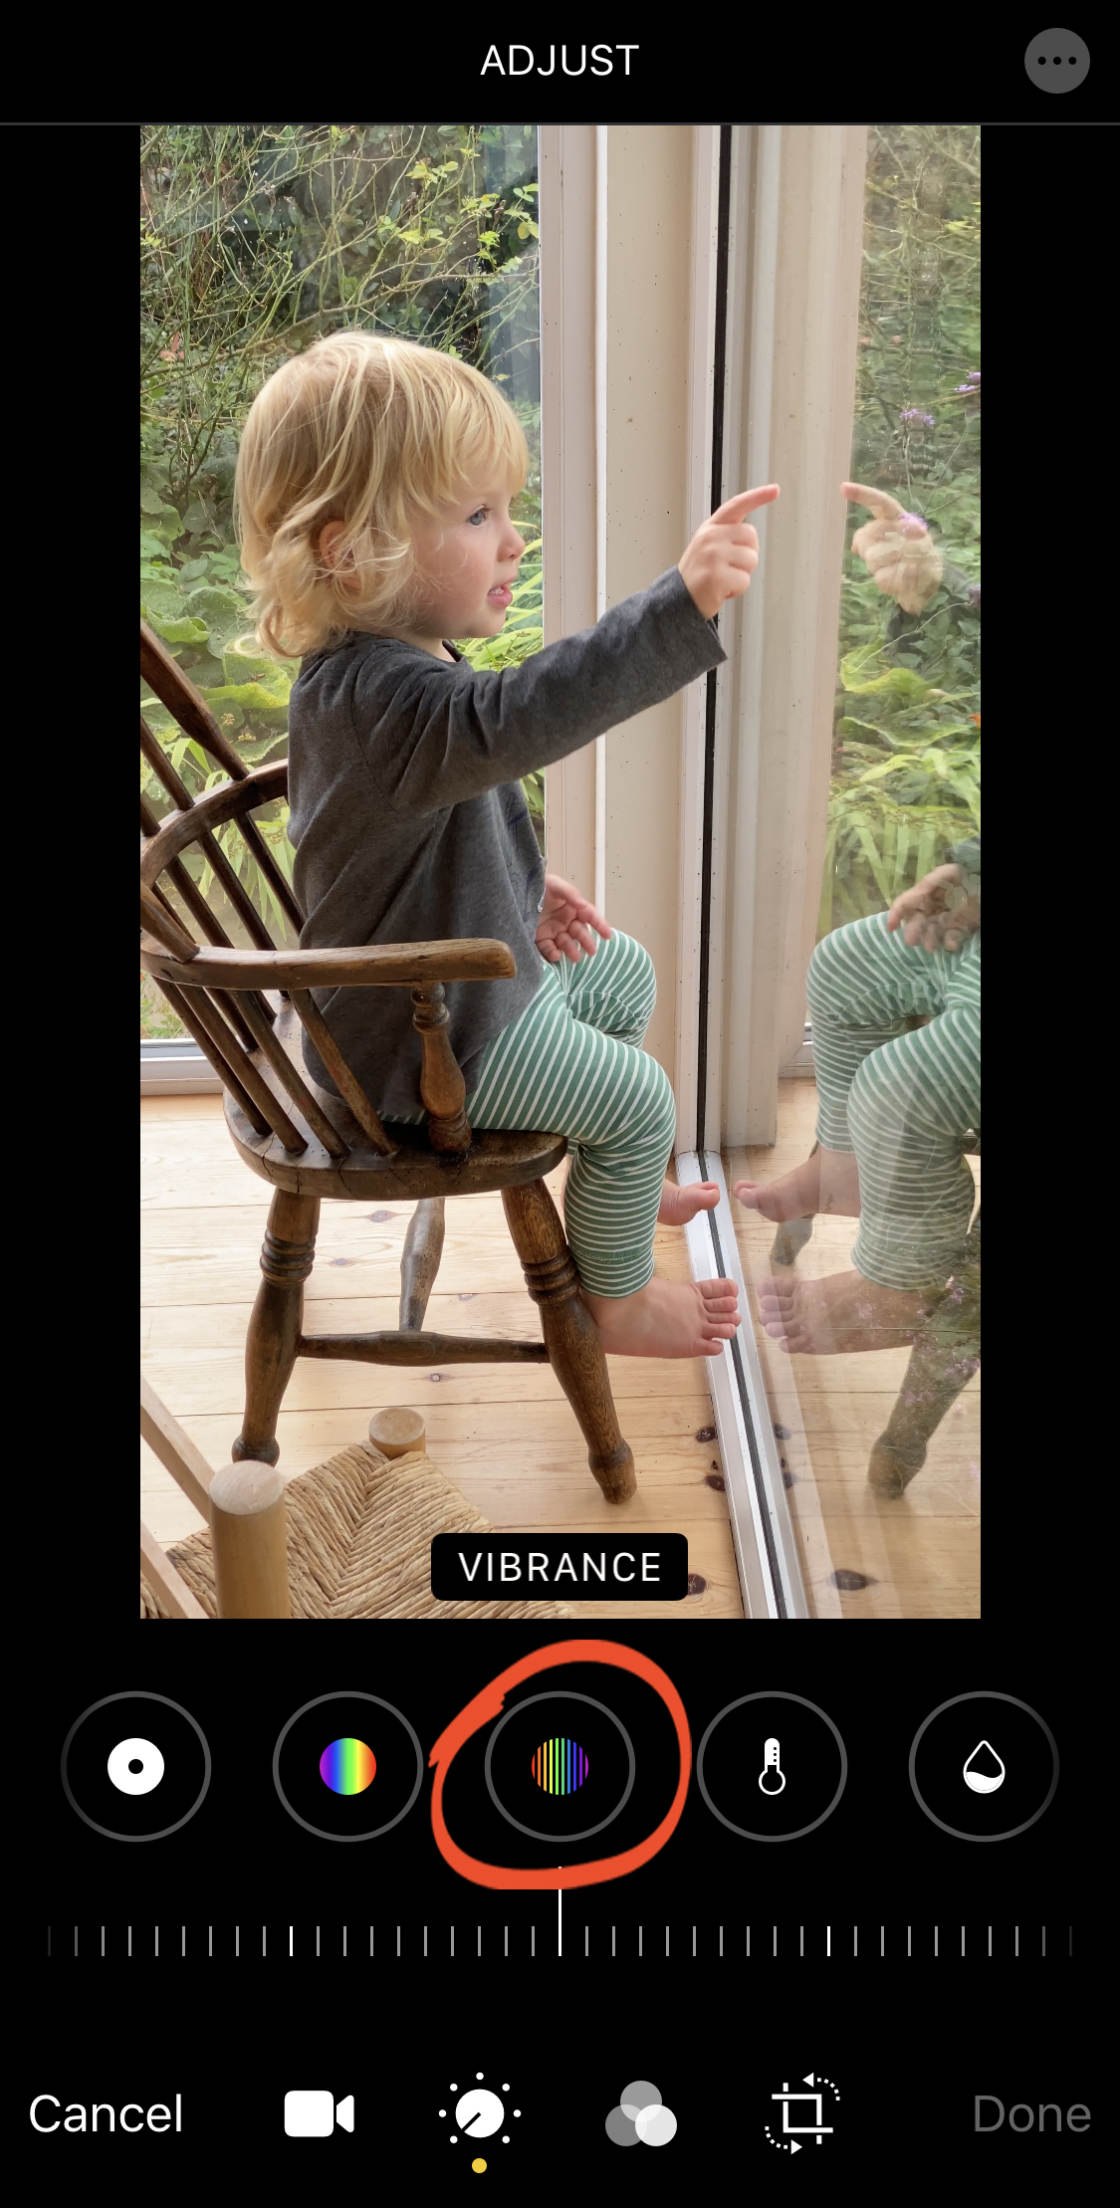
Drag the slider rightish to make muted colors more vibrant, or left to make them less ringing.
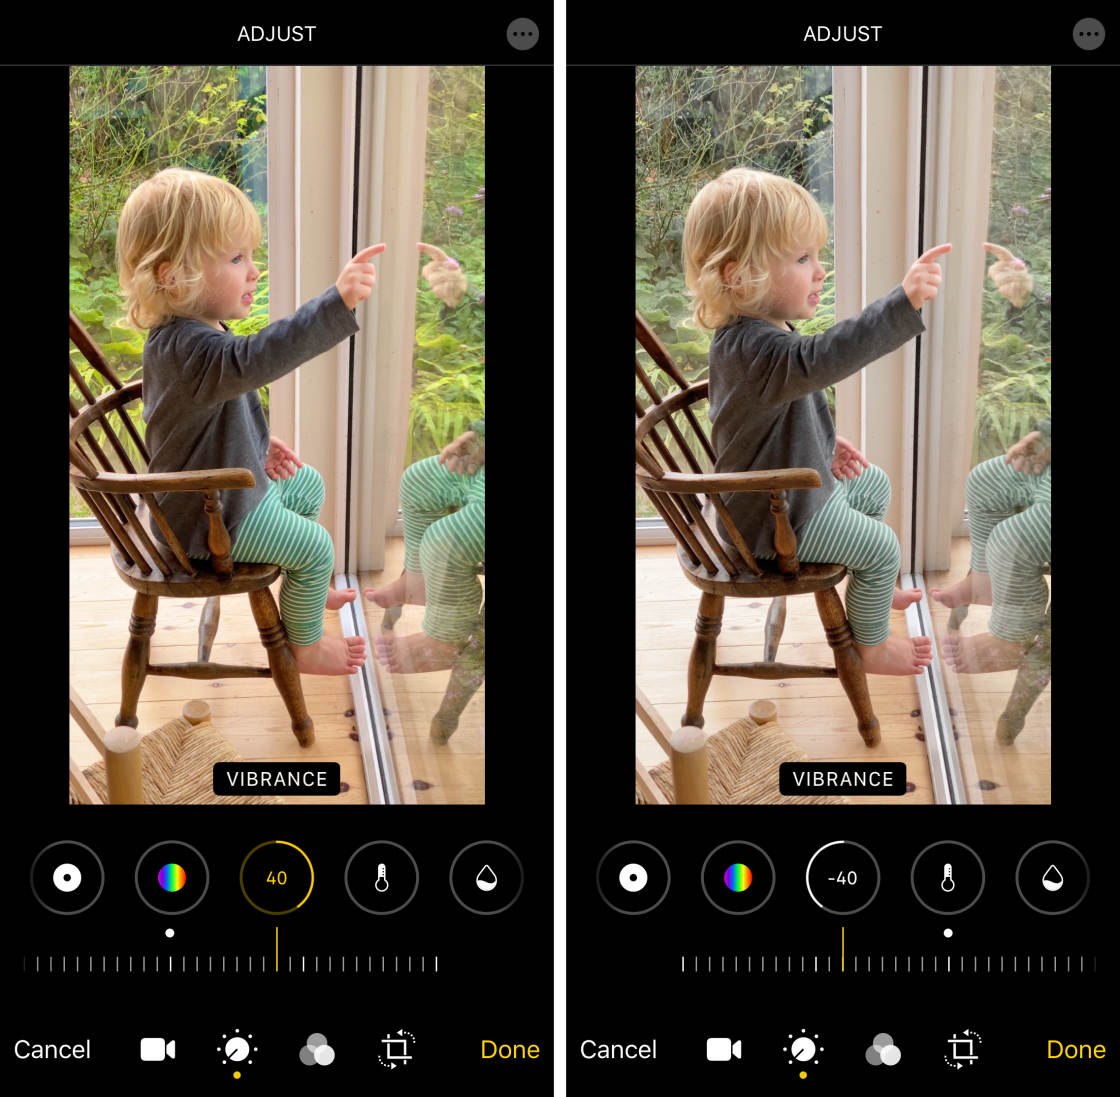
The Vibrance tool often results in more natural-looking colours than the Impregnation tool. This is because it doesn't over-saturate skin tones or colors that are already vibrant.
Even at the maximum Vibrance settings of 100 and -100, the skin tones still look natural.
6.10 Warmheartedness
TheLovingness tool makes the colours warmer (more orange) or ice chest (more blue).

Drag the slider justly to get the colours heater, or left wing to make them cooler.
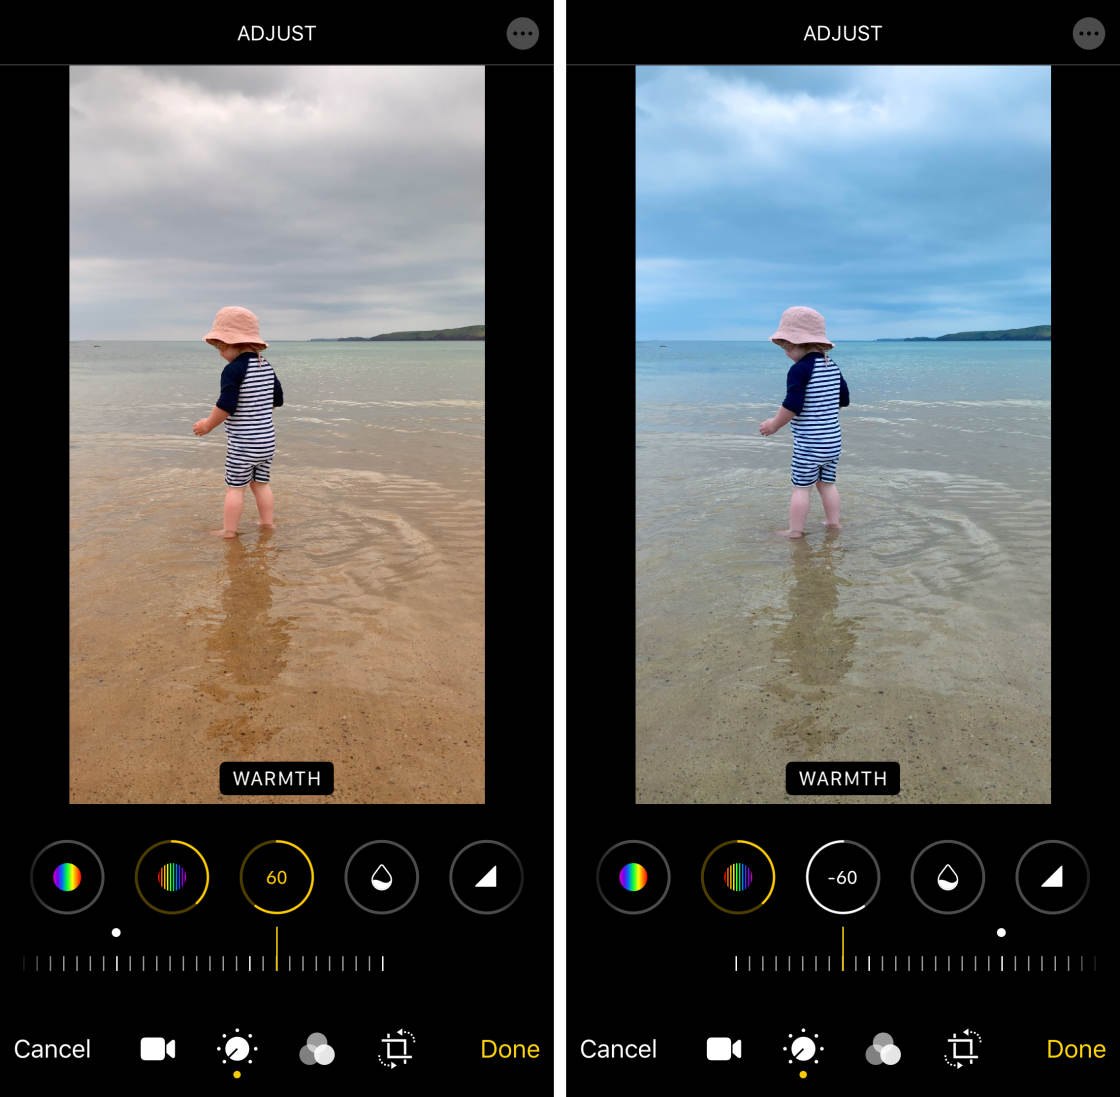
Adjusting the warmth allows you to correct the color balance or change the boilers suit modality of your telecasting.
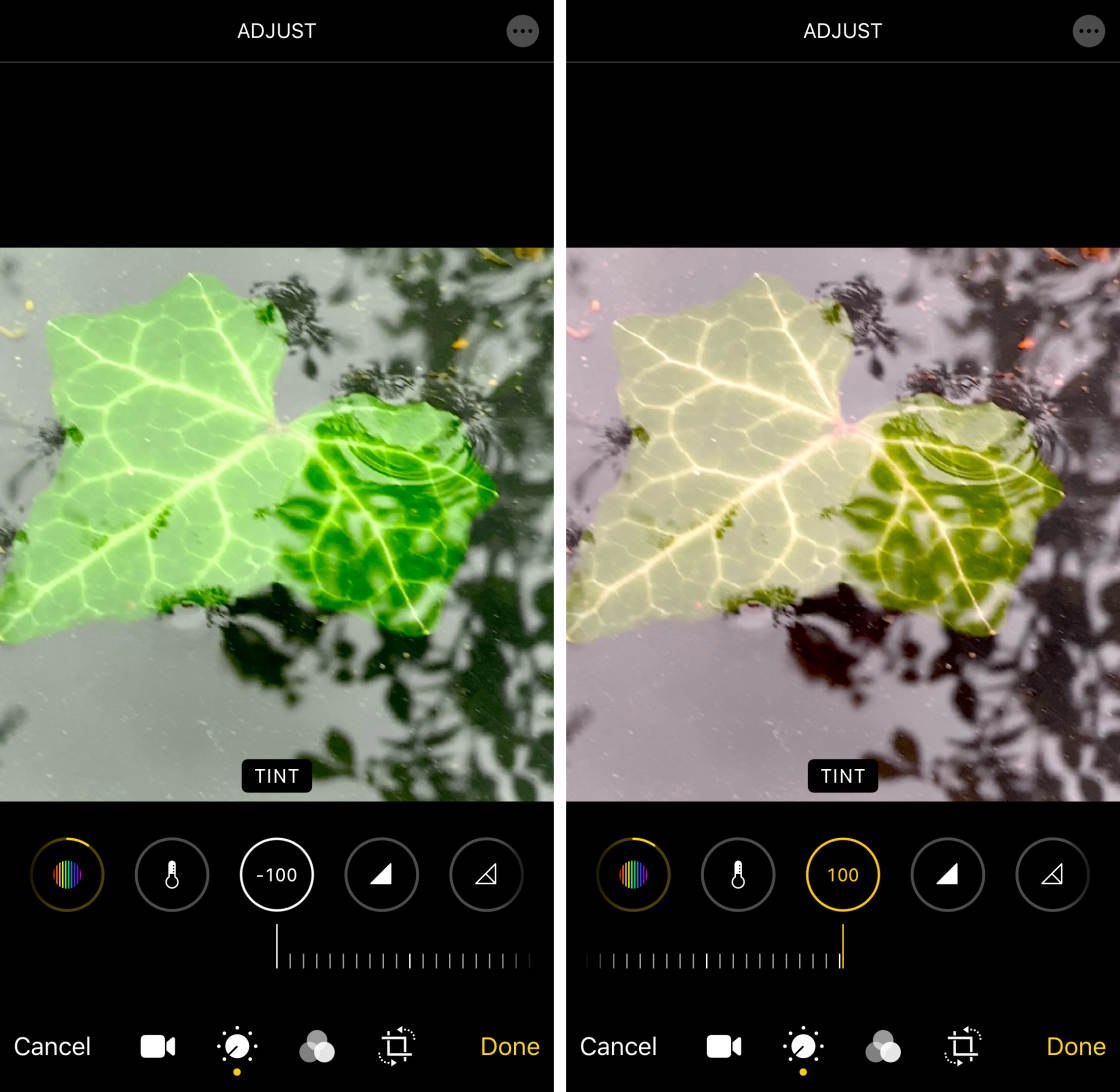
6.11 Tone
TheTint puppet adjusts the colorize remainder away adding more Green operating theater magenta.
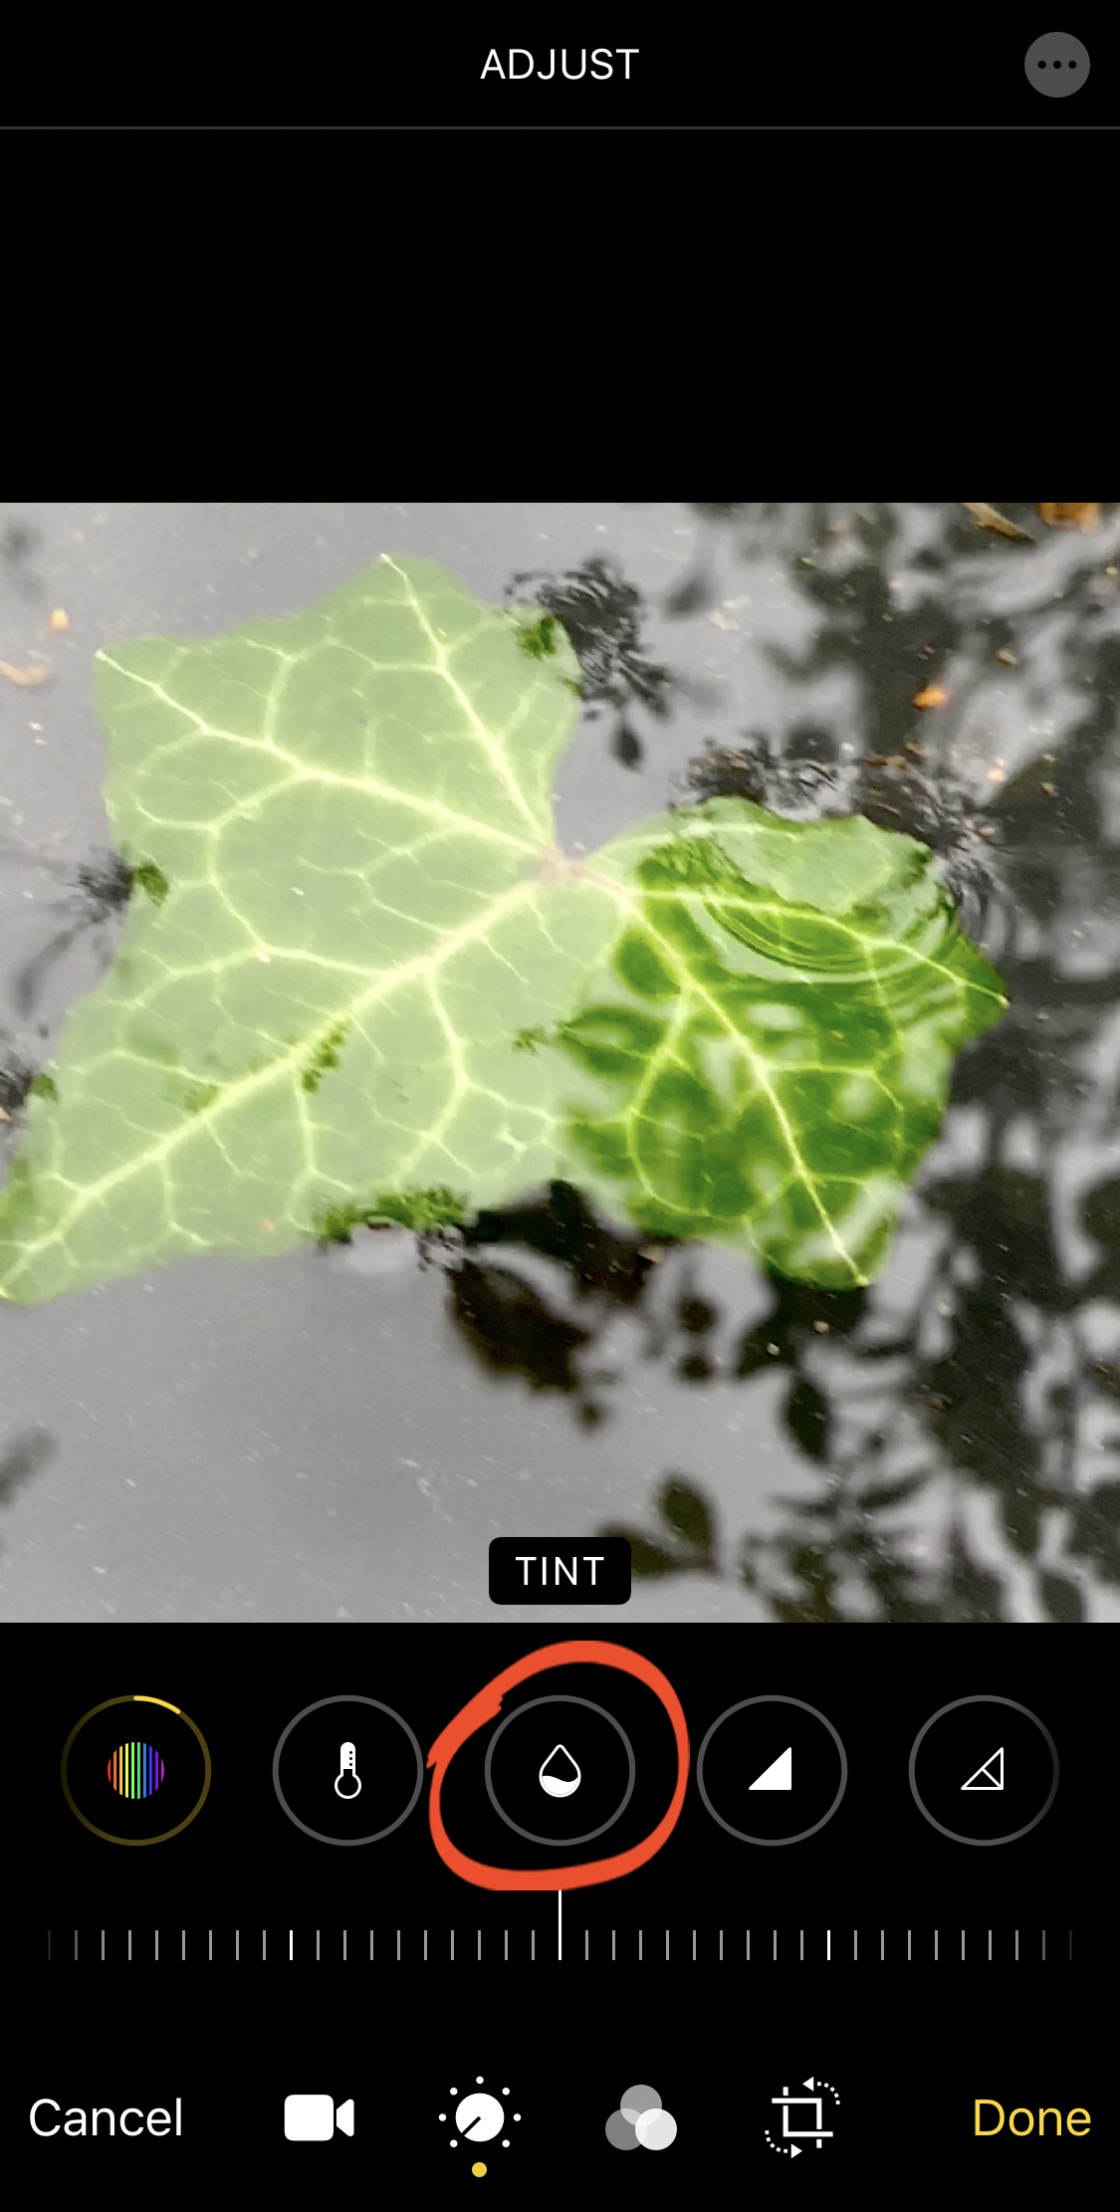
Drag the slider left to add a green shade, or right to add a magenta tinge.
6.12 Pungency
TheSharpness tool sharpens detail by making edges crisper and better delimited.
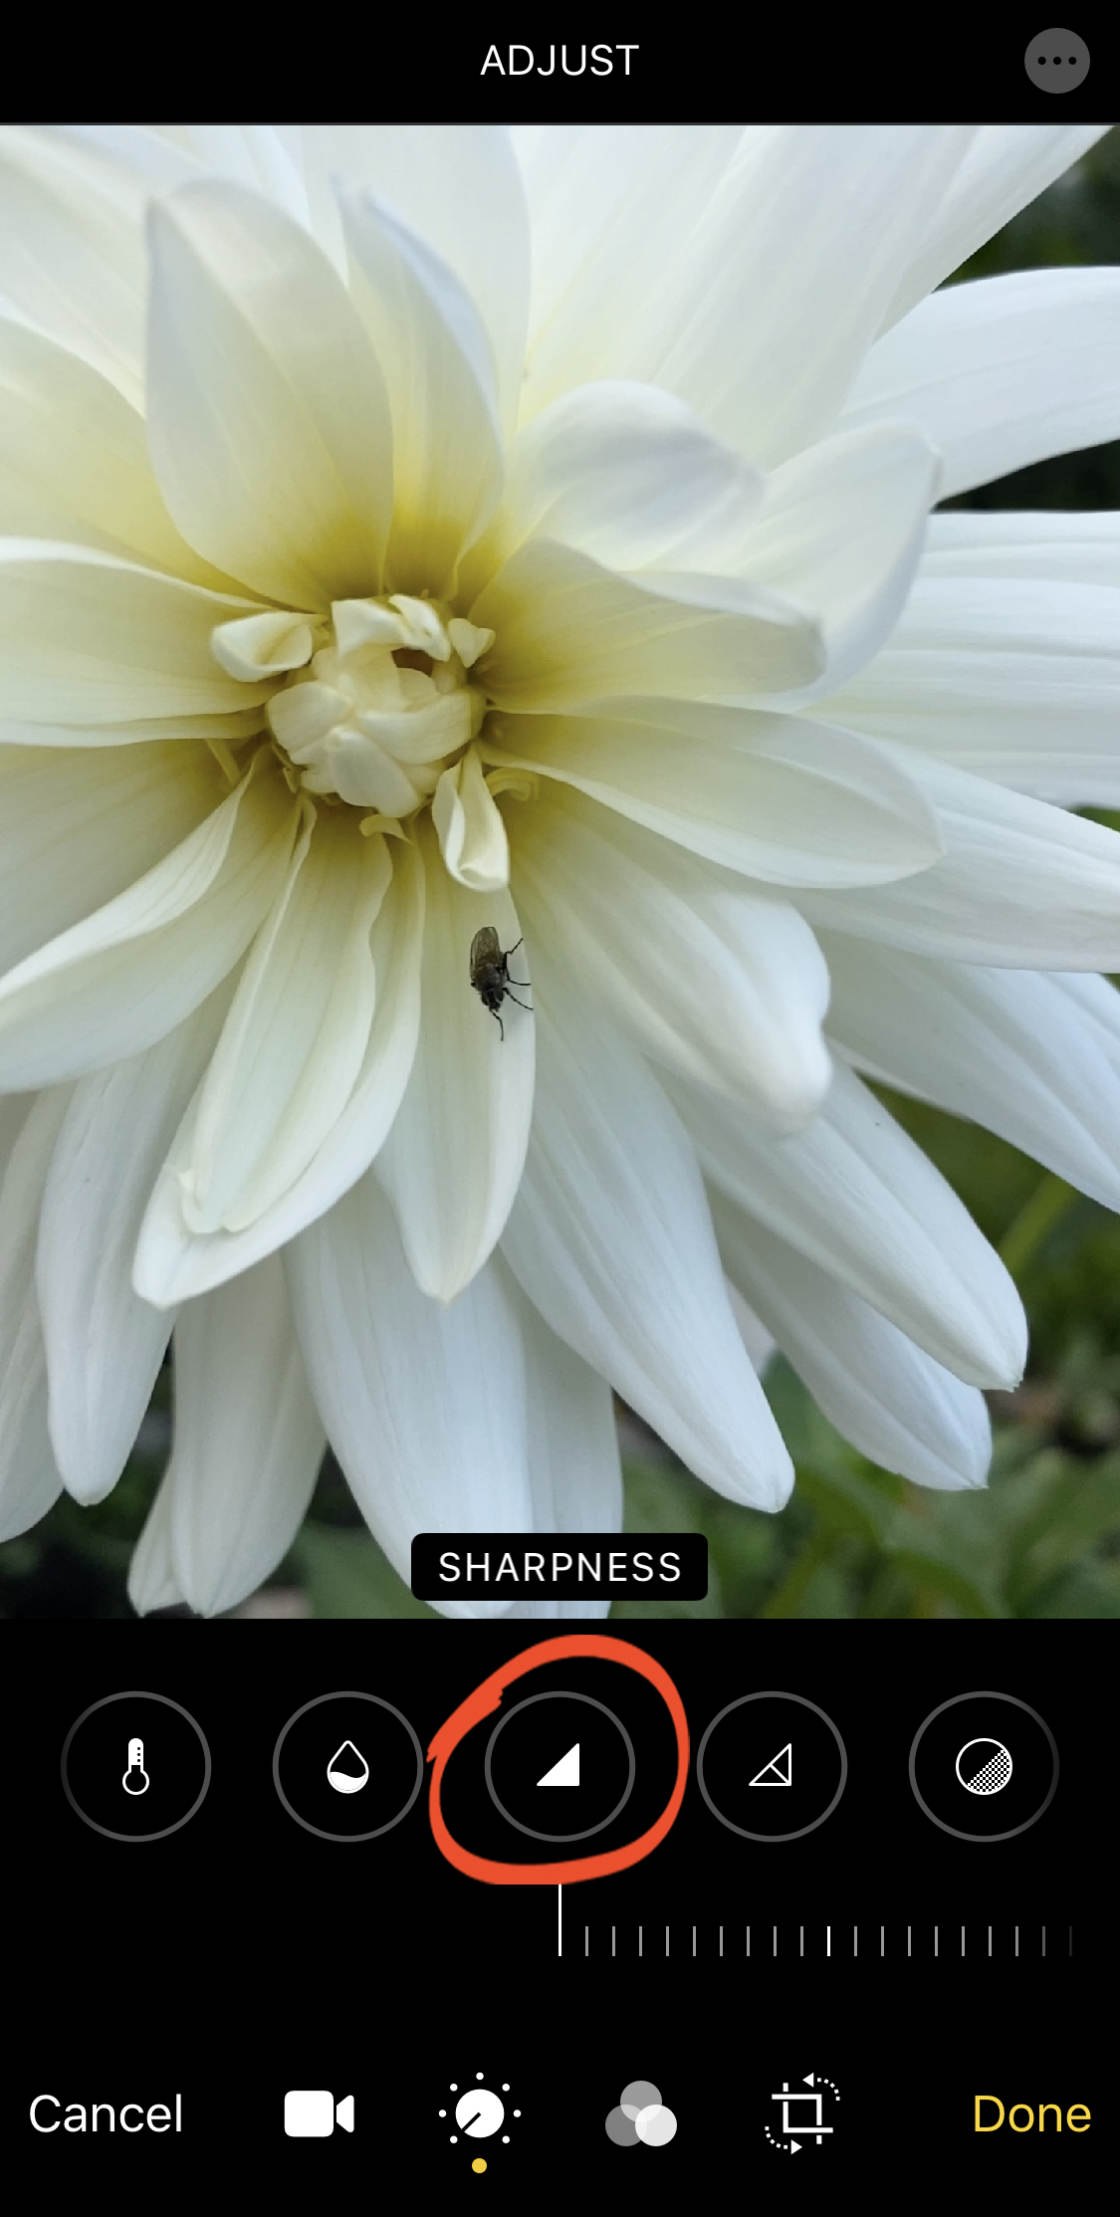
Drop behind the slider to the right to increase sharpness.
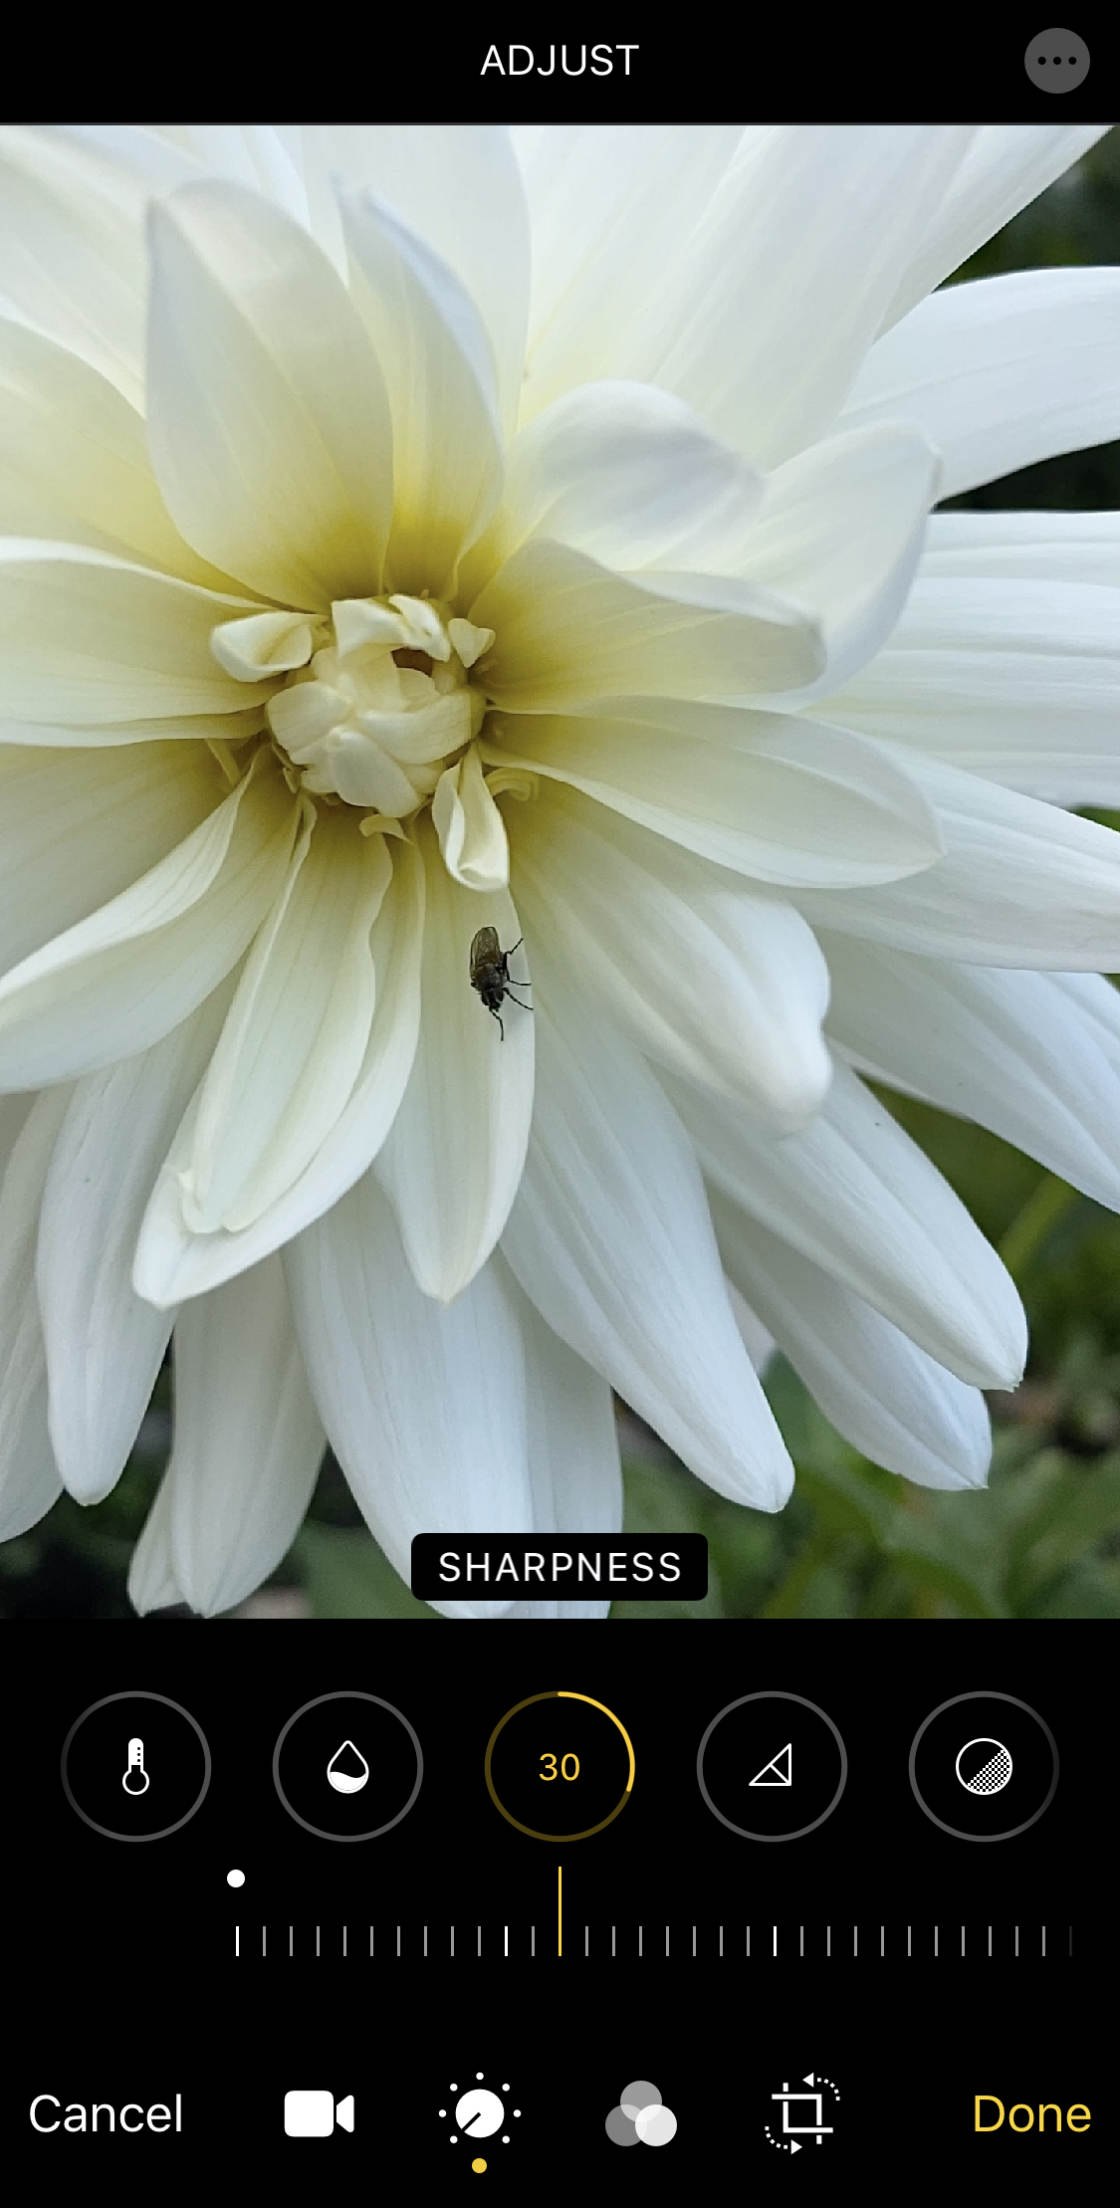
However, be careful not to over-focalize your video. Adding as well much asperity can reduce the quality and make IT look grainy.
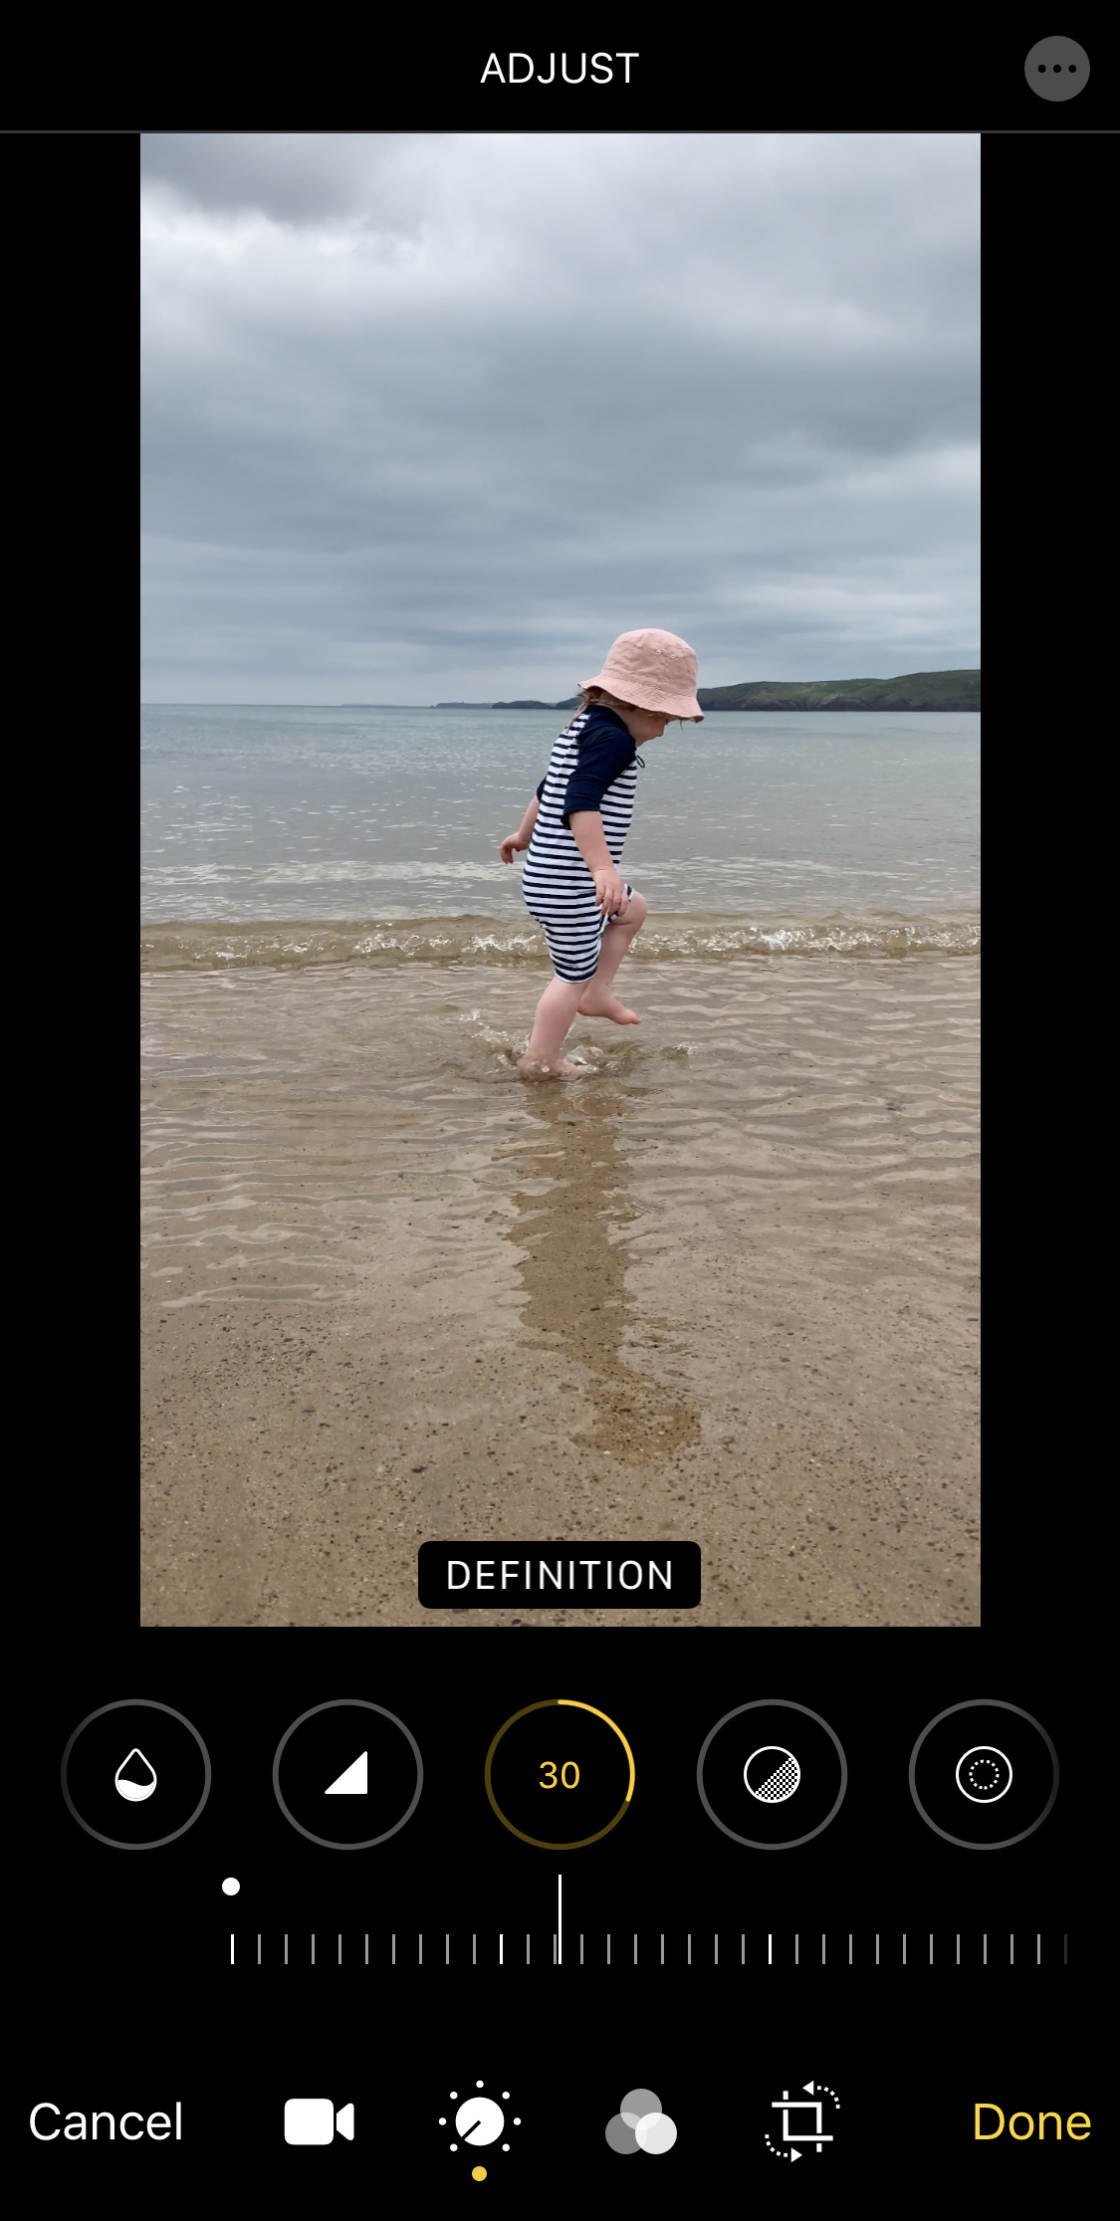
6.13 Definition
TheDefinition tool adjusts contrast to increase the clarity of your video footage.
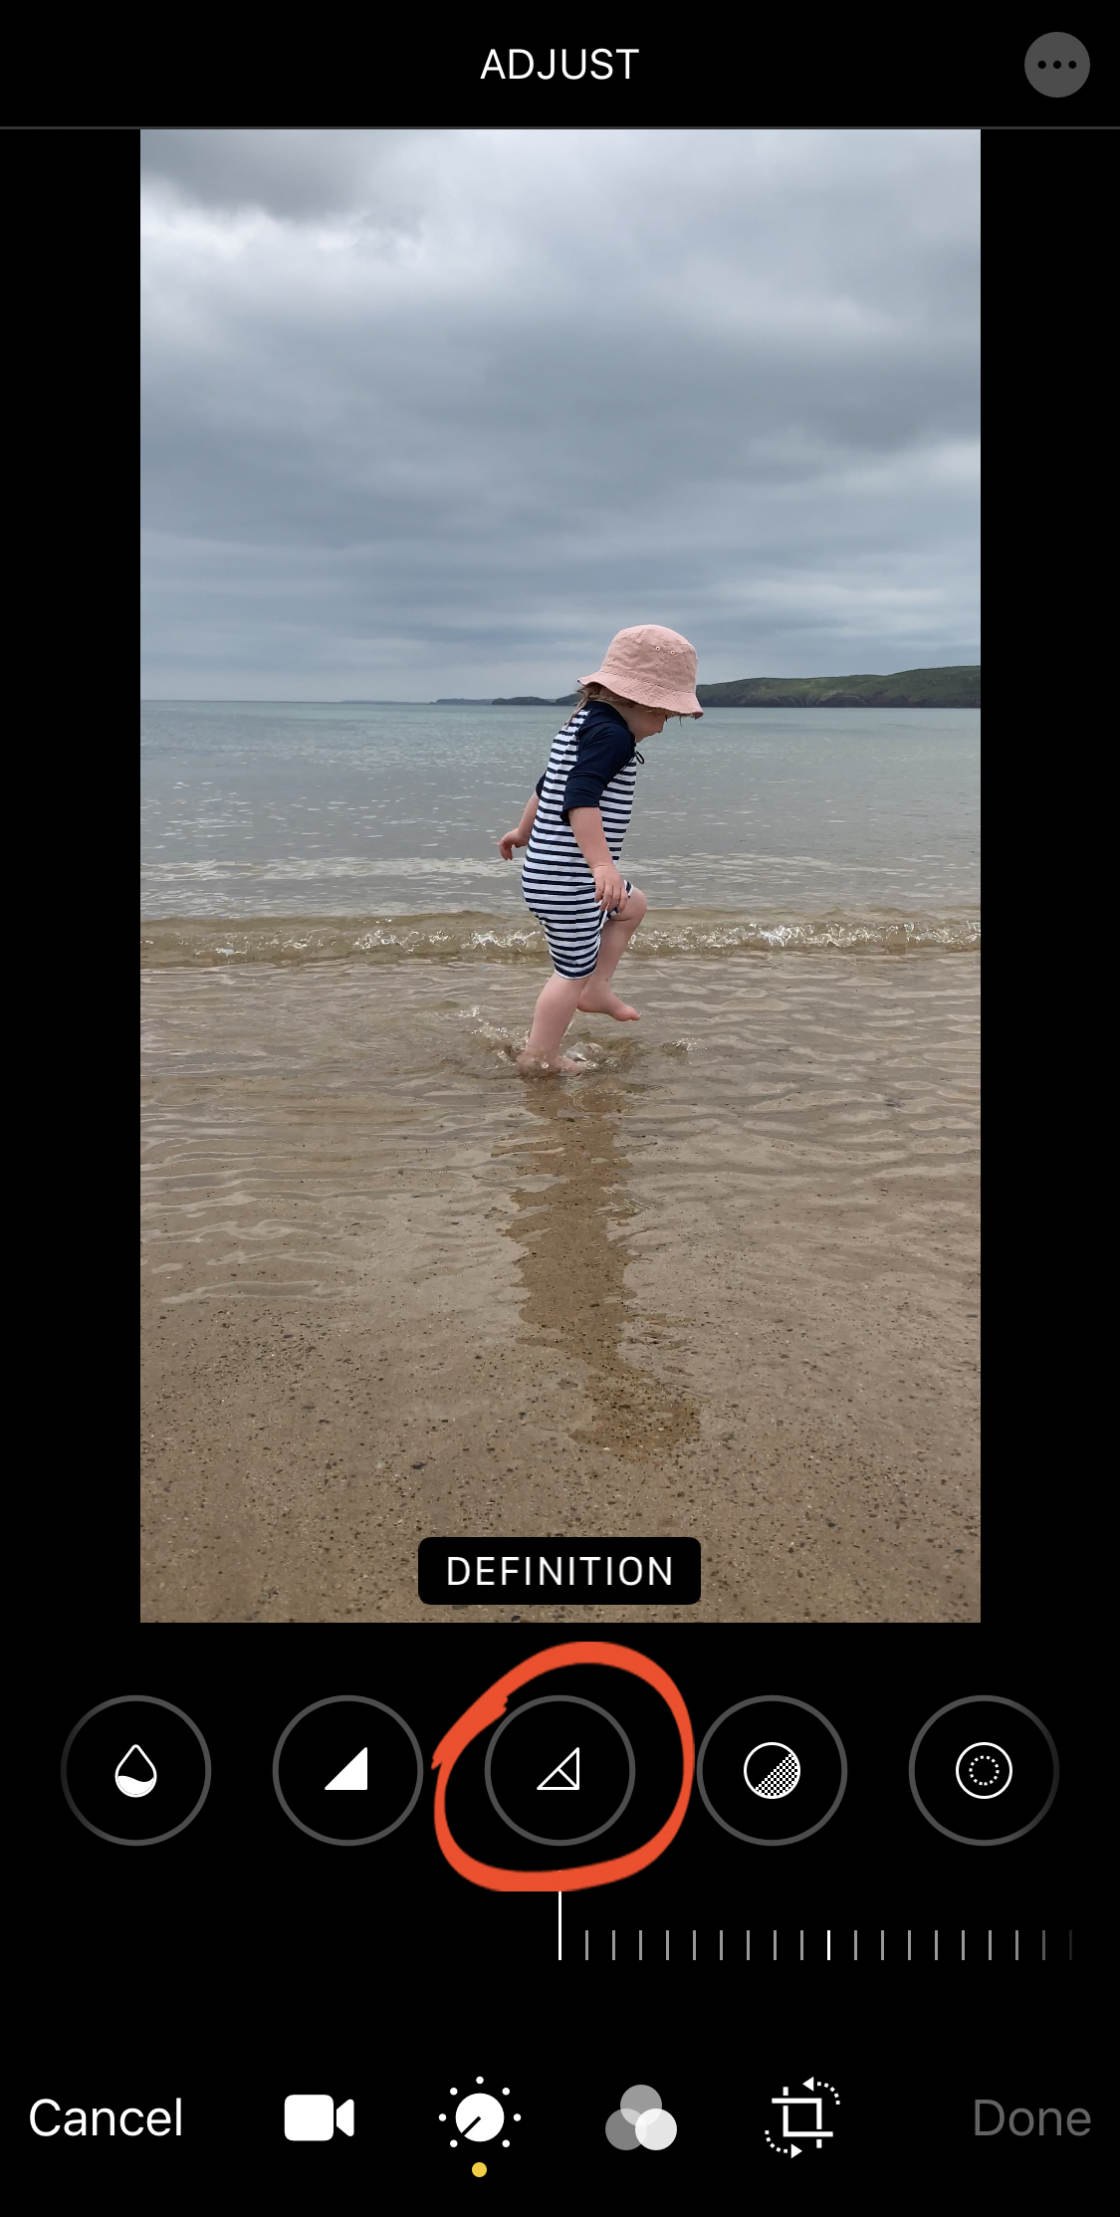
Drag the skidder to the compensate to increase clarity.
6.14 Noise Reducing
TheNoise Reduction tool reduces or eliminates "noise" – such as grain caused by shot in low light.
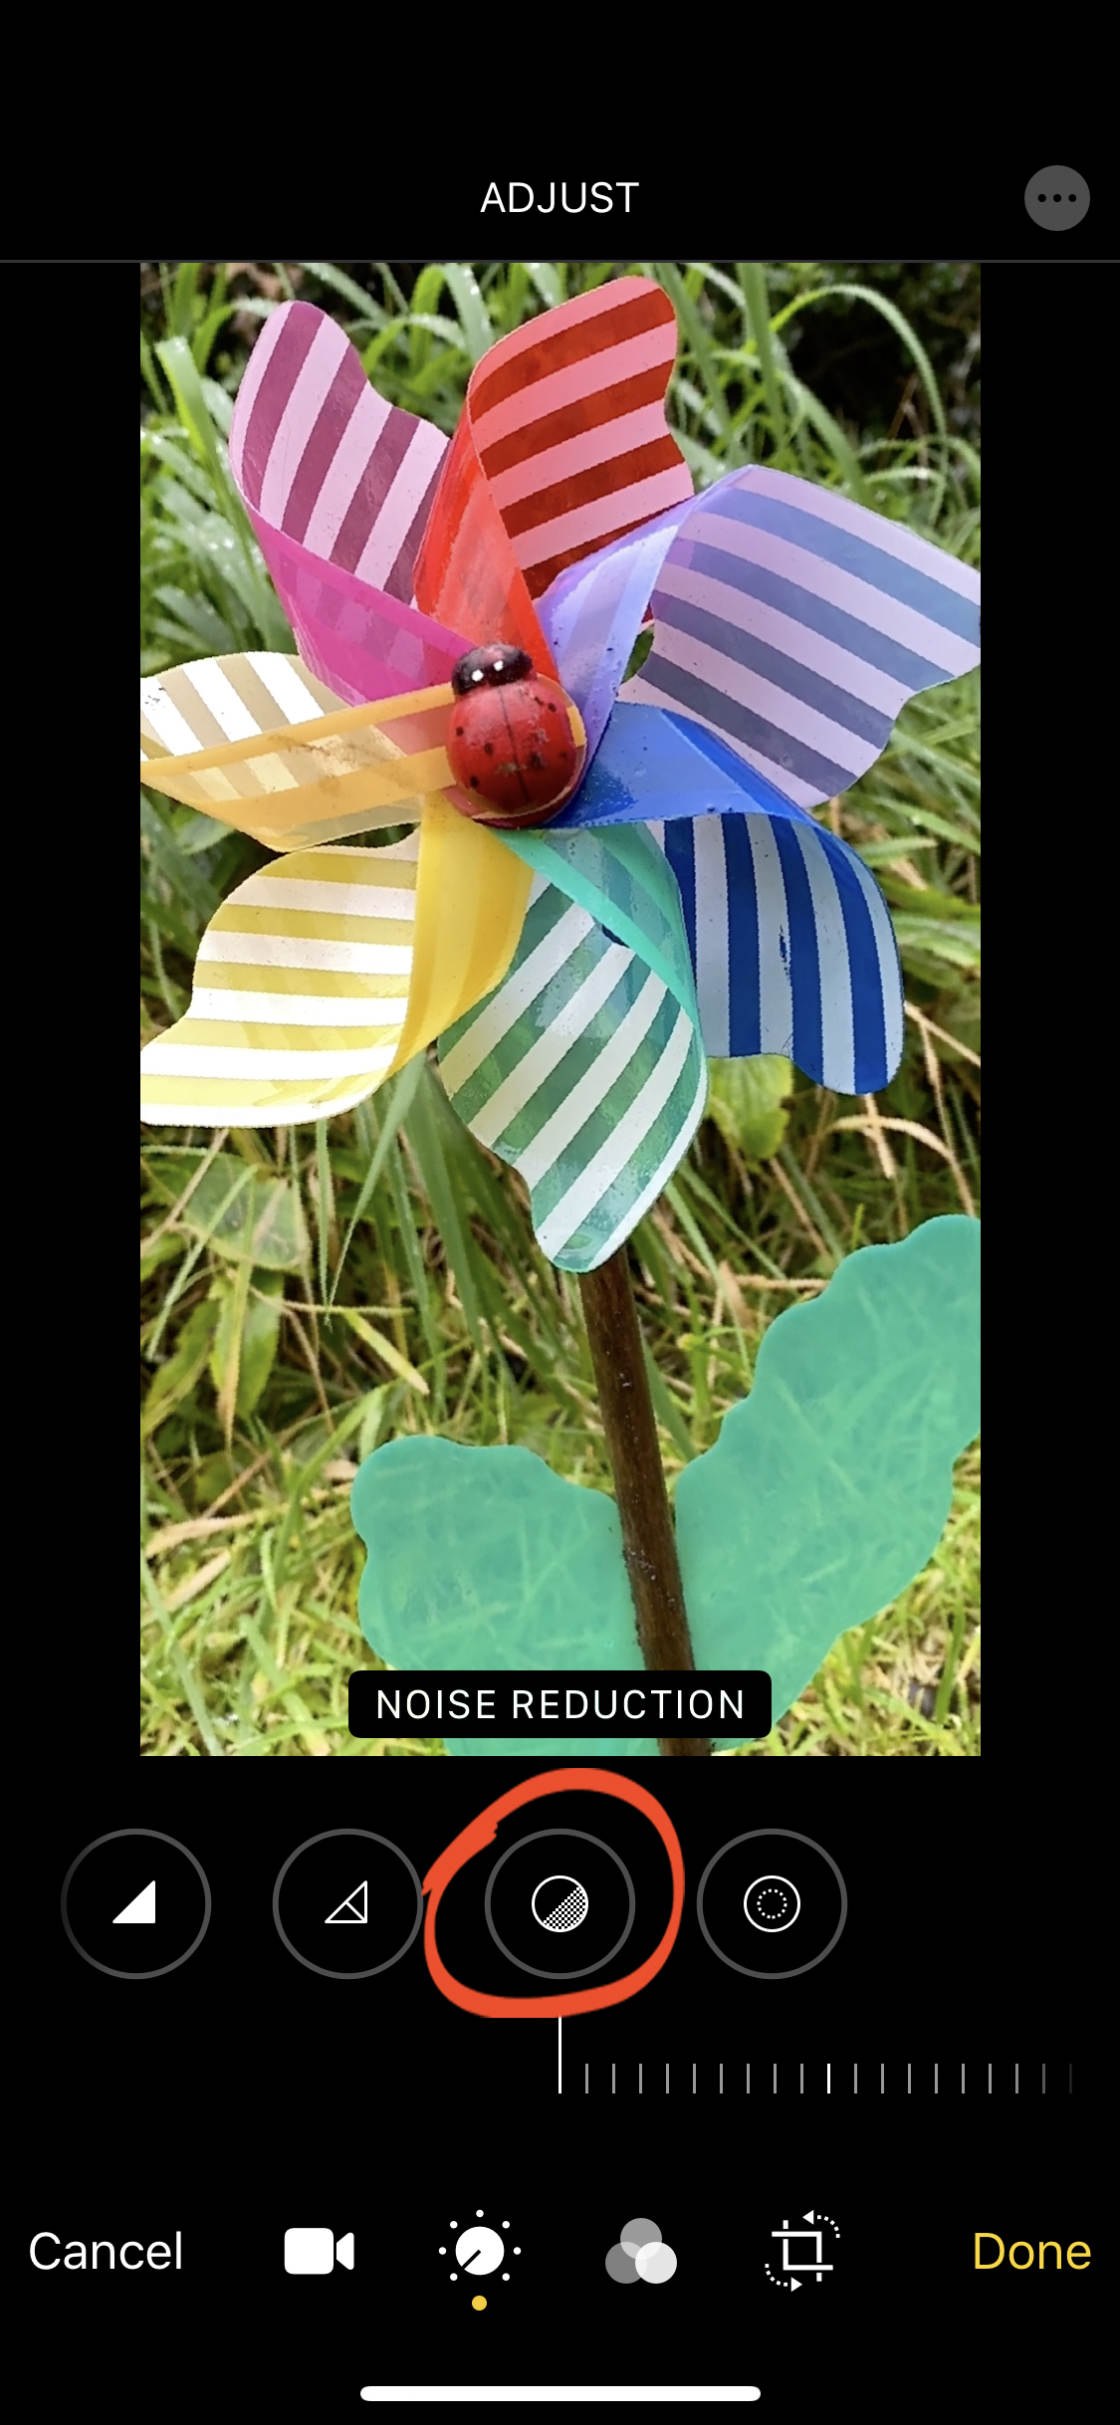
Drag the slider to the right to reduce noise in your video recording. Only live careful non to apply overmuch racket reduction as information technology can cushion the detail too more than.
6.15 Vignette
TheVignette tool brightens or darkens the edges of your video. This can serve draw attention to the center of the frame.
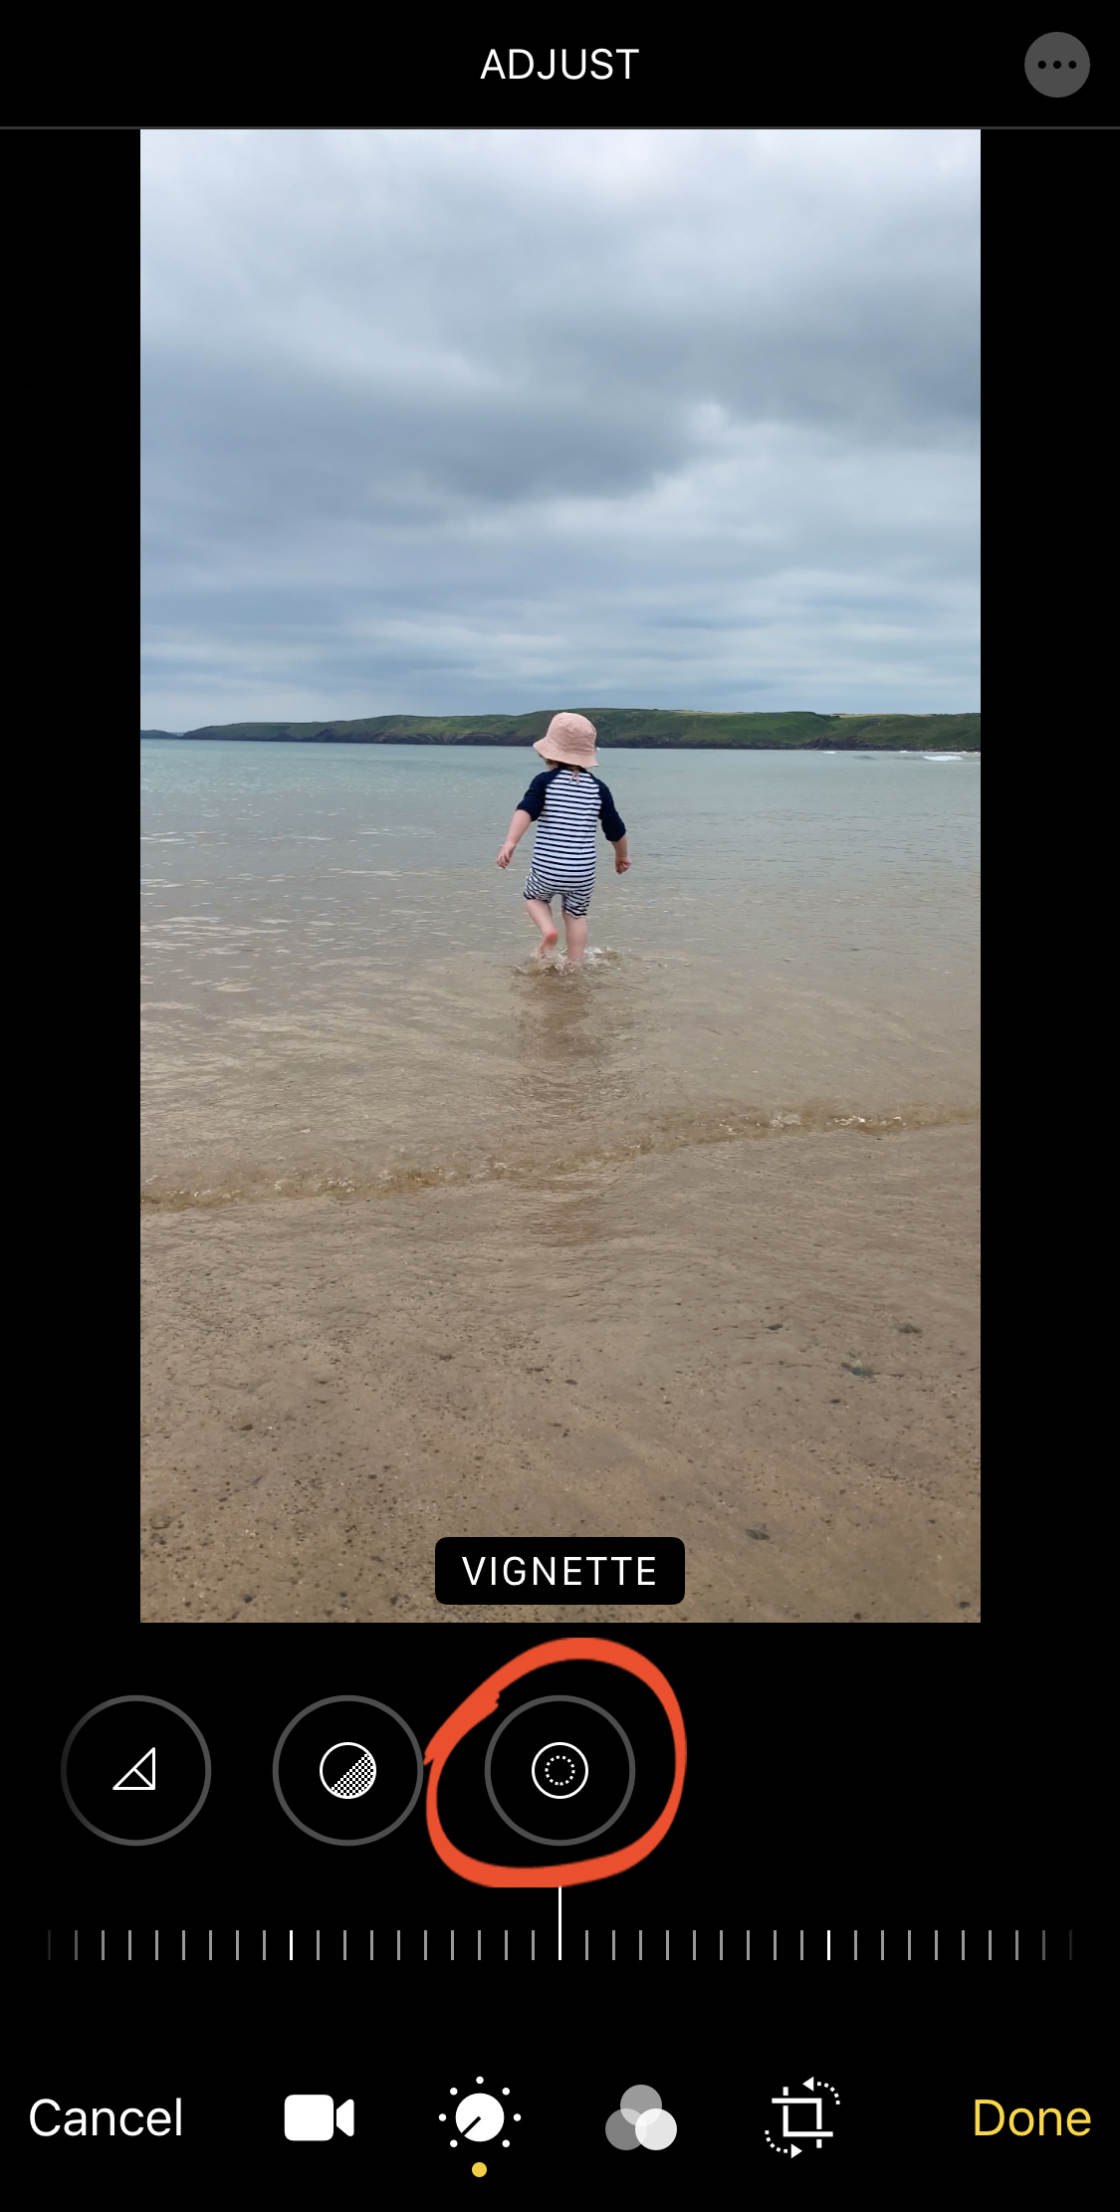
Hale the slider conservative to add a black vignette, or left to add a white sketch.
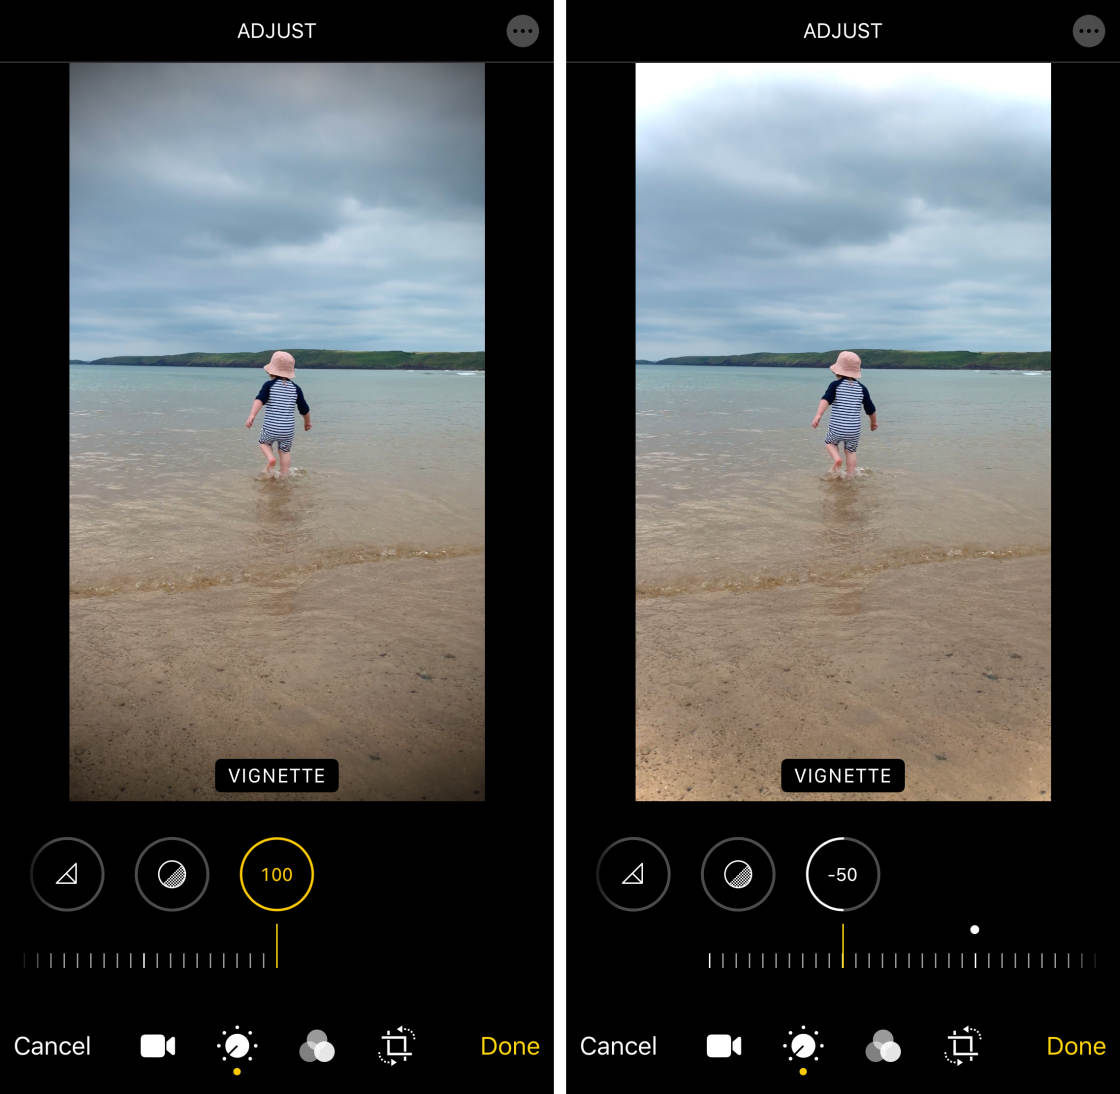
In nigh cases, a dark sketch will look better than a bright nonpareil. A dark sketch can add a wonderful sense of dramatic play to your videos.
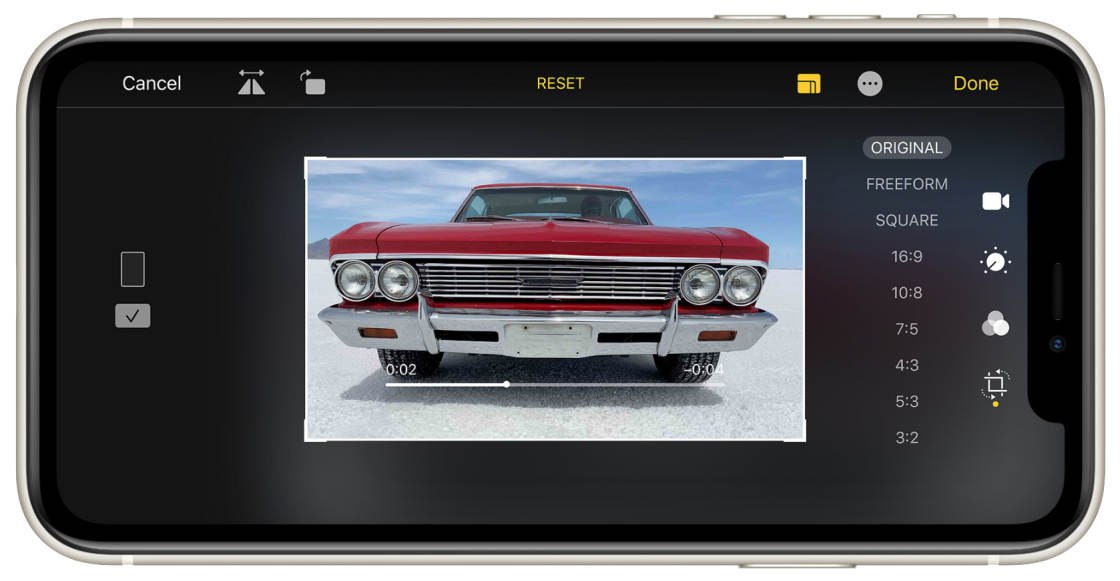
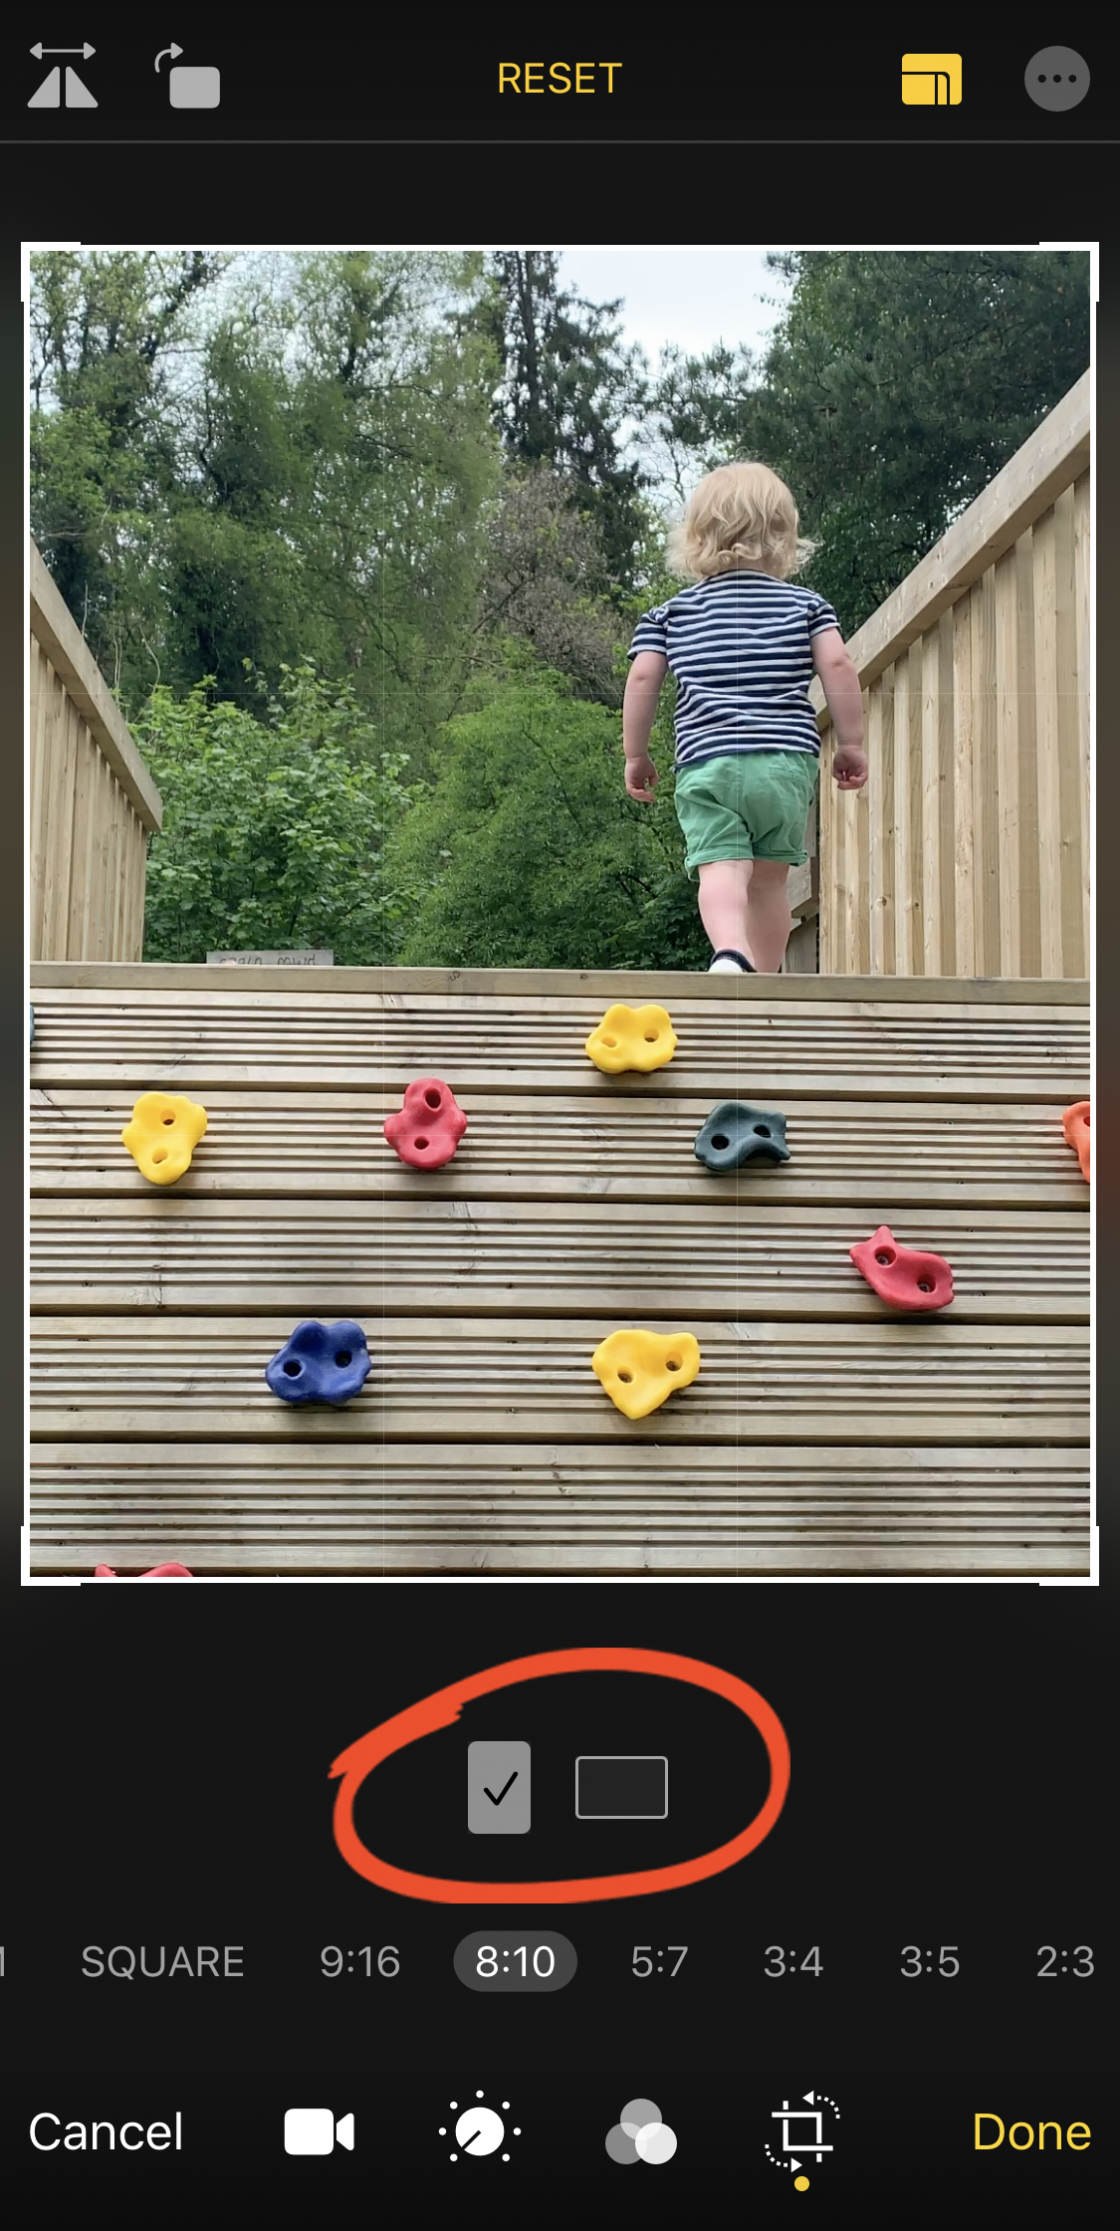
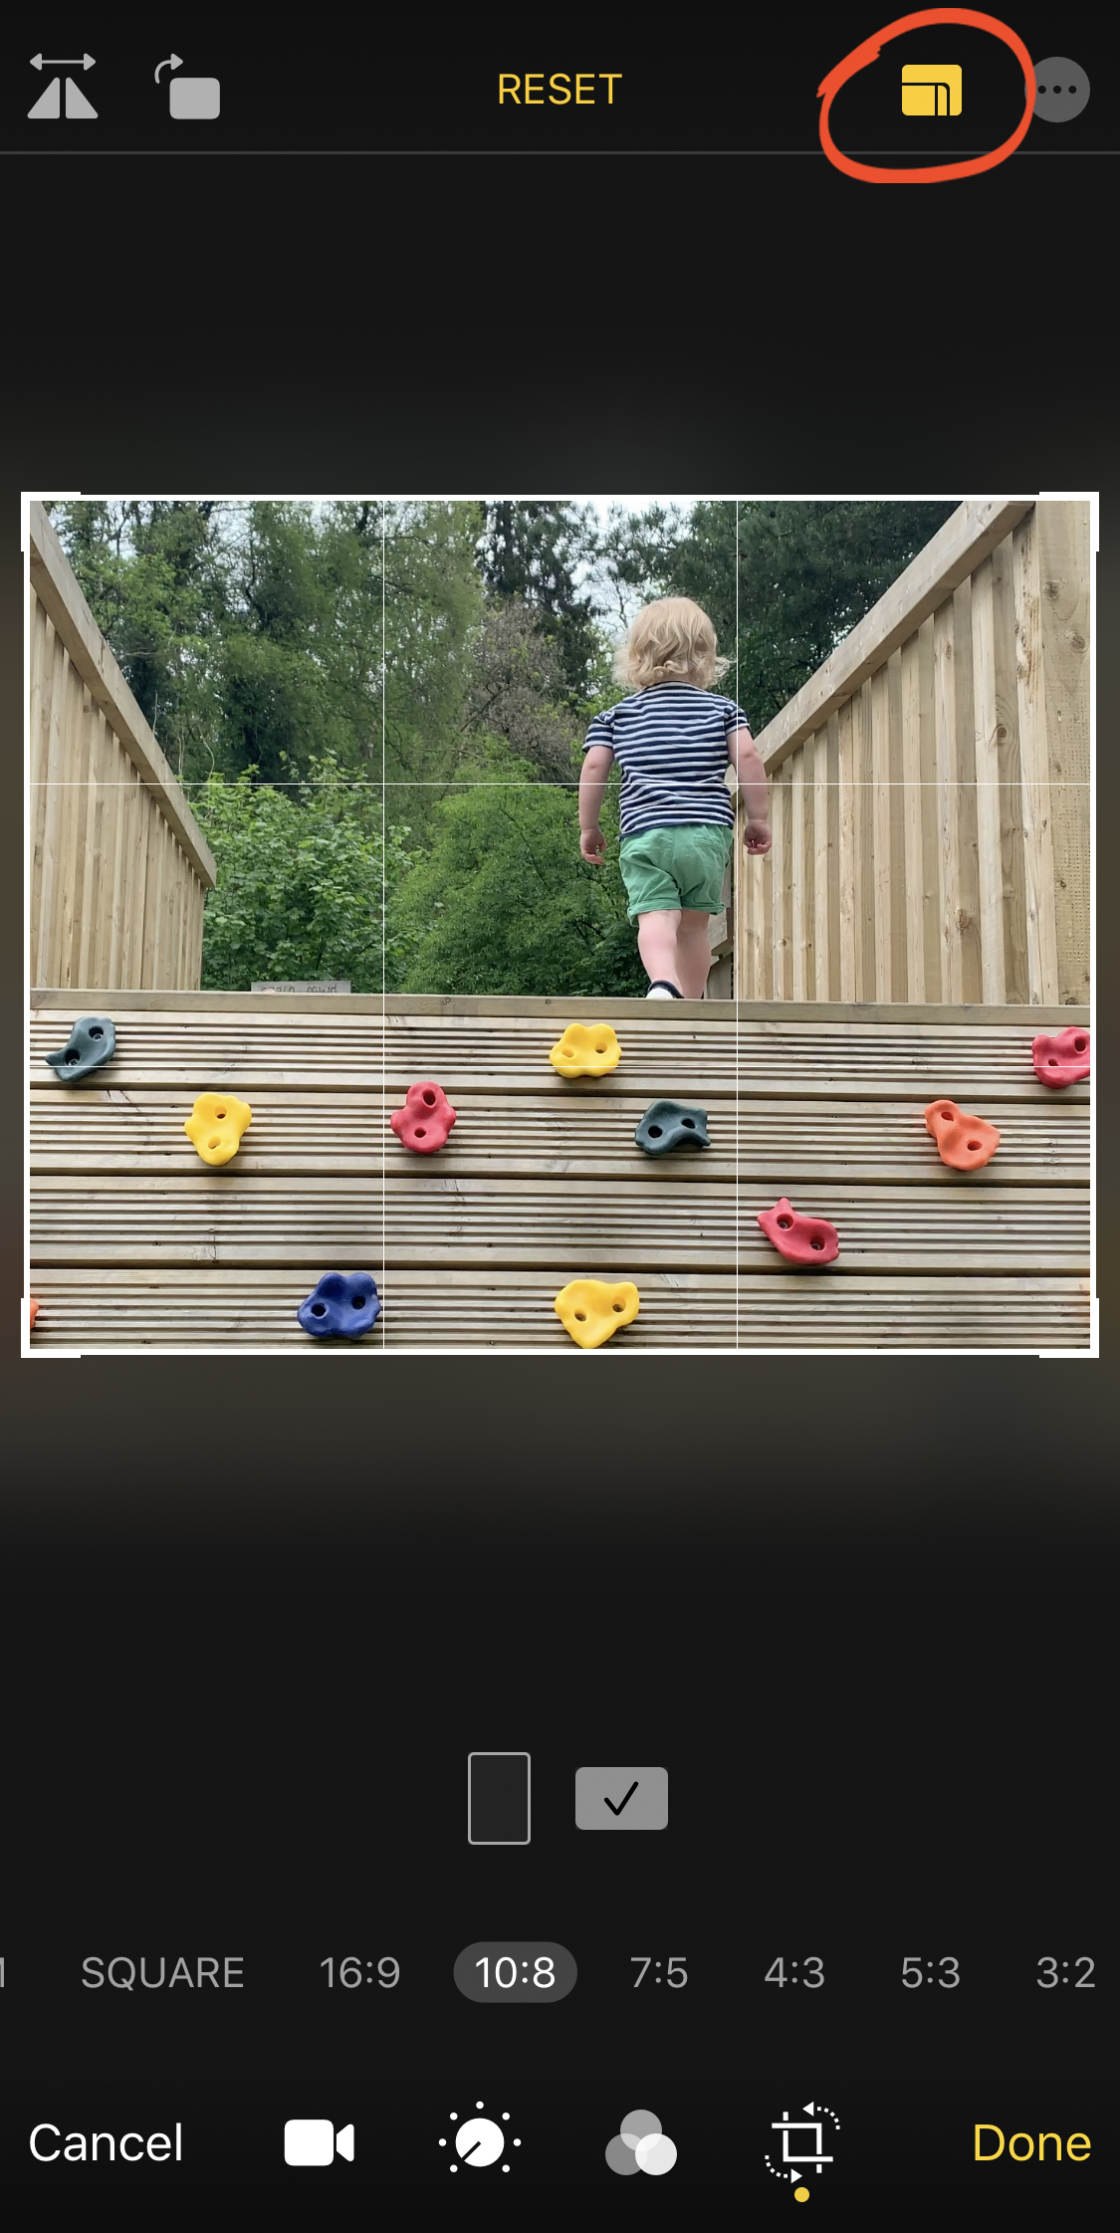
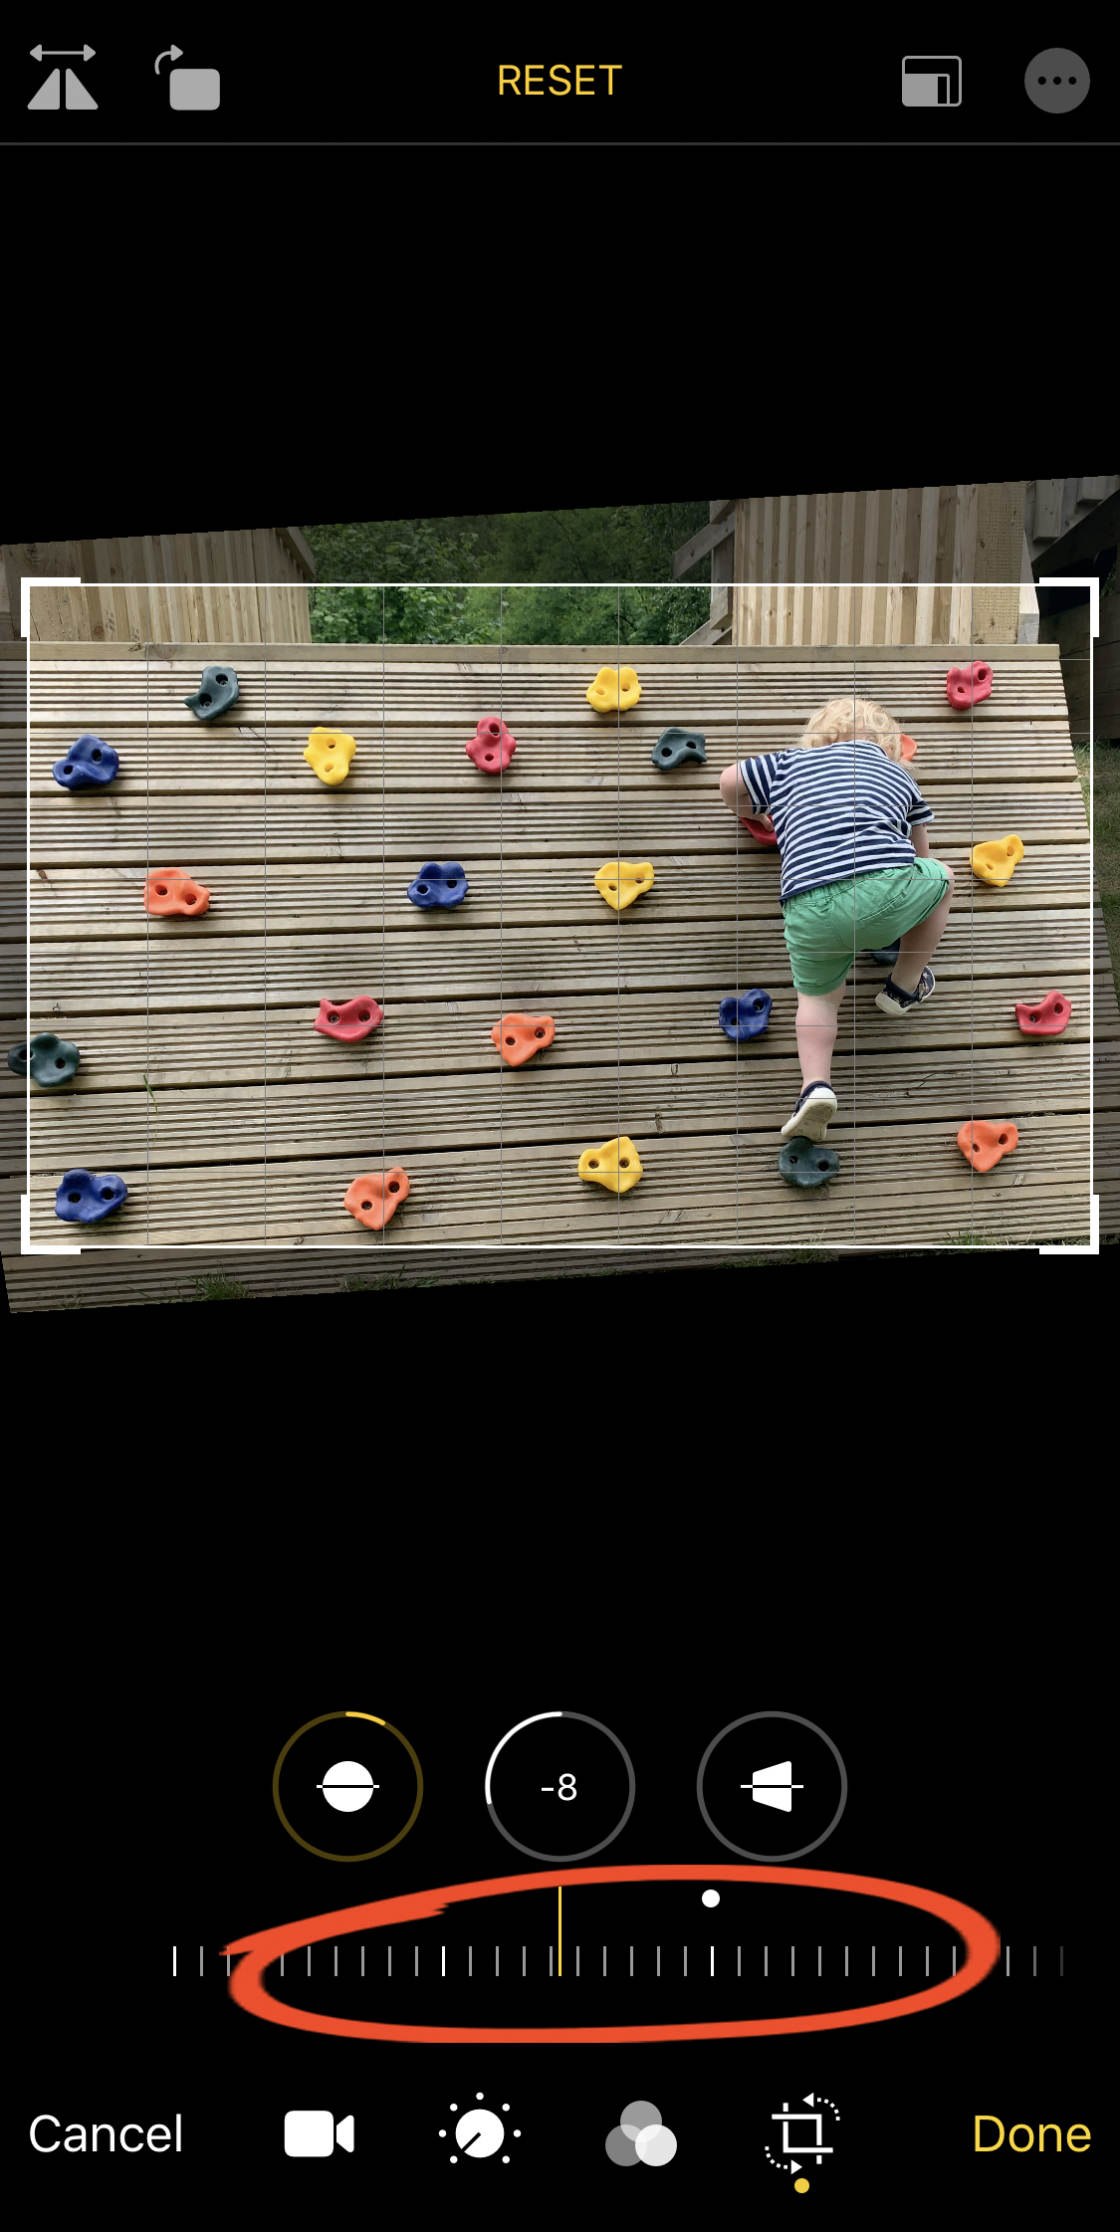
7. Crop, Square away & Adjust View
Tap theCrop tool at the rear end of the video editor screen.
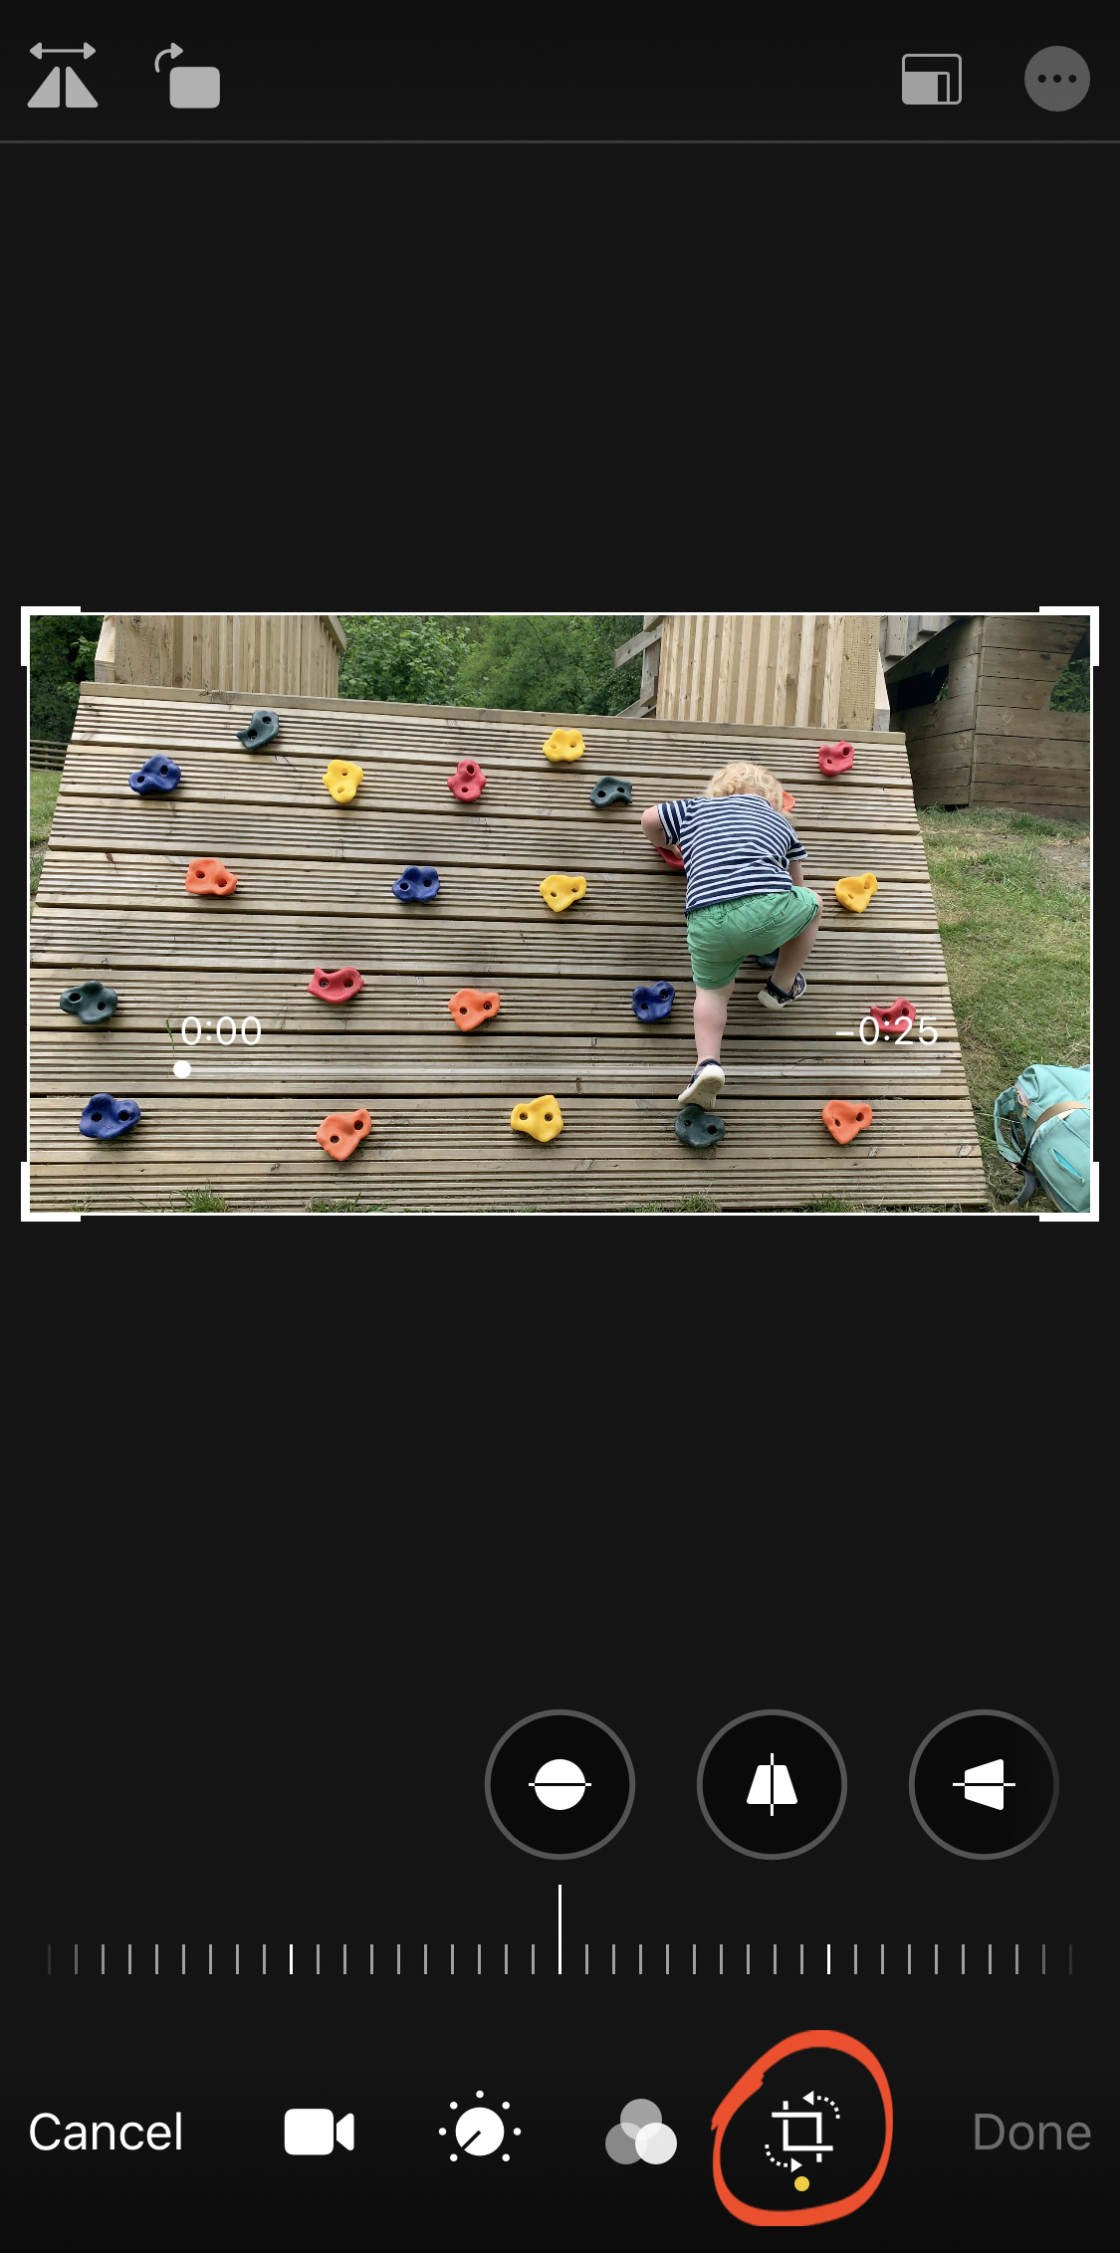
This gives you get at to a range of options for cropping, straightening, and adjusting view.
7.1 Pasture
Do you wishing to graze out the edges of your video?
Simply drag out the crop handles at the corners of the frame.
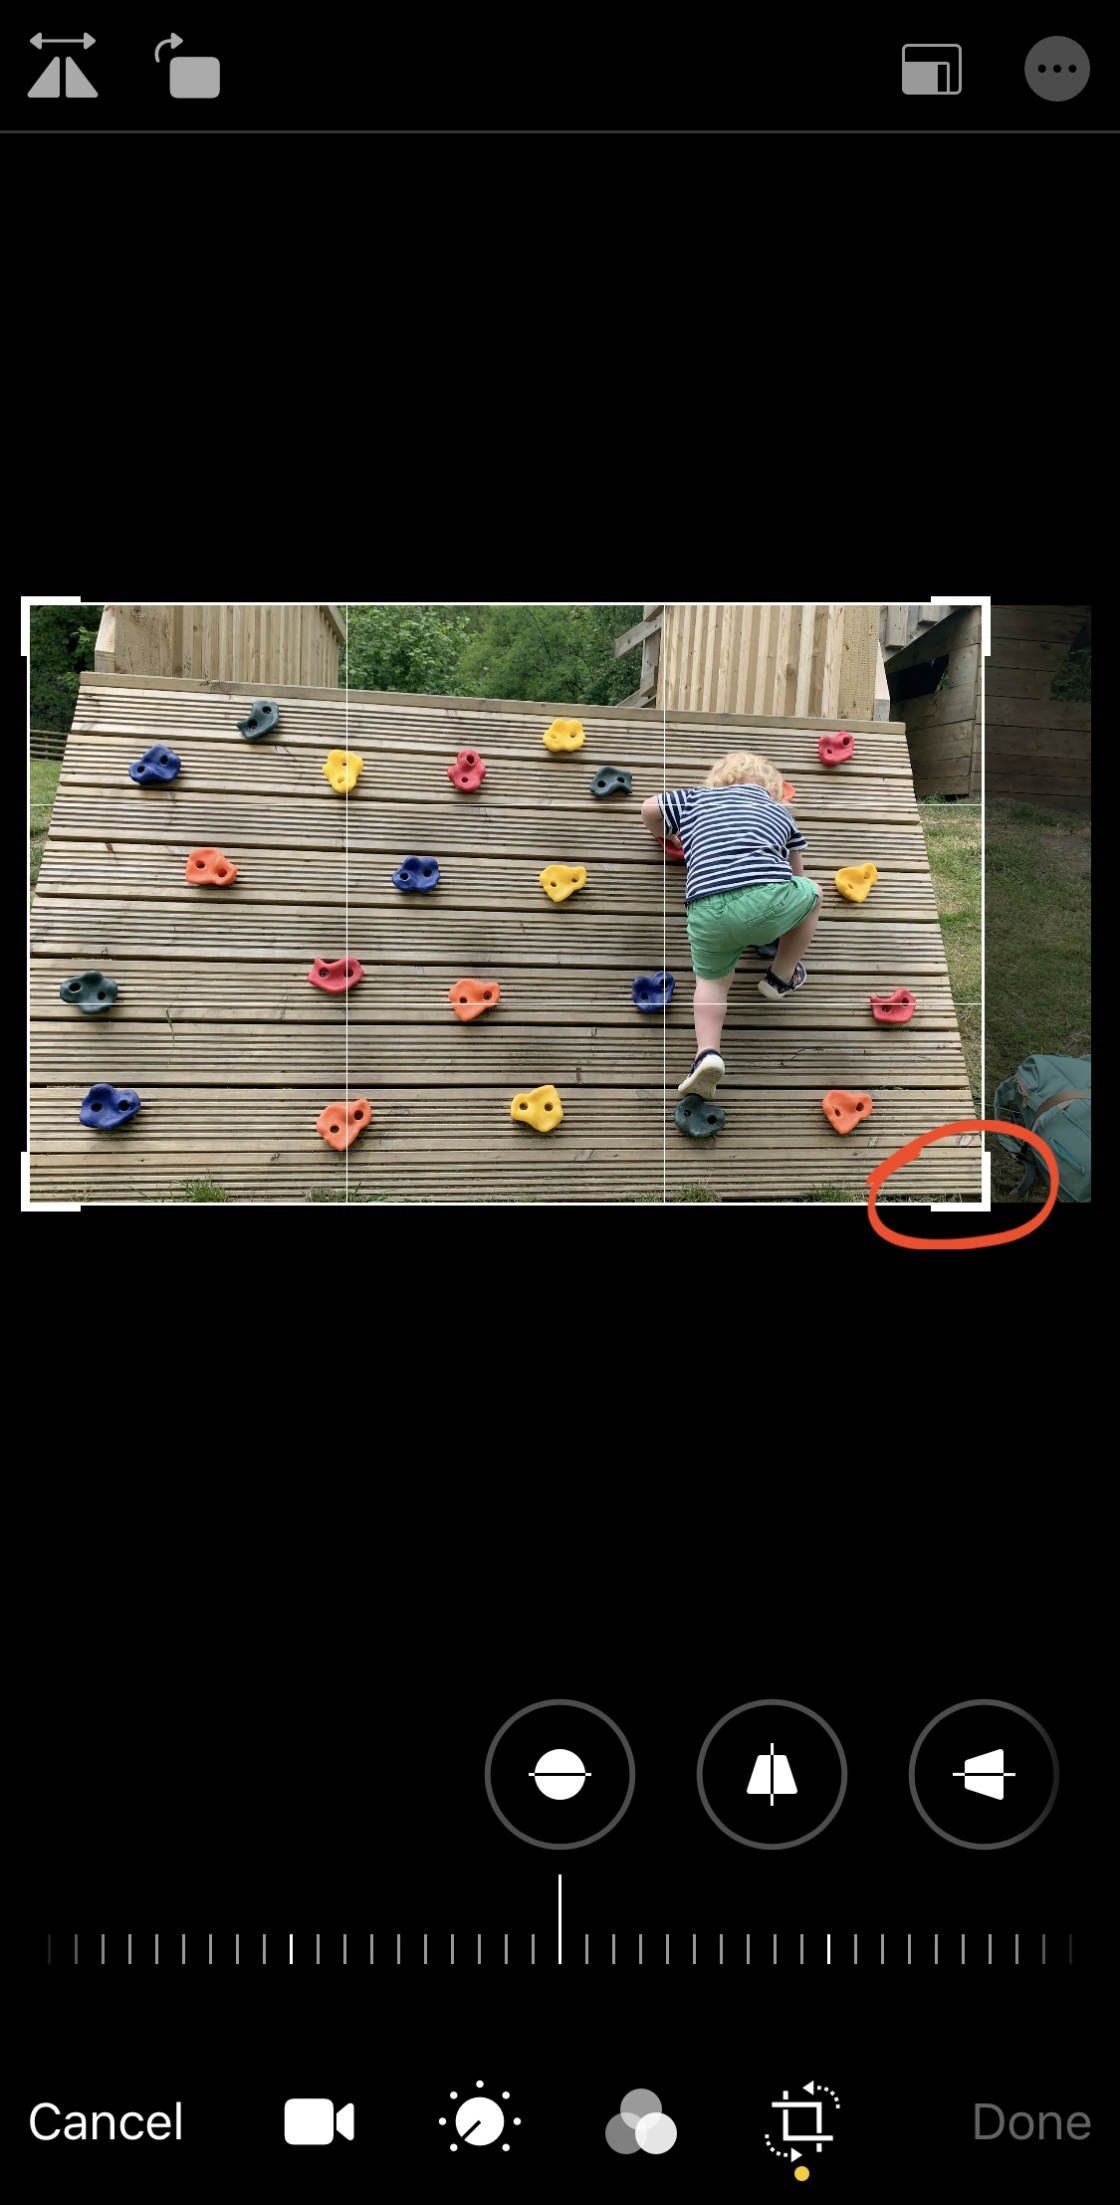
If you crop in too far, twinge inwards with two fingers to bring back the planted areas. You can as wel drag the video preview to line up which area appears within the browse frame.
When cropping, donjon in mind that the entire video will be cropped – not fitting the shape that you see in the preview.
After cropping, drag the timeline Browning automatic rifle at the bottom of the telecasting to check that the entire video looks good when cropped.
If you wishing to crop to a specific aspect ratio, tap theAspect Ratio icon at the top right.
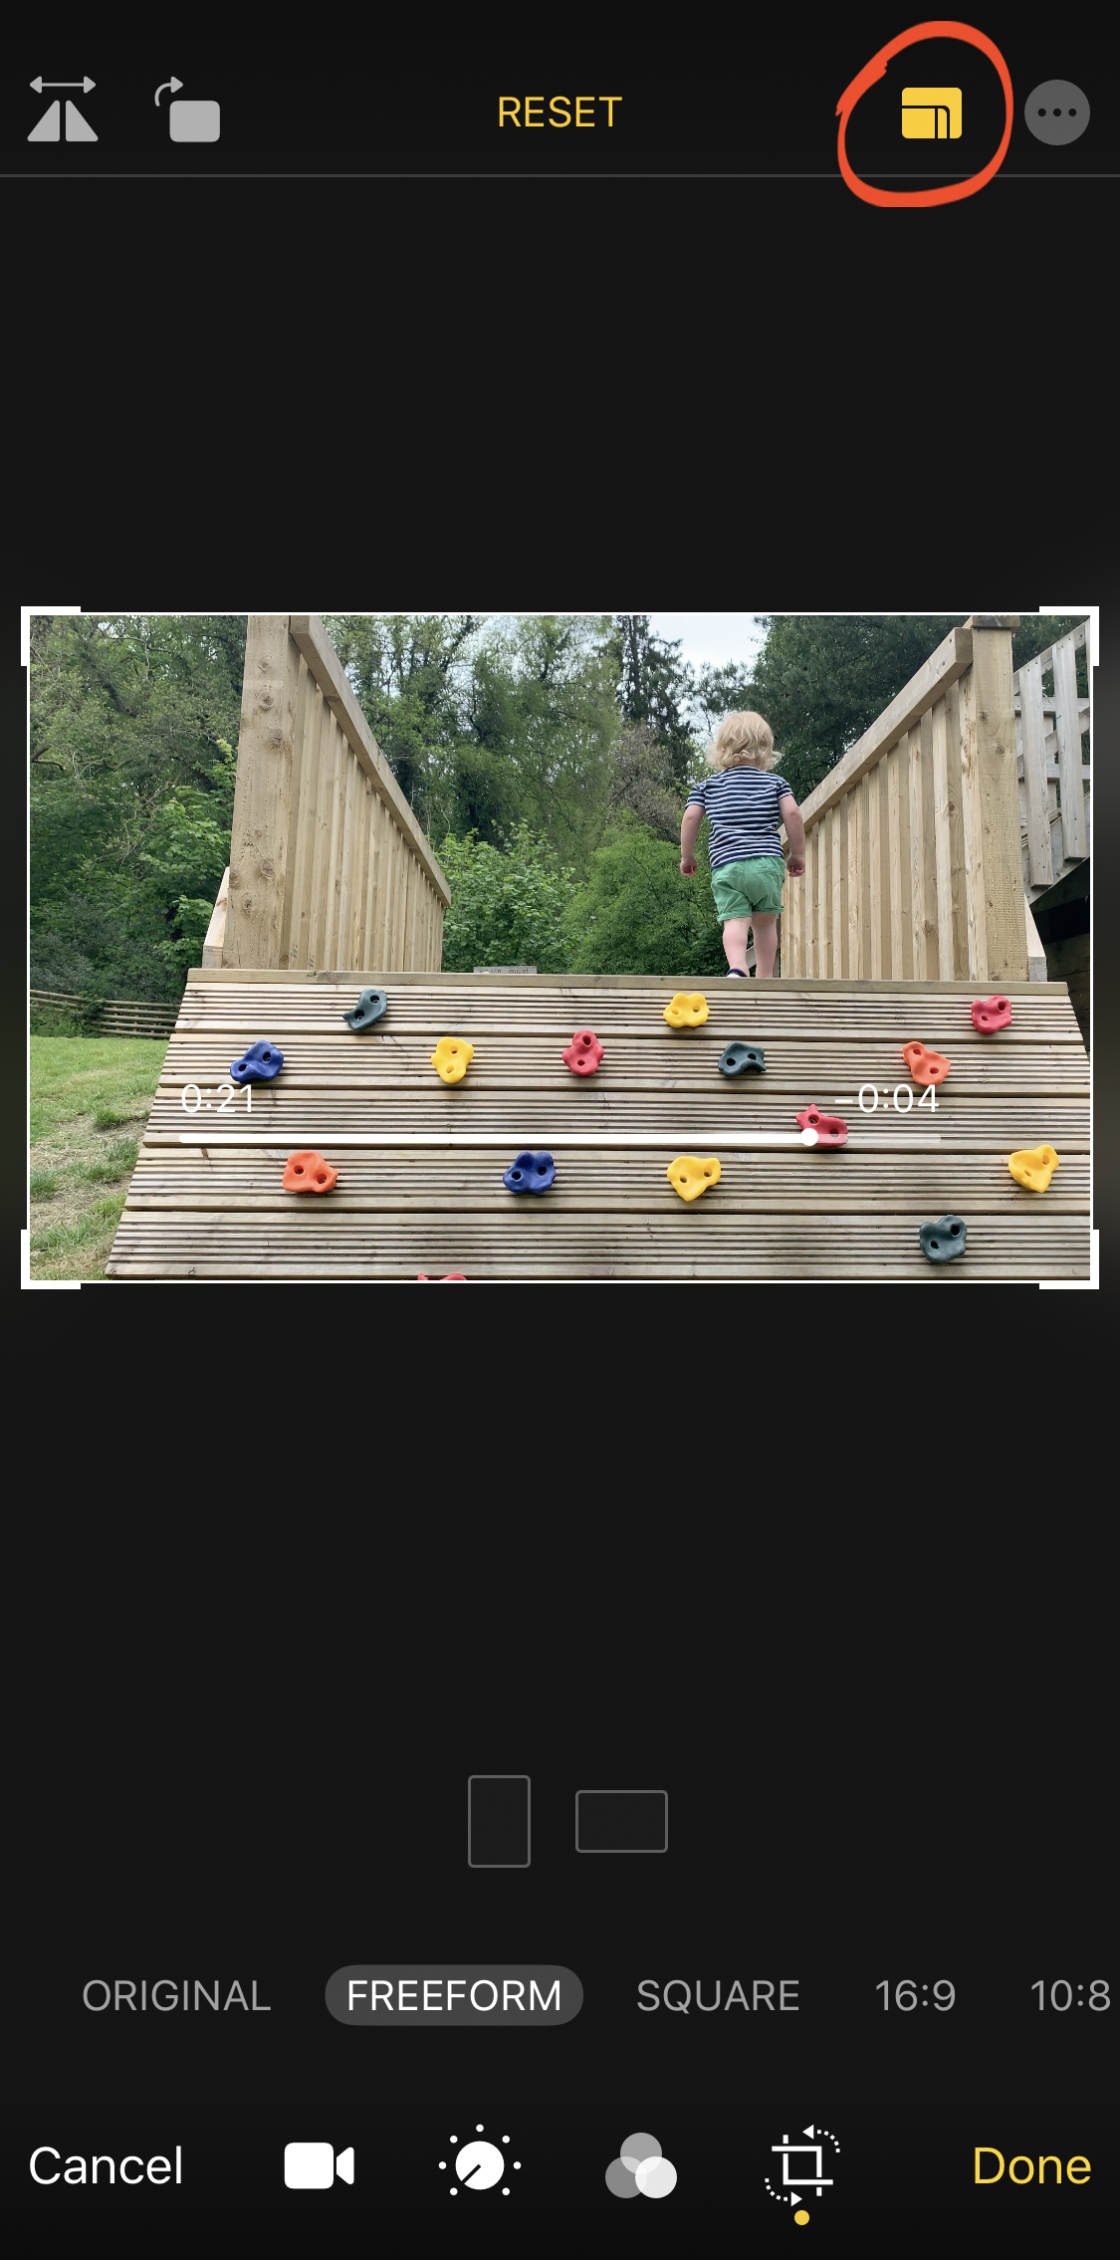
Swipe crosswise the row of aspect ratios, e.g. Honorable, 9:16, 8:10, etc. Then take the one you want to consumption.
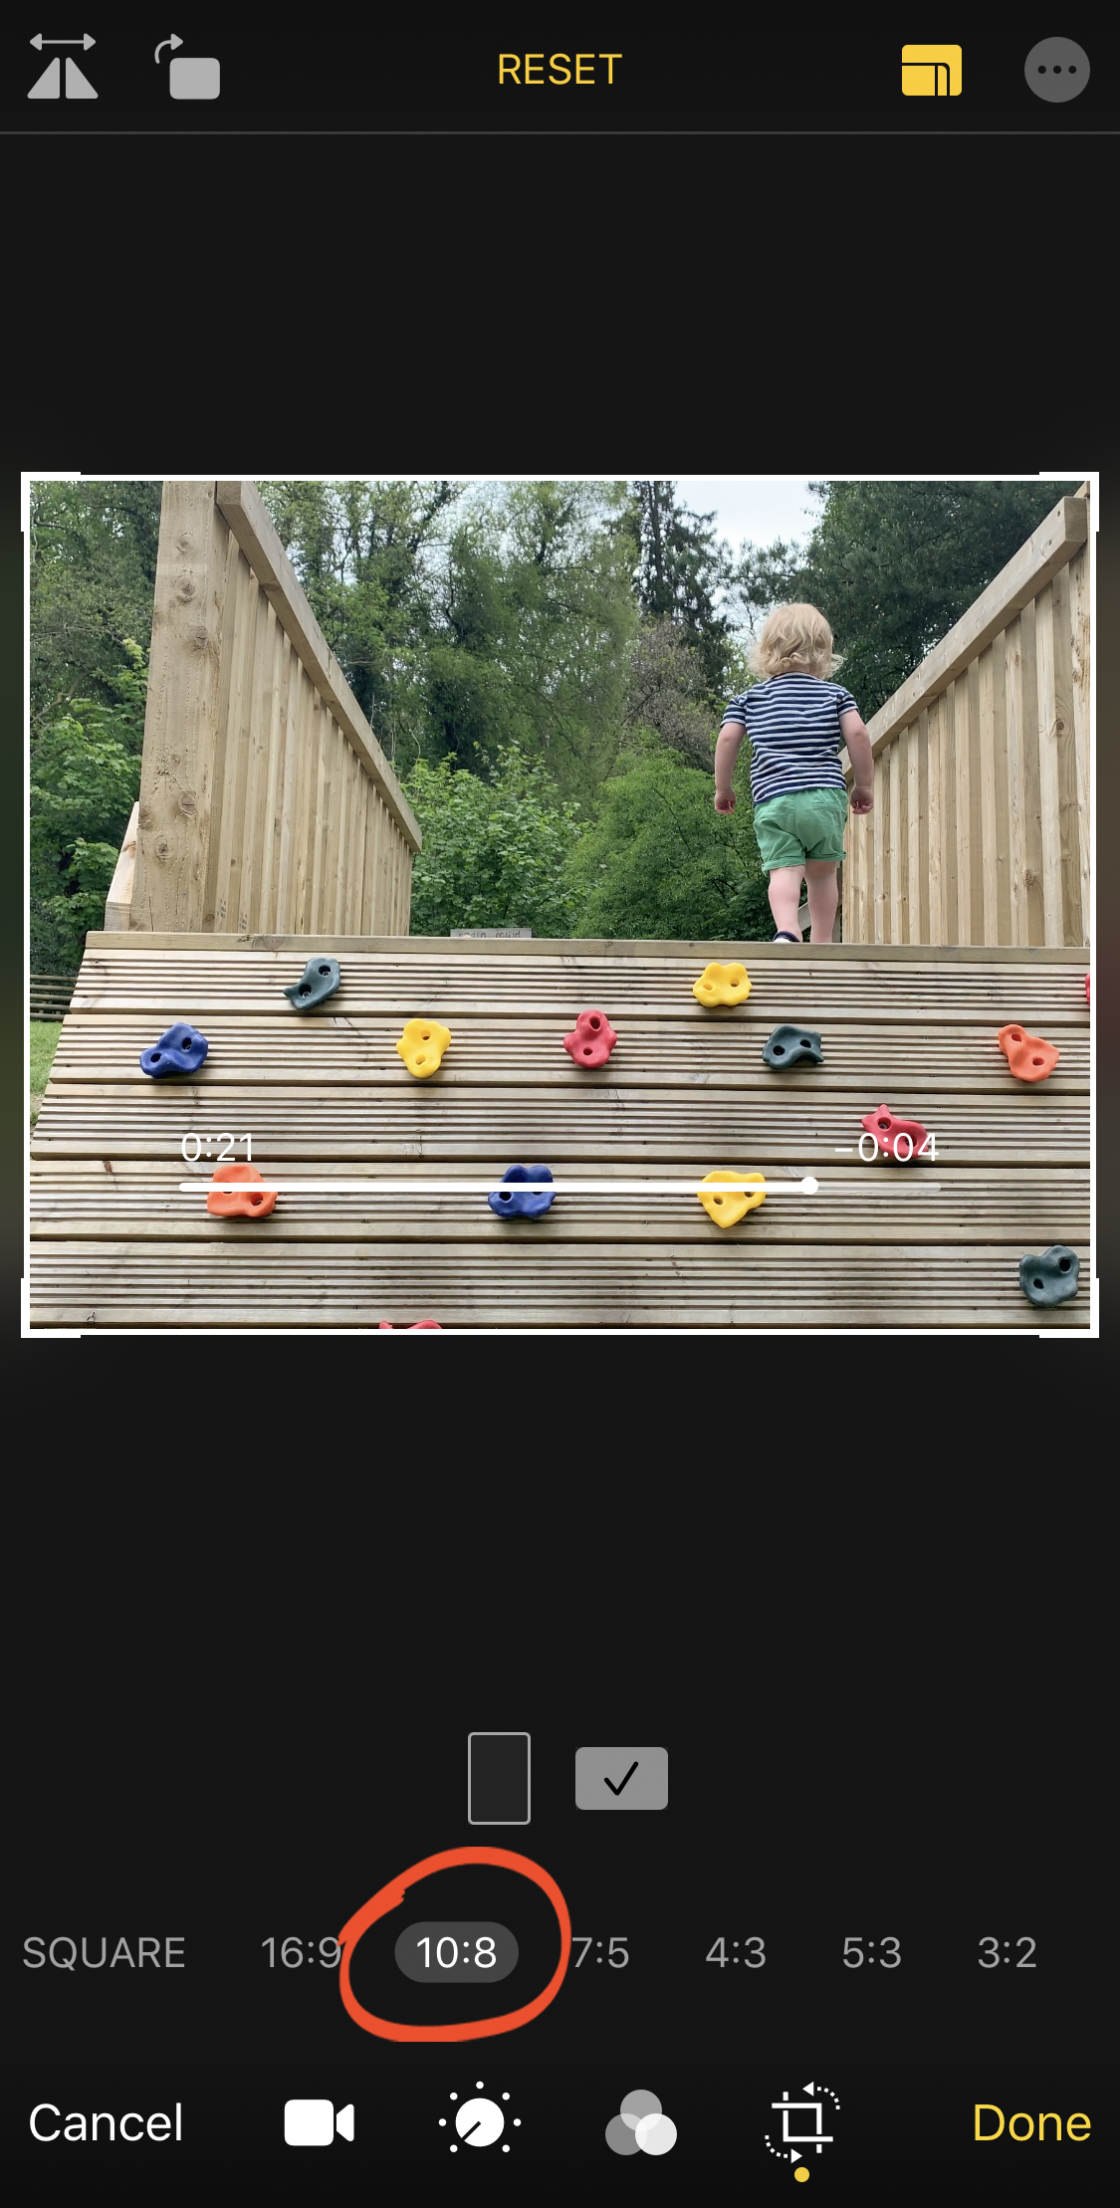
Above the look ratio options, select whether you neediness the video to constitute cropped vertically or horizontally.
You derriere haul the video preview to transfer which area appears inside the frame. And you can pinch in operating room out to adjust how much of the video is cropped.
To conk the aspect ratio options, tap the Aspect Ratio picture at the top right.
7.2 Straighten
If your telecasting footage doesn't look level, you can easy neaten it.
Tip theStraighten tool to a lower place the video.
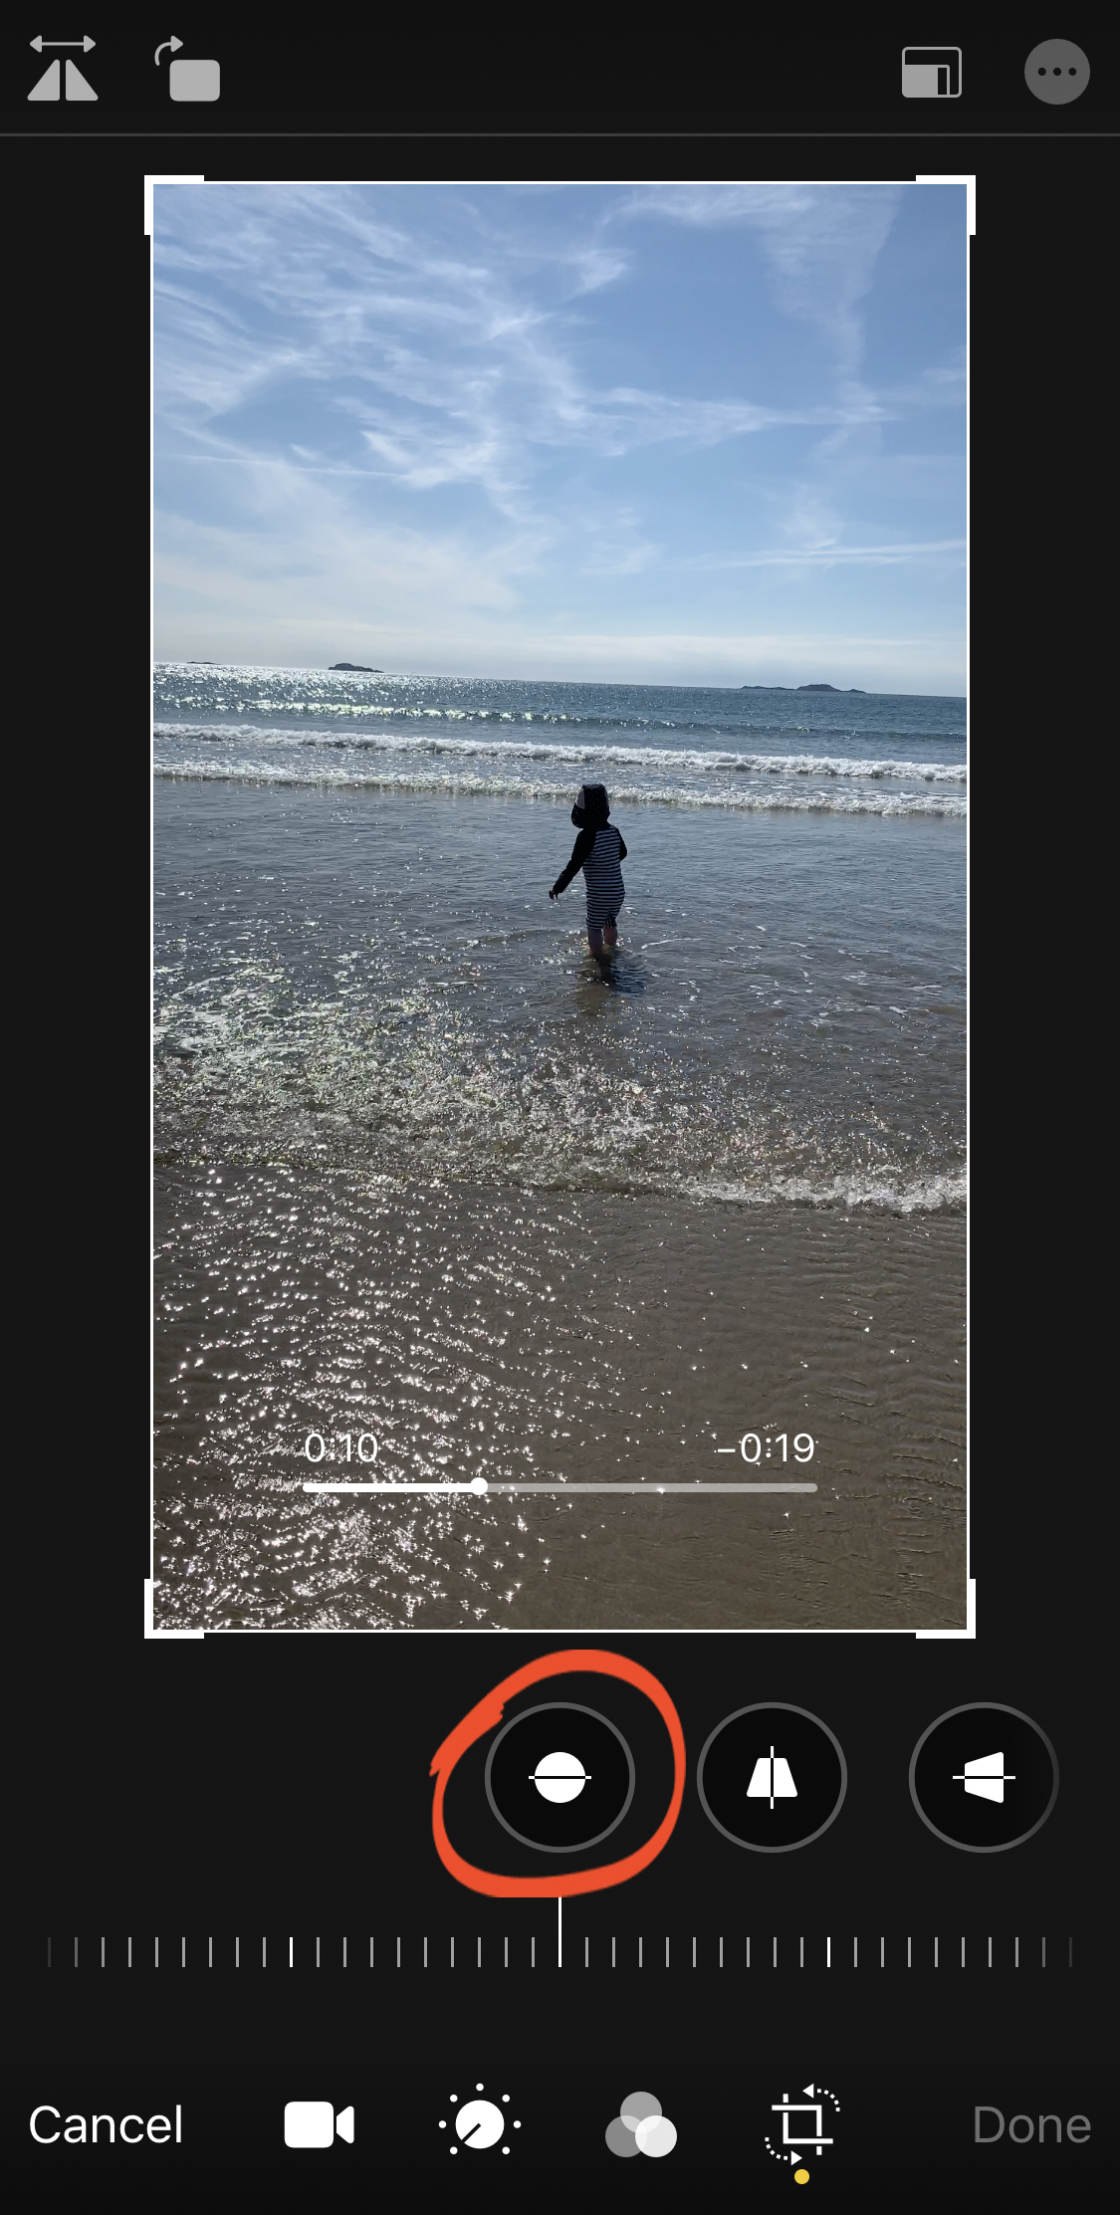
Then drag the slider to spread ou and straighten the video.
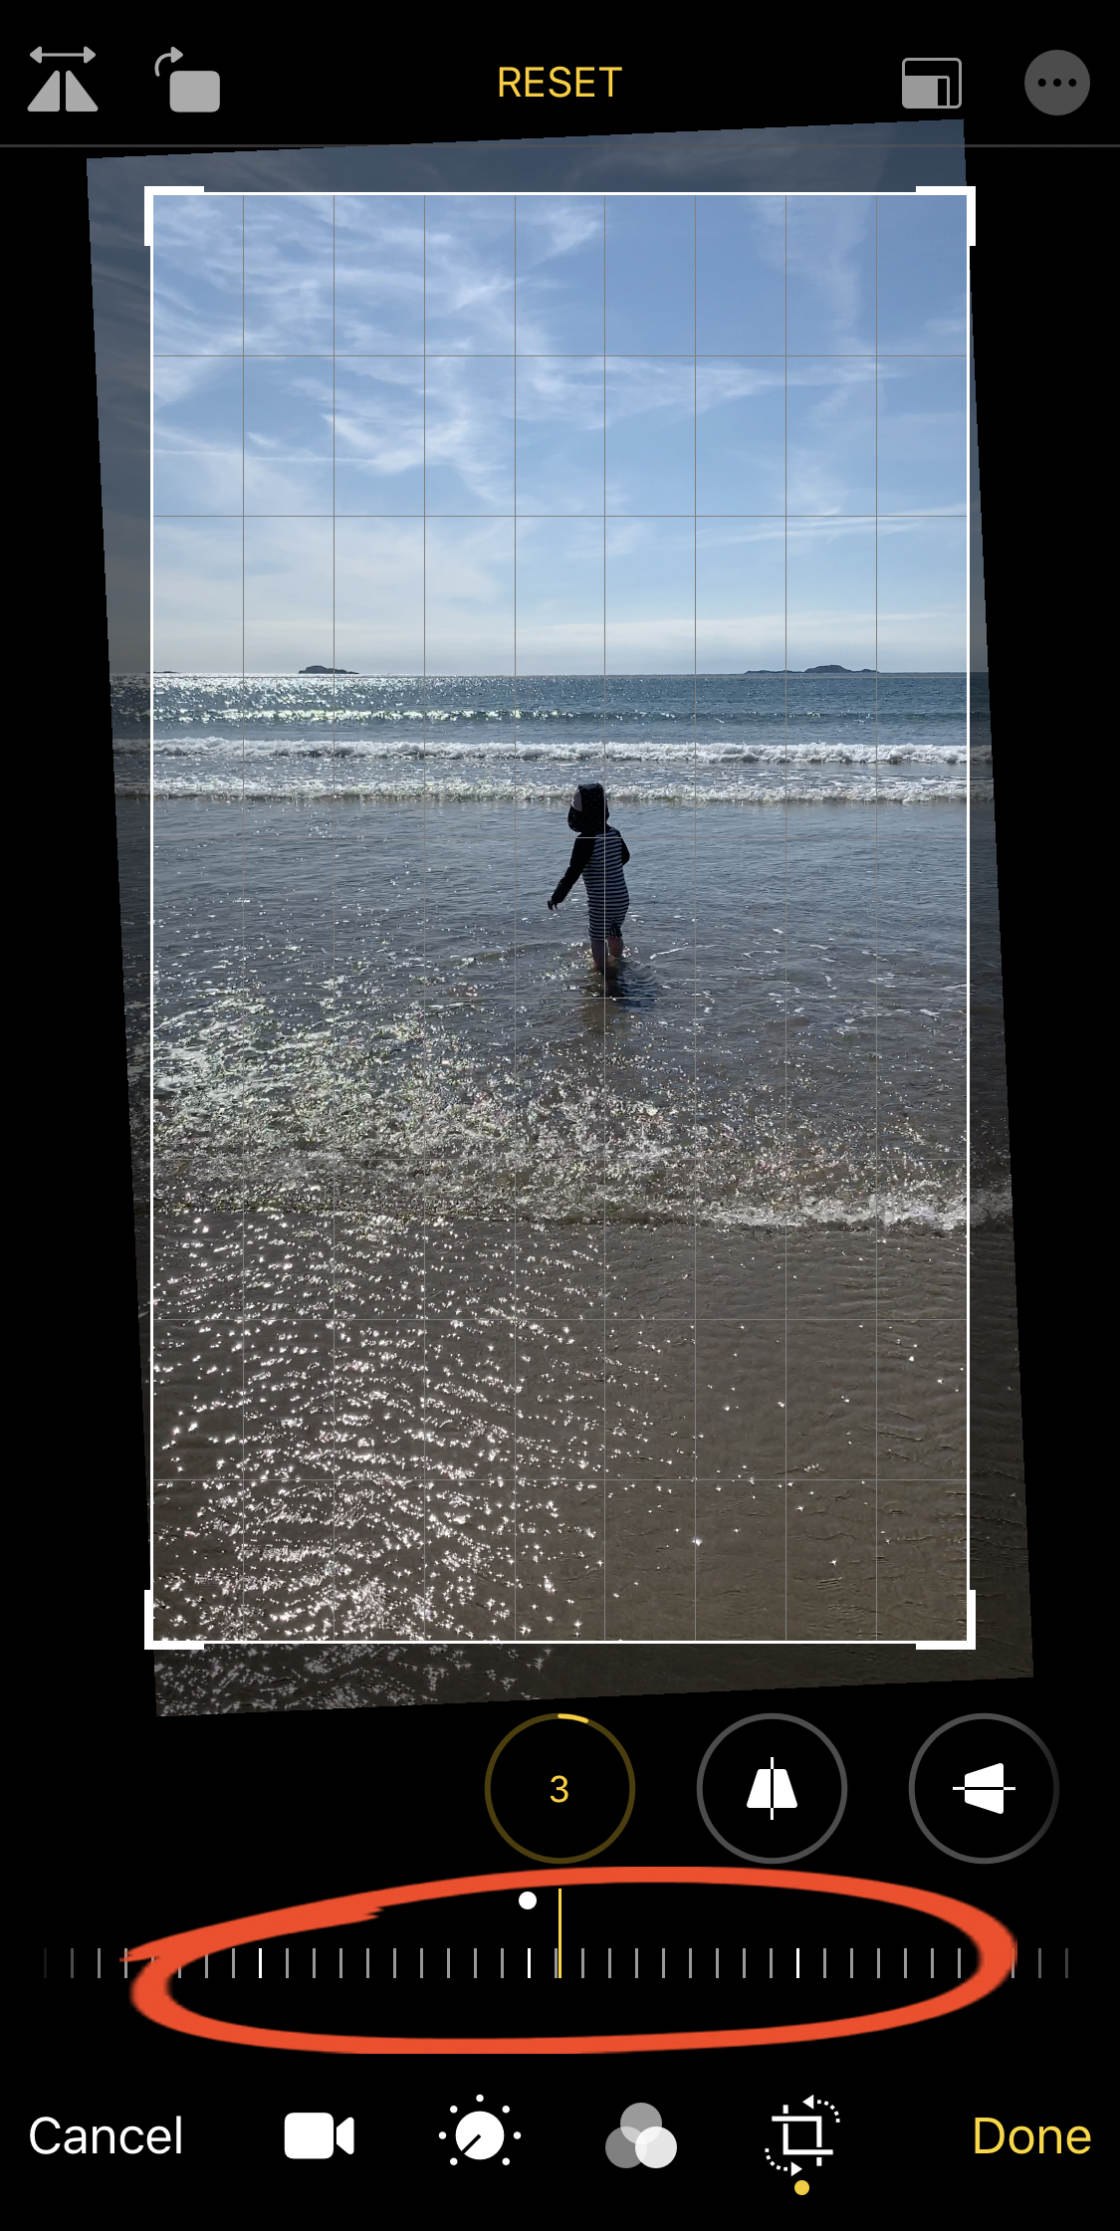
The entire TV will be rotated when you use the Straighten tool. So ever check that the whole telecasting looks skilled when straightened.
7.3 Perspective
Sometimes you might require to correct the vertical or horizontal perspective in your telecasting.
For example, if you shot the video from a low-toned lean against, big subjects (such as buildings) may appear to converge towards the top. But you could redress or reduce this with the Steep Perspective tool.
Retarding force the slider left or right to adjust the perspective.
If you deficiency to adjust the horizontal perspective, use the Horizontal Linear perspective tool.
Aft adjusting perspective, arrest that the entire television looks good with the perspective adjustments.
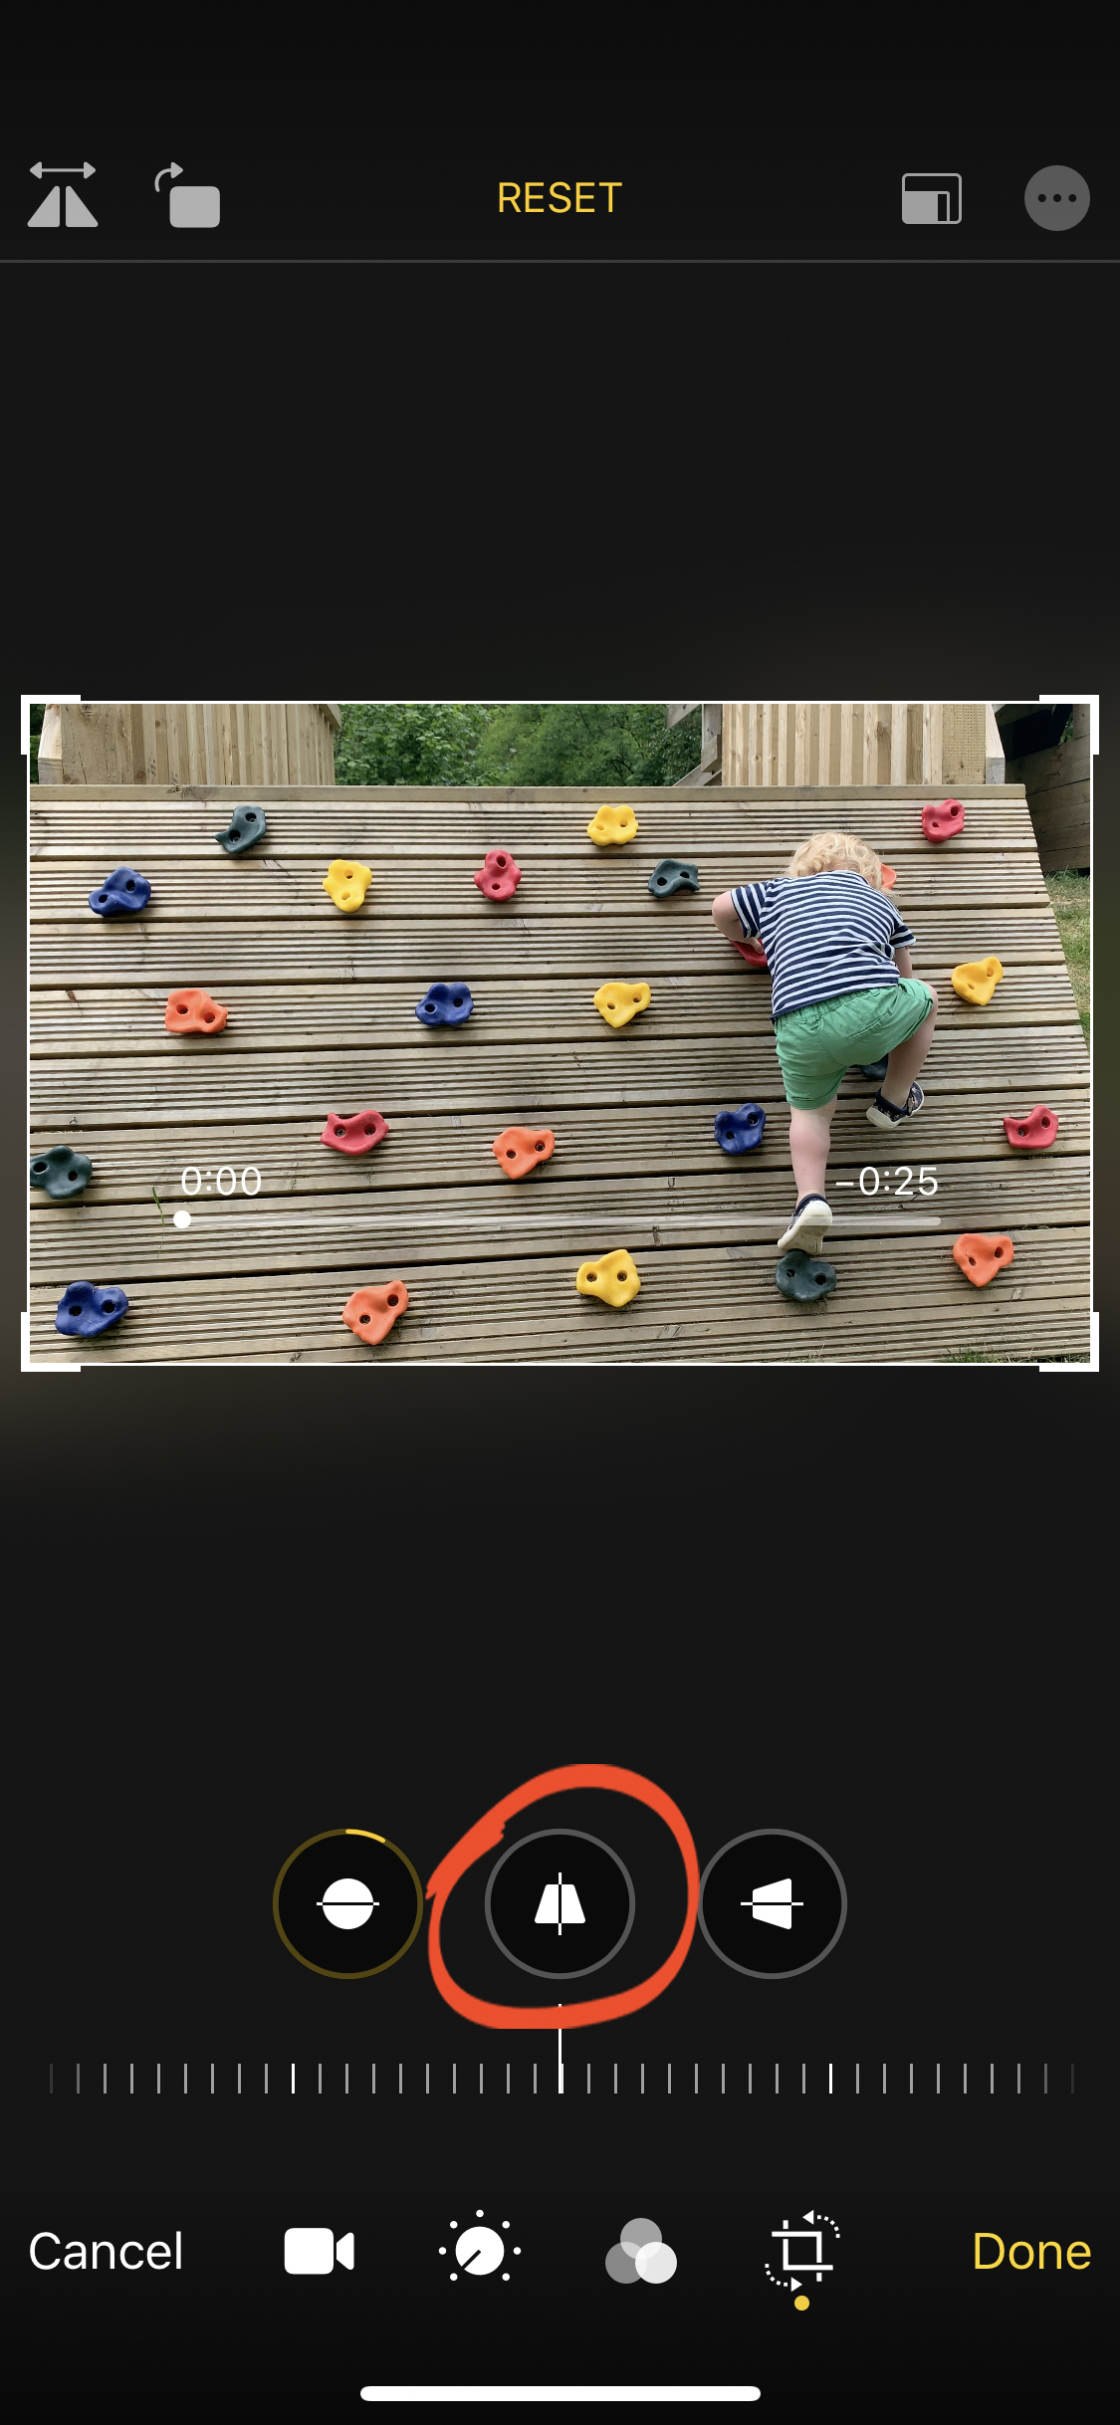
8. Nonmoving The Slow-Move Division Of A Slo-Mo Telecasting
Have you shot a Slo-Mo video in the iPhone Camera app? If so, the depart and destruction of the video will take on at normal speed, while the main part in the middle appears in poky-move.
Just did you know you potty adjust when the slow-motion part starts and ends?
In the Photos app video editor, ensure the Video picture is selected at the seat of the screen.
At a lower place the frame viewer, you'll see a quarrel of colorless vertical parallel bars.
Where the bars are close unitedly, the television plays at sane speed. Where the bars are further asunder, the video plays in slow down-motion.
To go under which segment plays in slow motion, drag the two tall whiteness parallel bars to the left operating theatre right.

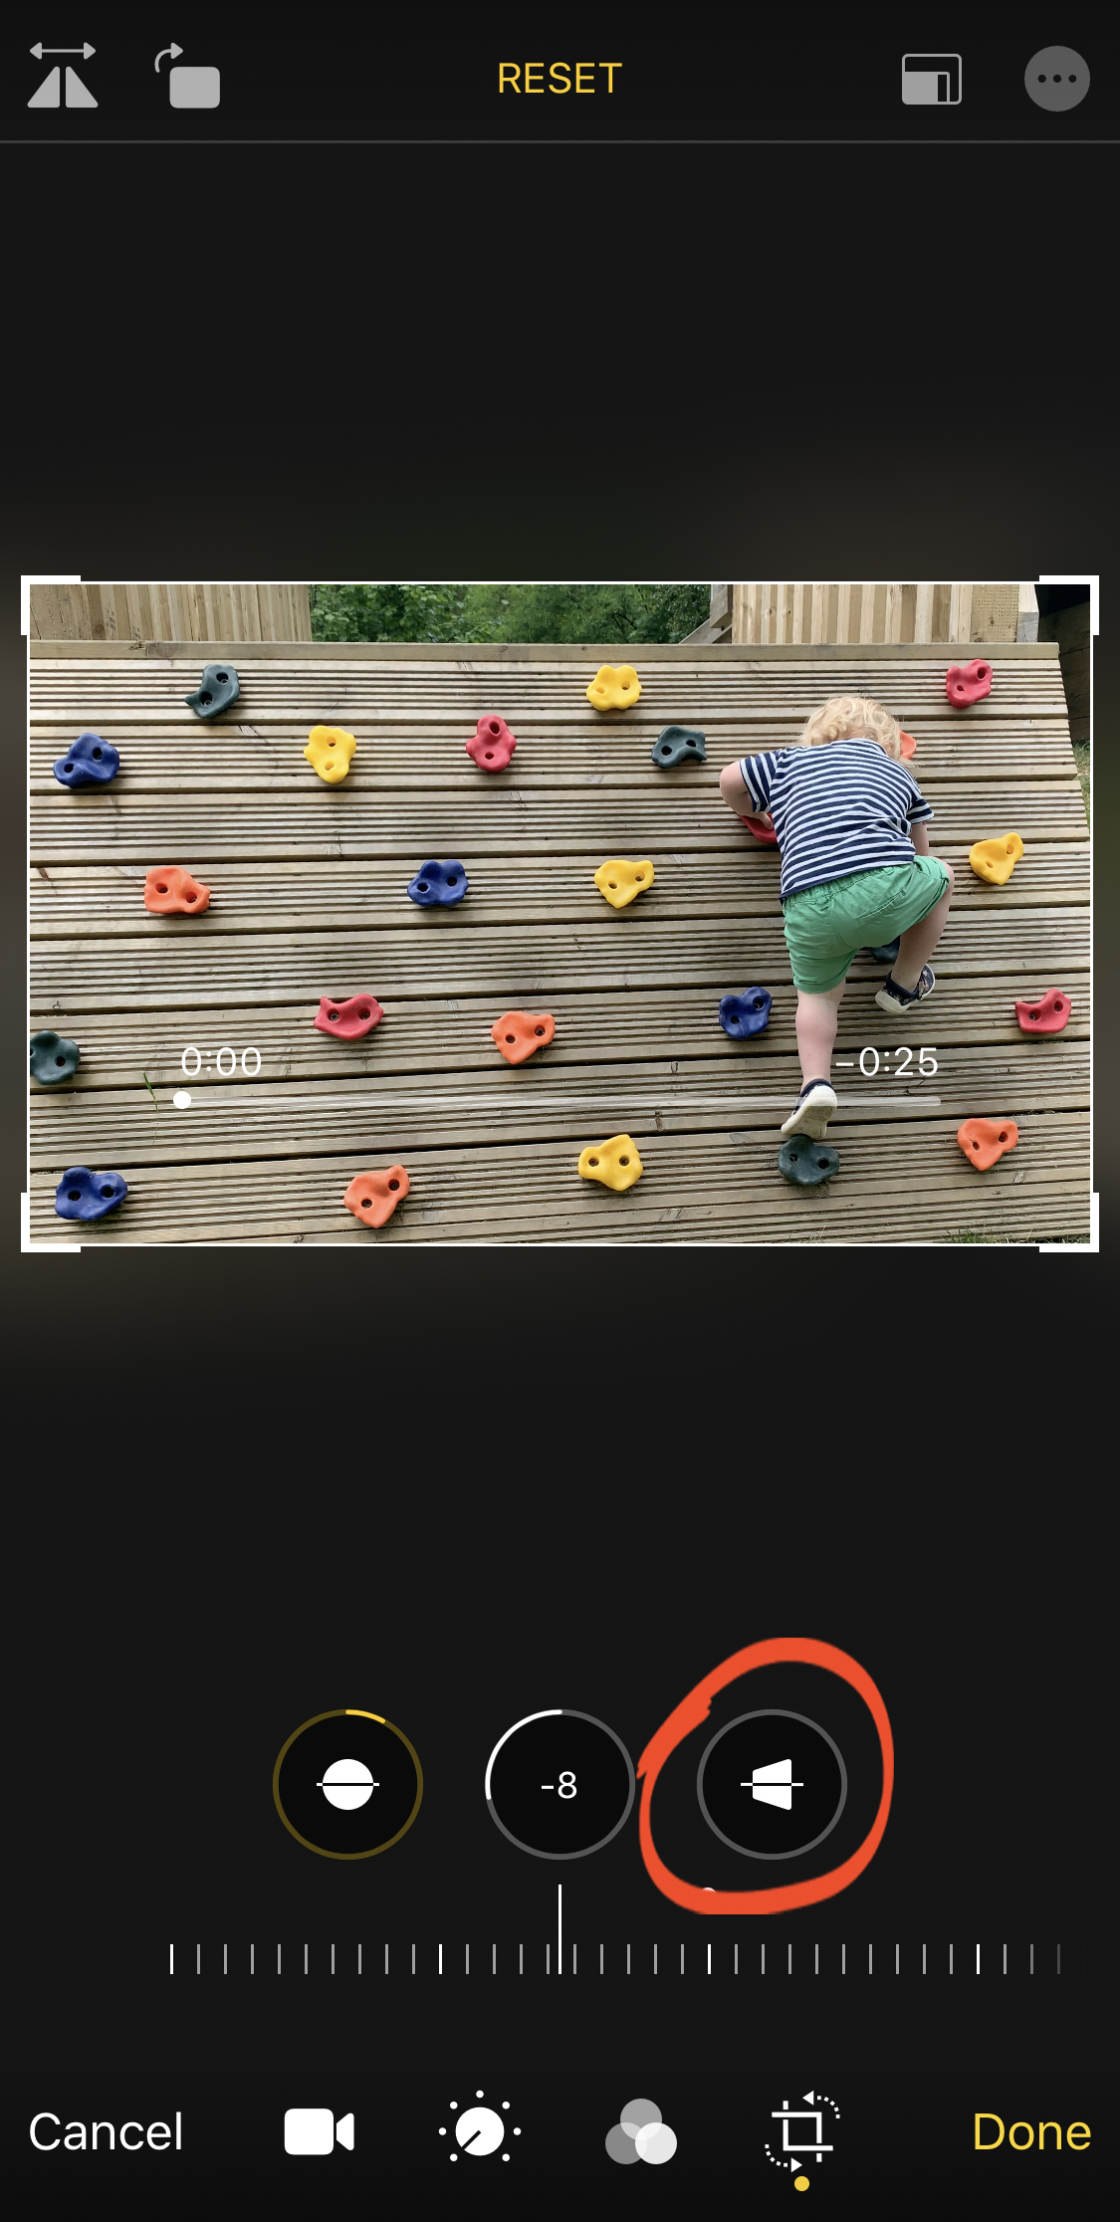
9. Muffle The Sound In Your Video
Would you rather your video didn't have whatever sound?
To mute the good in your video recording, ensure the Video icon is selected at the bottom of the screen. Then solicit the yellow Sound (speaker) icon at the top left.

The picture appears grey when the video sound off is muted. To replacement the valid back along, tap the hoar Sound icon.
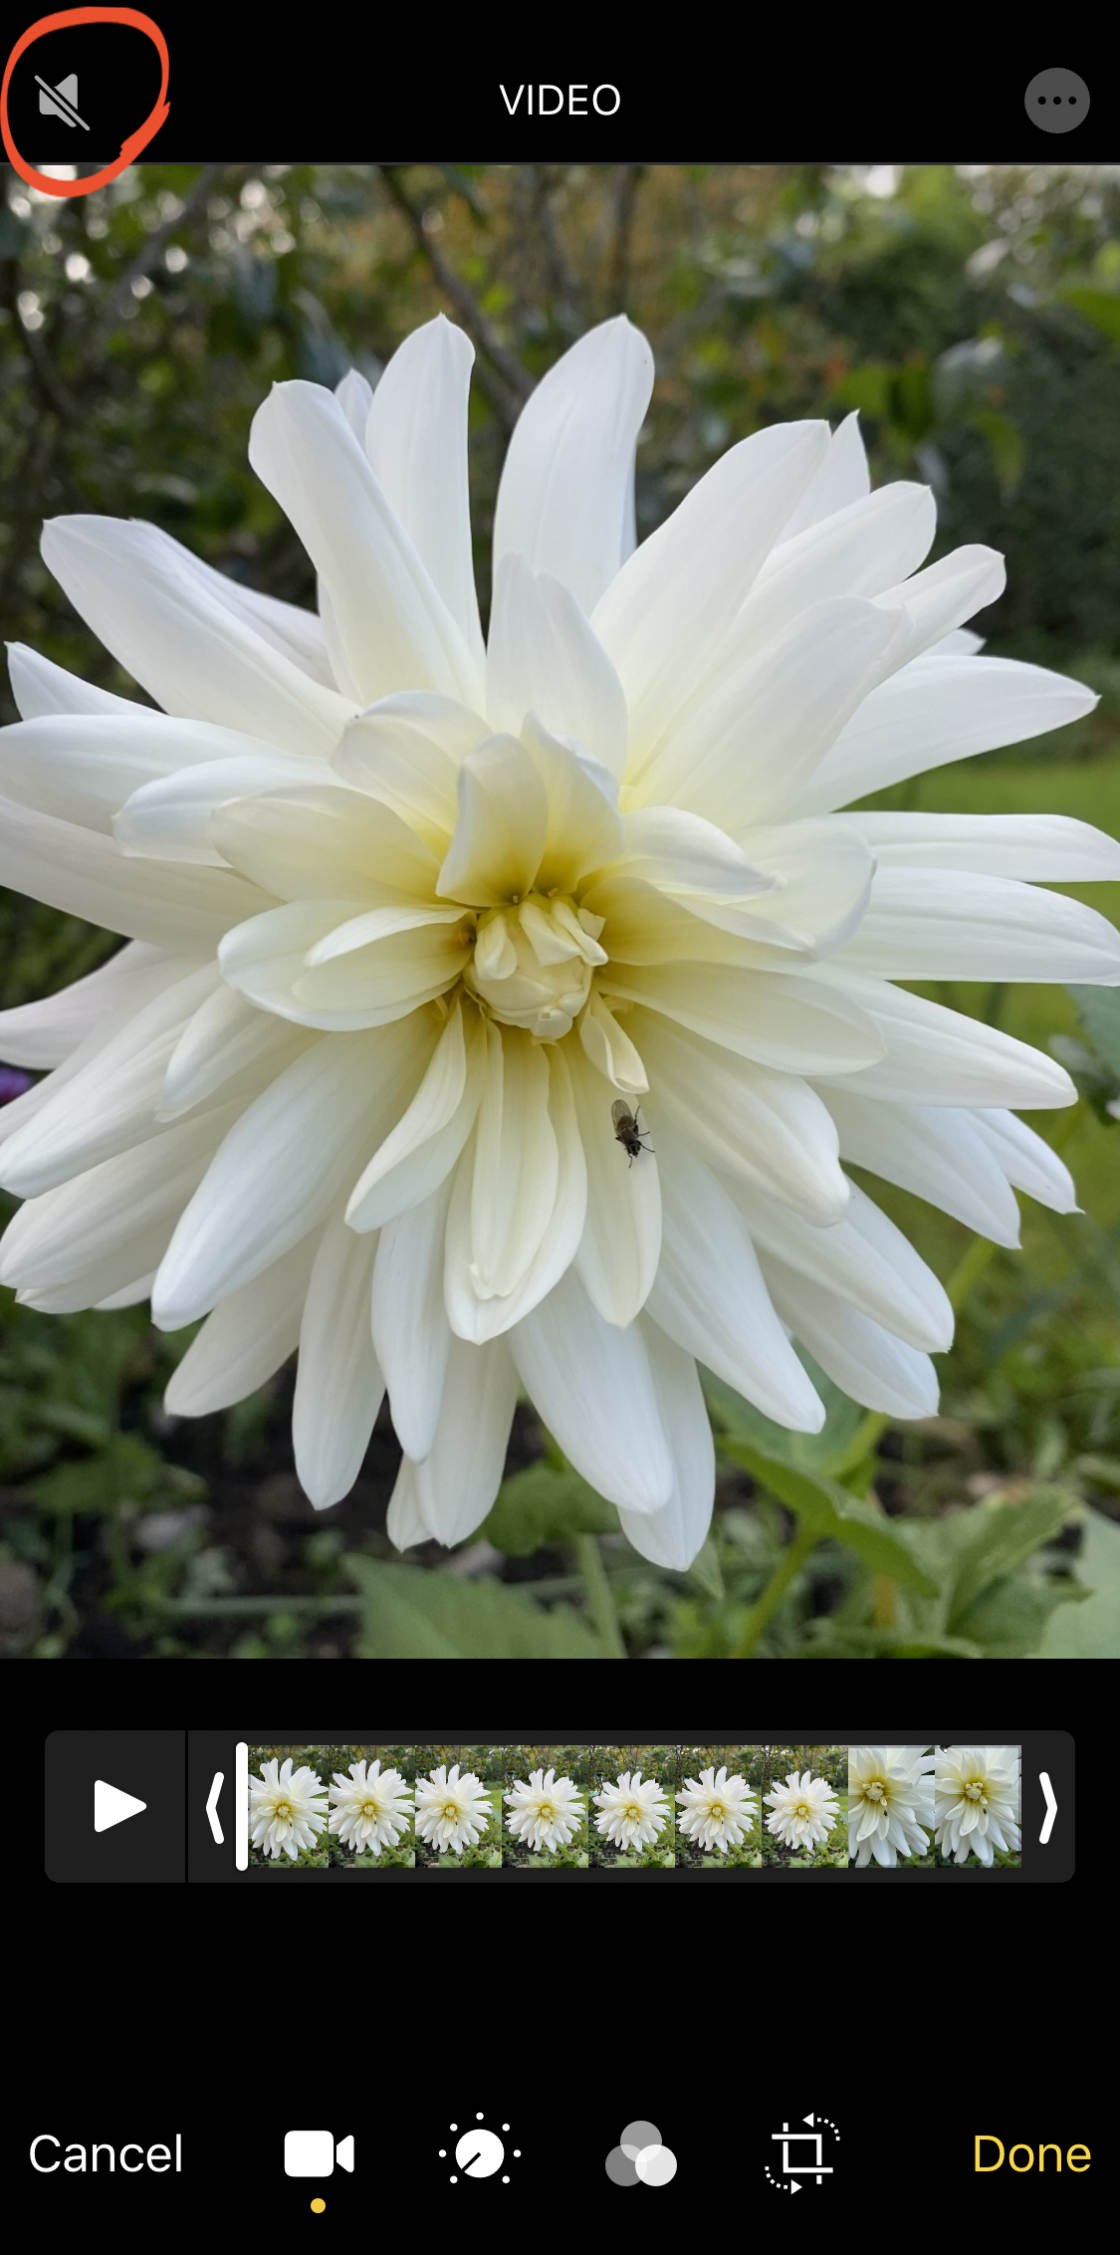
The image appears yellow when the video fathom is switched on.
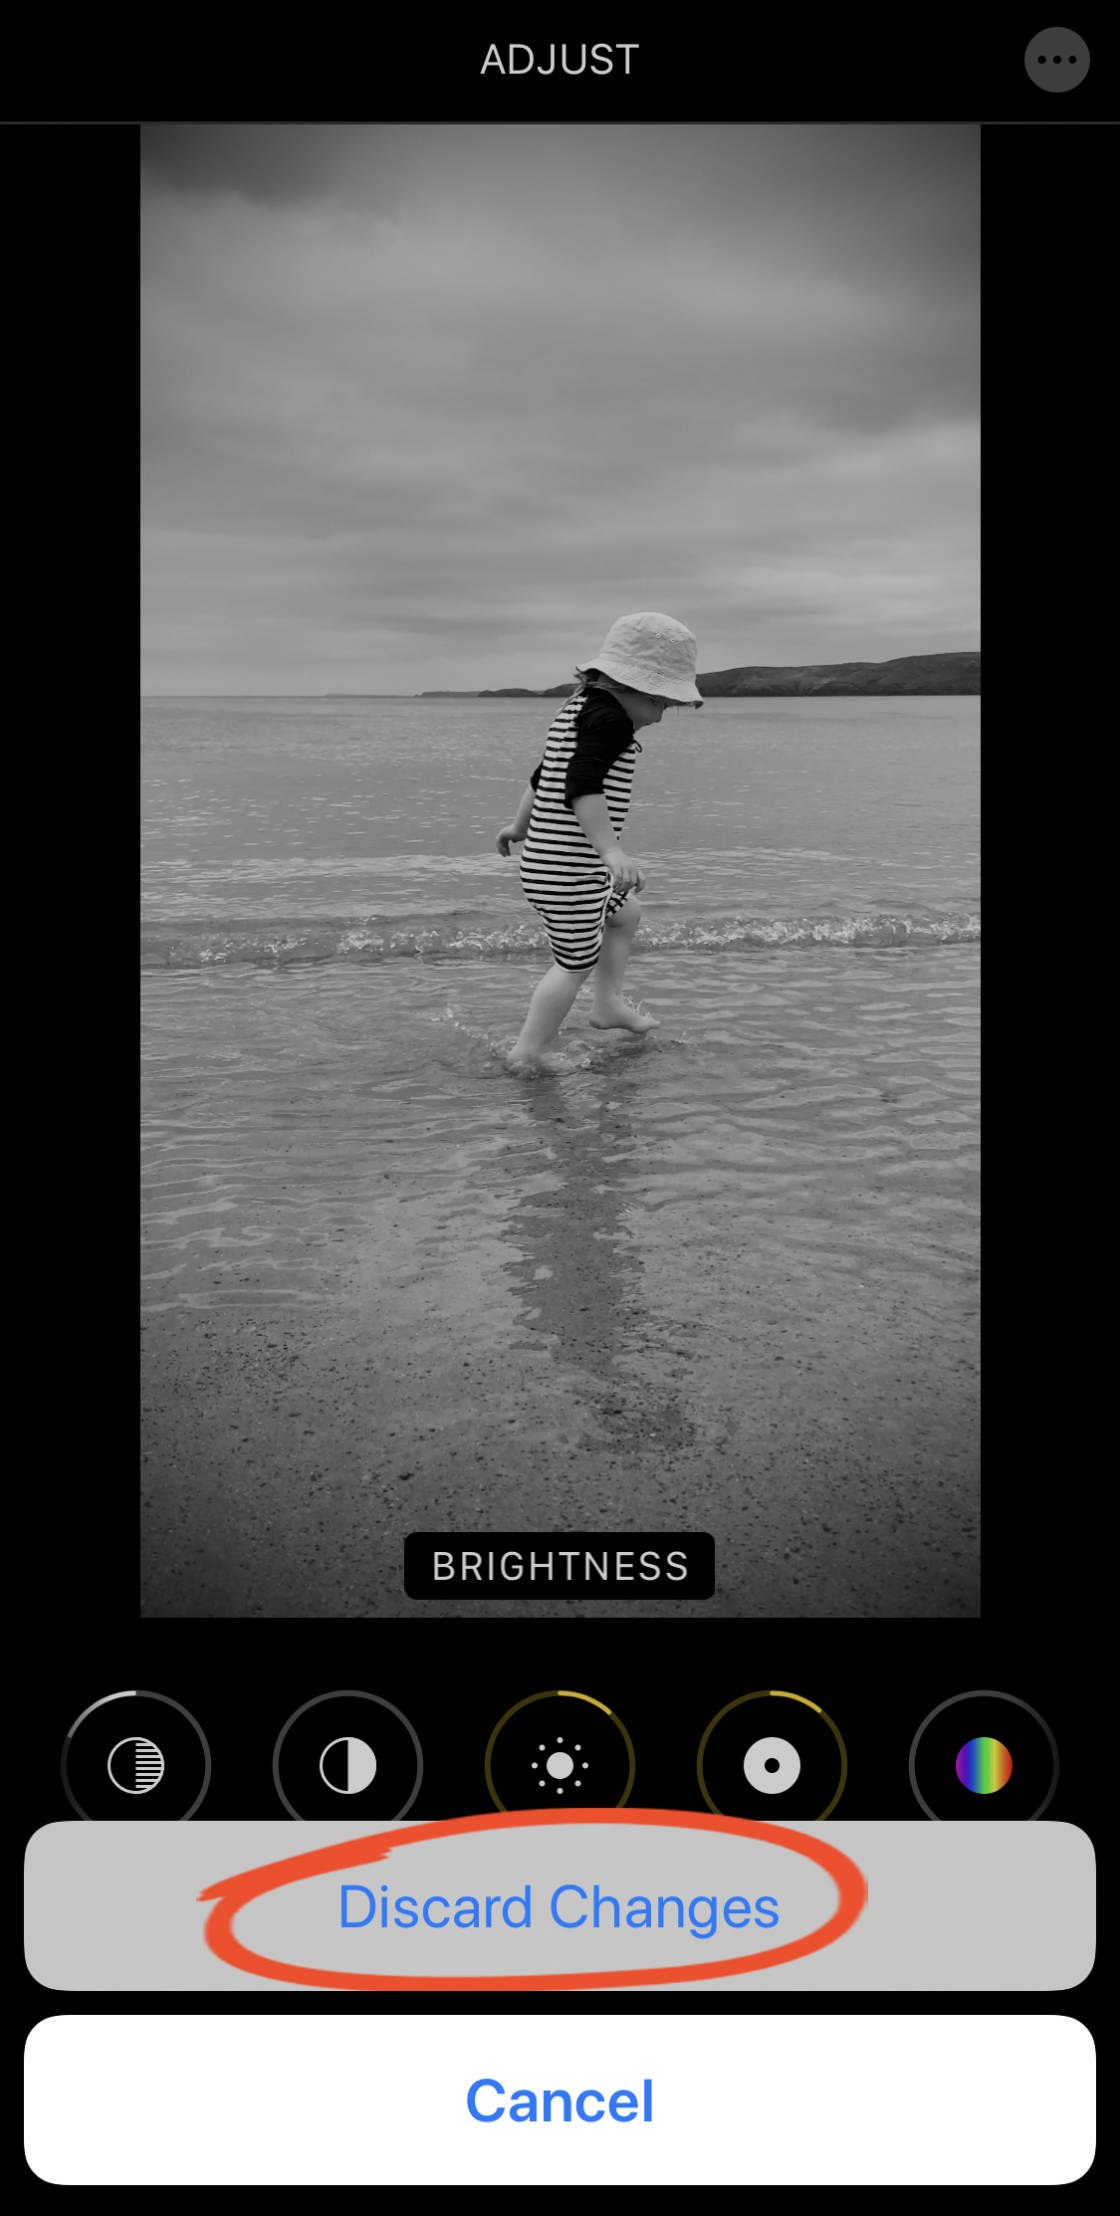
10. Save Your Altered Video
When you've finished editing your video, tapDone to save the changes and exit the video editor program.
If you assume't want to save your edits, intercept Cancel as an alternative. Then dab Discard Changes.
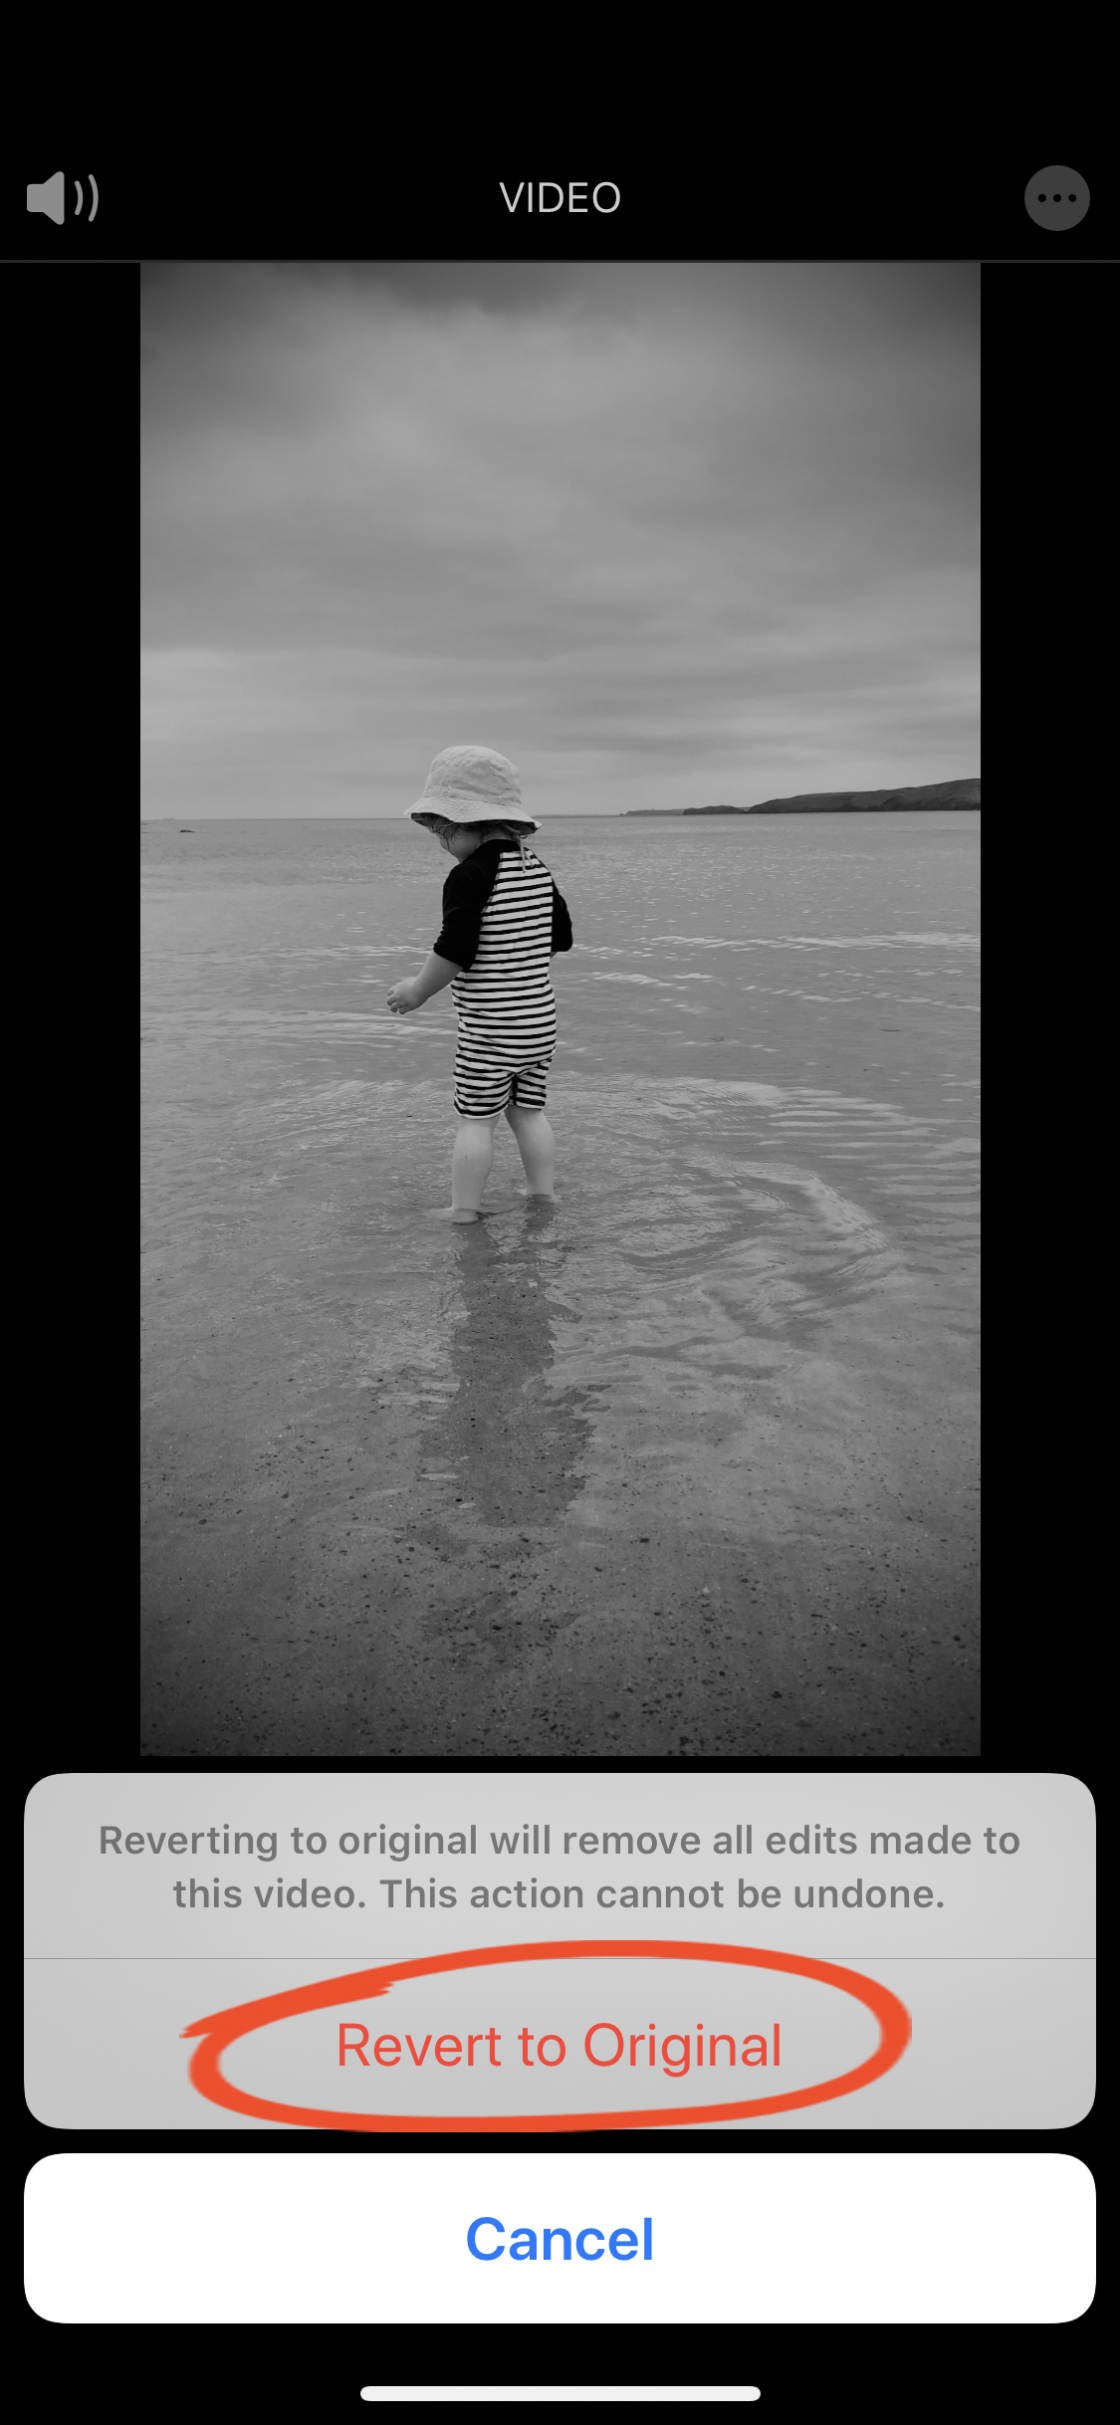
11. Remove Your Video Edits
All video edits in the Photos app video editor are not-destructive. So, even after you've saved your edits, you can undo them at some time.
To retrovert your edits, undecided the video in thePhotos app and exploitEdit.
You tin remove or adjust man-to-man edits by departure to a uncommon tool around and changing the scope.
Or you can take out all edits past tapping Revert > Revert To Original.
how to make videos more clear on iphone
Source: https://iphonephotographyschool.com/video-editing/

Posting Komentar untuk "how to make videos more clear on iphone"